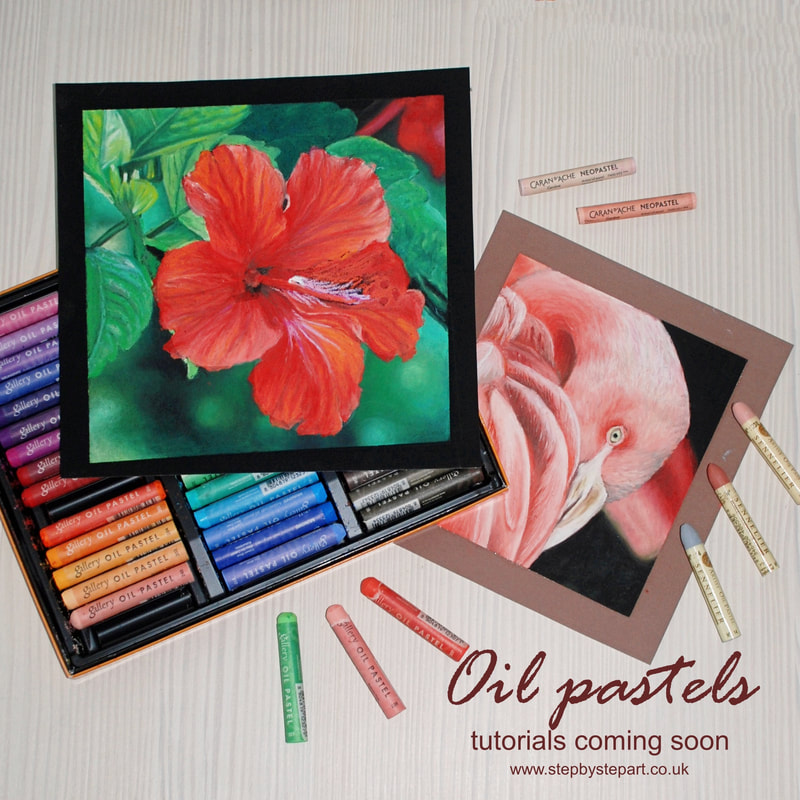
Oil pastels | A helpful guide for oil pastel artists and beginners
Are you new to oil pastels and looking for advice?
If you are thinking of trying oil pastels for the first time, but unsure what products you will need or where to begin, we provide you with a comprehensive list of information which will set you on your journey.
Oil pastels comprise of an oil and pigment held together with a combination of binder and filler. They are vibrant and offer quick results with no drying time needed like some other mediums. Mistakes can be easily concealed and achieving flawless, tonal transitions require little practice. It is this succinct nature of pastels, coupled with the vibrancy of the pigments that can provide considerable enjoyment whilst learning and adds to their appeal.
Oil pastels comprise of an oil and pigment held together with a combination of binder and filler. They are vibrant and offer quick results with no drying time needed like some other mediums. Mistakes can be easily concealed and achieving flawless, tonal transitions require little practice. It is this succinct nature of pastels, coupled with the vibrancy of the pigments that can provide considerable enjoyment whilst learning and adds to their appeal.
1. Oil pastels
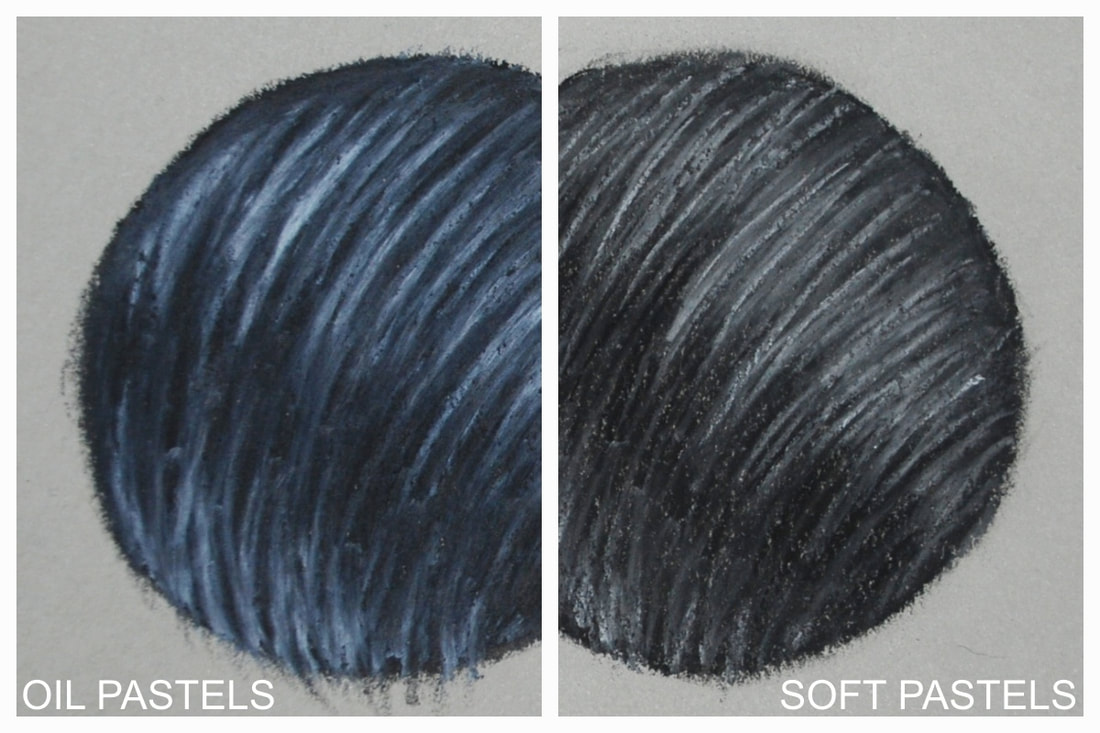
Like soft pastels, the oil pastel is available in different qualities. Some contain more binder than pigment, making them somewhat harder. There are many companies that sell oil pastels, with Sennelier being one of the most notable. " The student-grade oil pastels are going to have more wax in them, resulting in a difference in blending and covering a surface. "
although the There are four types of 'dry' pastel; Soft, Hard, compact and pencil. They also come in many forms; half stick, full stick, slim, thick, soft and hard. With all these choices, it adds to the confusion when buying your first set. Soft pastels (also known as dry pastels), are made from a mixture of dry pigment, binder and filler to form a paste which is then rolled or shaped and left to dry. The ratio of pigment and binder differ in each range, so an oil pastel like Sennelier contains less binder. This means they are much softer and creamier, but provides intense colours. No oil pastel is designed to achieve fine detail, being soft, but it is possible to use coloured pencils to add this detail to the final applications.
although the There are four types of 'dry' pastel; Soft, Hard, compact and pencil. They also come in many forms; half stick, full stick, slim, thick, soft and hard. With all these choices, it adds to the confusion when buying your first set. Soft pastels (also known as dry pastels), are made from a mixture of dry pigment, binder and filler to form a paste which is then rolled or shaped and left to dry. The ratio of pigment and binder differ in each range, so an oil pastel like Sennelier contains less binder. This means they are much softer and creamier, but provides intense colours. No oil pastel is designed to achieve fine detail, being soft, but it is possible to use coloured pencils to add this detail to the final applications.
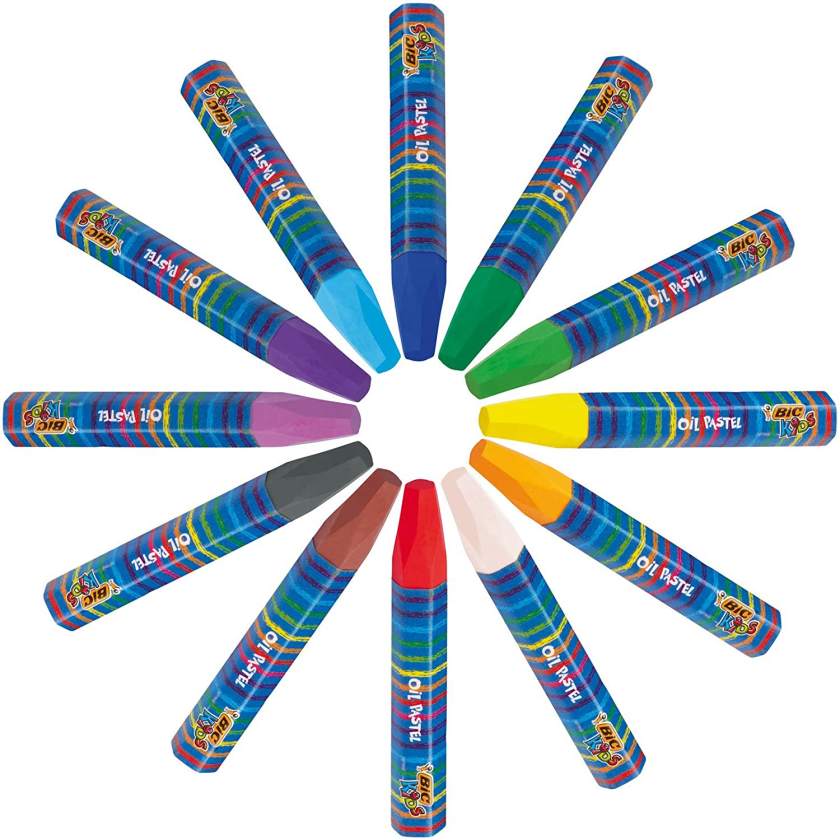
Oil pastels for kidsOil pastels for kids are made with
|
Student grade oil pastelsStudent oil pastels are made
|
Artists grade oil pastelsArtists oil pastels are made using the finest quality pigments
|
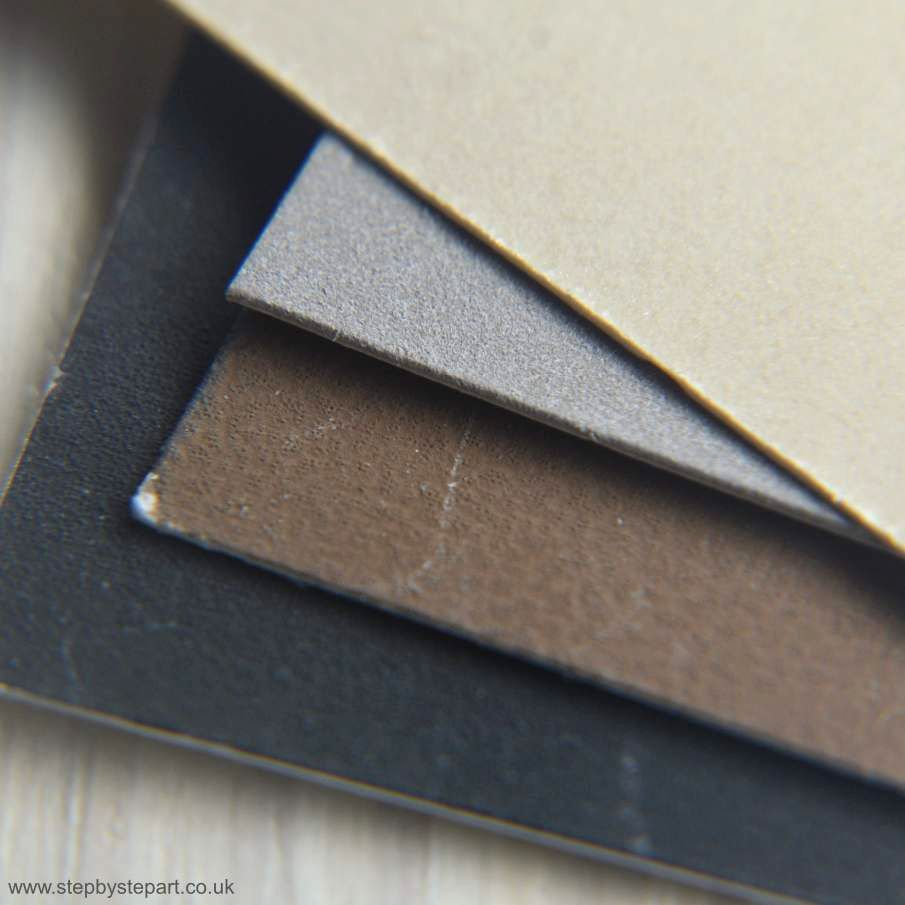
2. Paper/supports
ADAPT THIS FOR OIL PASTELS.
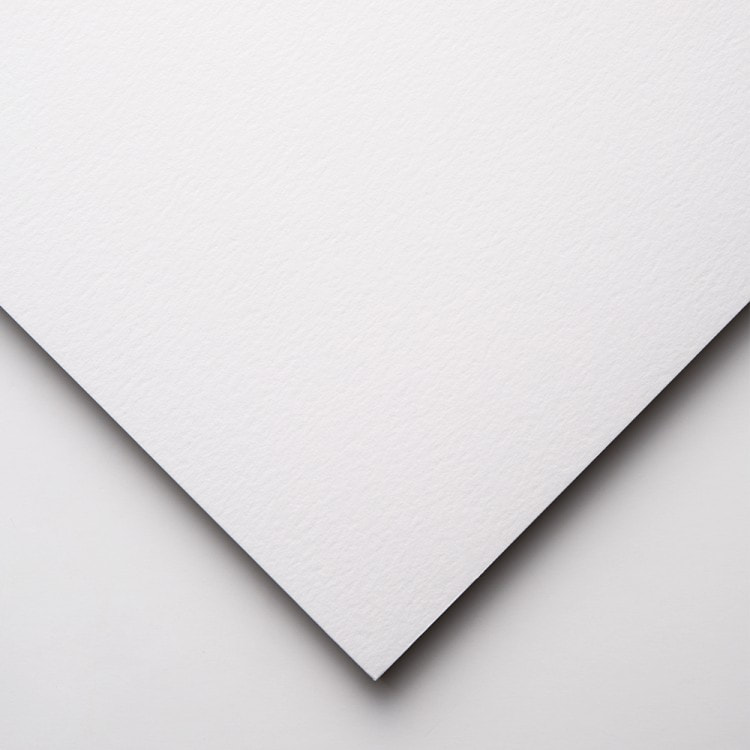
There are numerous surfaces out there for use with oil pastels and it can be overwhelming trying to choose the best one, particularly if it is your first time using pastels. Oil pastels never dry, so a paper that has a tooth is recommended to stop the pastel from slipping around the paper. We explain about the better known pastel papers and explain the differences between each. Which one do we recommend you start your journey with? The Clairfontaine Pastelmat is a great surface for artists of any calibre but we would recommend purchasing a trial pack (like this one) allowing you to try a few different surfaces and pick the one(s) you prefer. Every paper and artist is different and the type of art you create can play a part in your selection. Pastel sketches will not require a toothy paper like a detailed portrait would and modern style art may be more effective on papers that not only have a tooth but a texture.
There are numerous surfaces out there for use with oil pastels and it can be overwhelming trying to choose the best one, particularly if it is your first time using pastels. Oil pastels never dry, so a paper that has a tooth is recommended to stop the pastel from slipping around the paper. We explain about the better known pastel papers and explain the differences between each. Which one do we recommend you start your journey with? The Clairfontaine Pastelmat is a great surface for artists of any calibre but we would recommend purchasing a trial pack (like this one) allowing you to try a few different surfaces and pick the one(s) you prefer. Every paper and artist is different and the type of art you create can play a part in your selection. Pastel sketches will not require a toothy paper like a detailed portrait would and modern style art may be more effective on papers that not only have a tooth but a texture.
Pastel papers offer both tooth and texture. They are affordable, available in a wide range of colours, highly affordable and you can buy them individually or in a pad. The Canson Mi-tientes paper has a honeycomb texture on one side and a fine grain on the other, which can provide a good starting point for the beginner. Other papers include Fabriano Ingres and Tiziano, Hahnemuhle Ingres and Clairfontaine Ingres.
|
Abrasive papers are the most popular choice for pastel art as they hold more pastel than paper sheets. Many brands are created by screenprinting a primer onto a sheet of watercolour paper which provides a sturdy base for your work. UArt is created using a computer processing system and they offer seven different grade surfaces from 800 (Very fine) to 240 (rough)
|

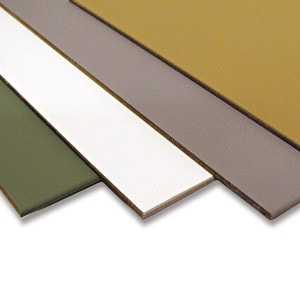
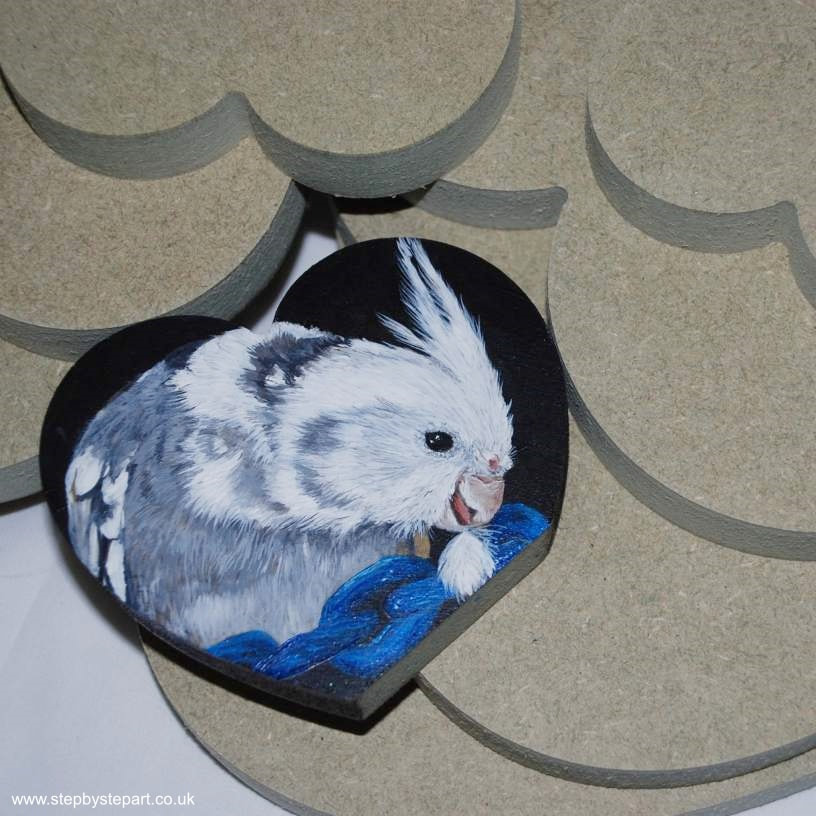
Wood? Canvas Fabric? offers a very different finish to other papers. It is composed of an acid-free backing sheet, coated with inert synthetic fibres. This grabs the pastel well and presents as a soft, painterly finish particularly favoured by animal artists. On the downside, velour paper is not as forgiving and if you are a newcomer to pastels, you may find it laborious. Soft pastel can fall from the paper easier than hard pastels.
|
3. Blending tools
The following products are an integral part of the pastel art kit. As pastels can be messy, blending your work using sponges, shapers and tortillions instead of using your hands will help to minimise the transfer of pastels between layers. The Pan Pastels have their own blending tool kit. Each tool specially shaped for working specific areas.
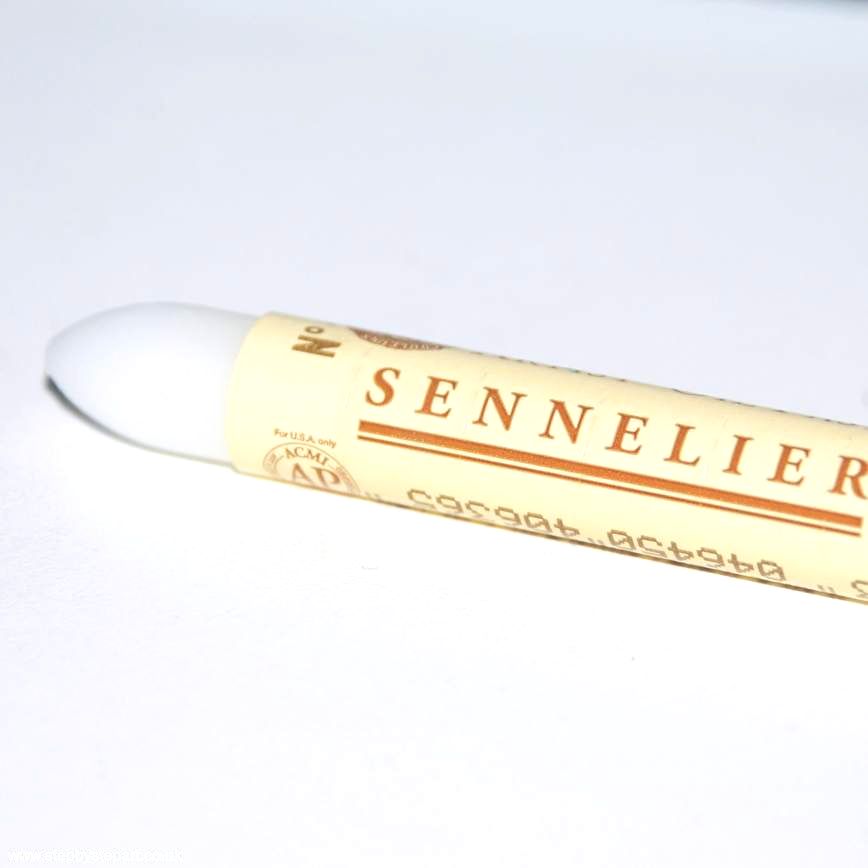
Transparent oil pastelSennelier includes a transparent medium in their oil pastel collection, which aids the blending process without changing the colour of the pastel tones it is mixing. As this is made from the same mixture as the oil pastel, it may be a little too oily for the area you are trying to blend and you may need a different tool to achieve the effects you are aiming for.
|
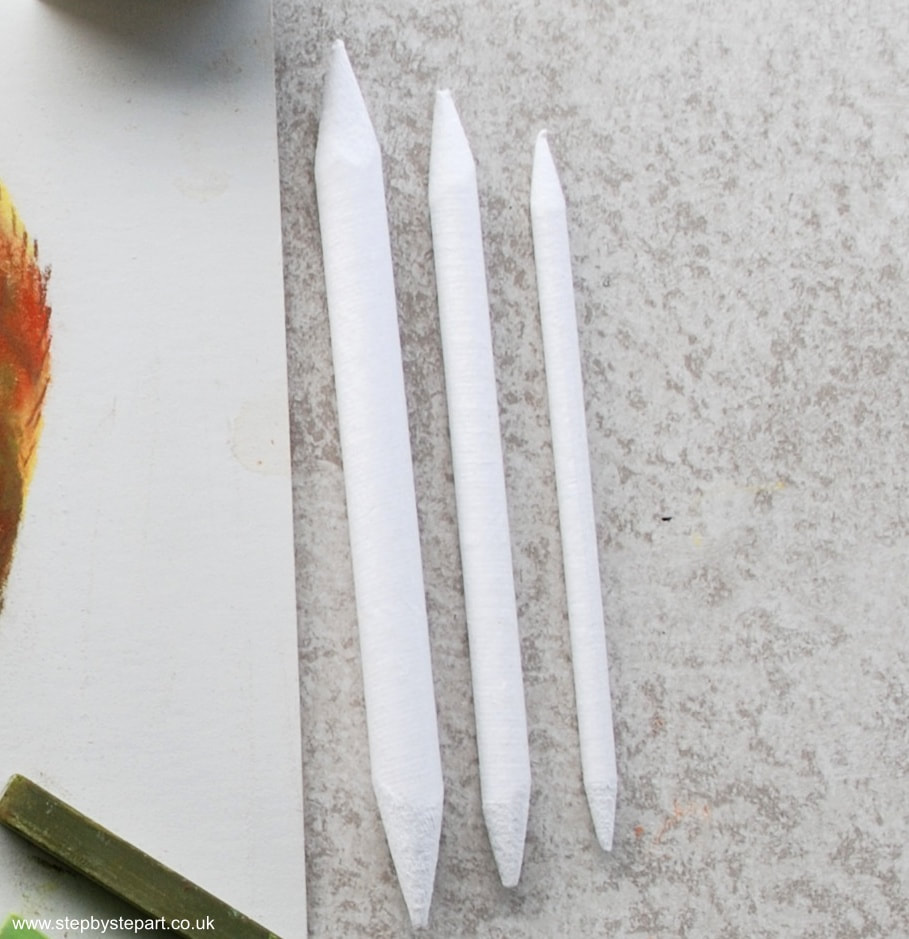
Paper stumps and paintbrushesColour shapers and tortillions are perfect for blending oil pastels. The tip is designed to tease and blend small areas of your work, whilst the outer edge can be used to blend large areas. As stumps & tortillions are made of rolled paper, you can peel away each layer to expose clean paper underneath. A more economical blending tool but not suited to abrasive papers as they will wear down the tip.
|
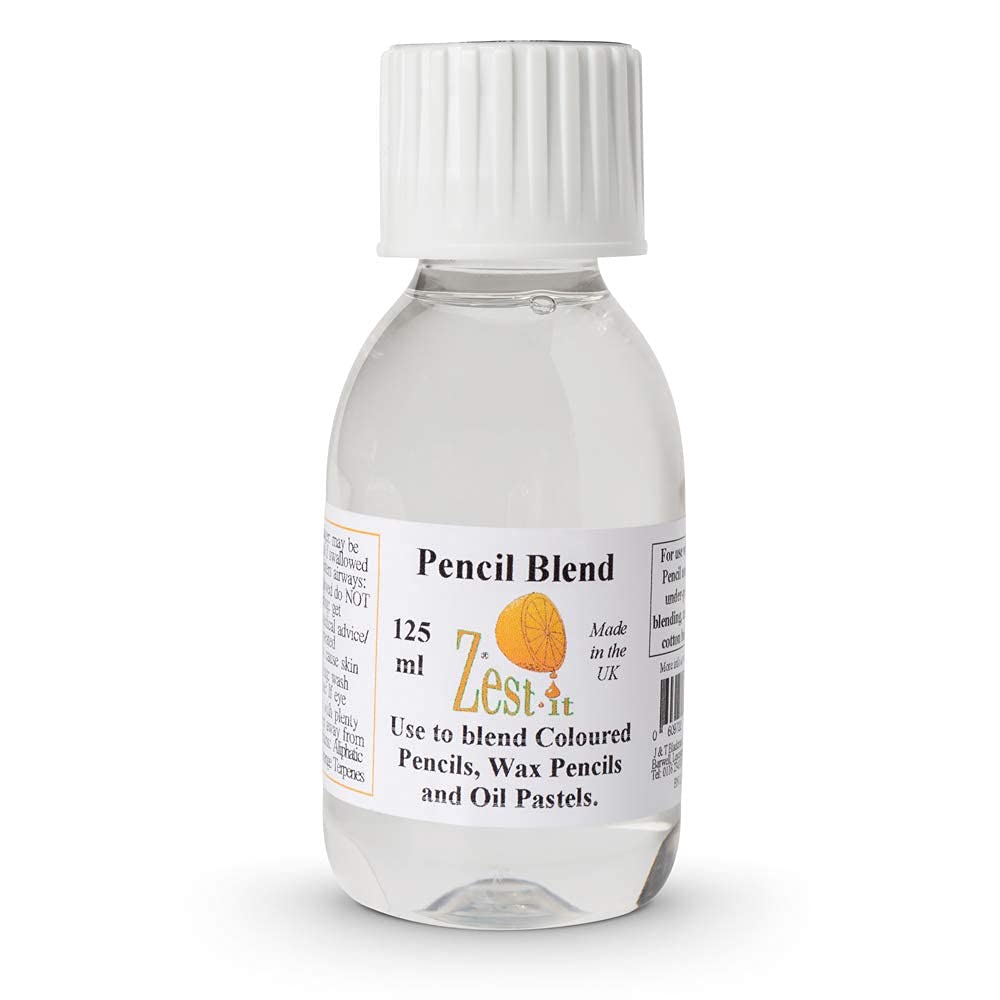
Zest-it pencil blendOil pastels can be blended with solvents like the Zest-it Pencil Blend. The company state "Use with a brush, tortillion or paper stump. Pencil Blend leaves no residue and allows the blending of coloured pencils, pastels, oil pastels and wax for under-painting the subject and the finished result."
|
4. Tools for technique applications
There are different ways to shape your pastels to allow you to create the precision you need in your work. Pencil sharpeners or craft knives for the pencil form, sandpaper for hand-held pastels. Soft pastels are not suited to shaping or sharpening as they are crumbly and you will end up with a pile of dust which is an expensive waste. Hard pastels can be moulded over fine sandpaper and pastel pencils can be sharpened two ways. Either with a good old-fashioned pencil sharpener or with a craft knife. This can be followed by manipulation over fine sandpaper.
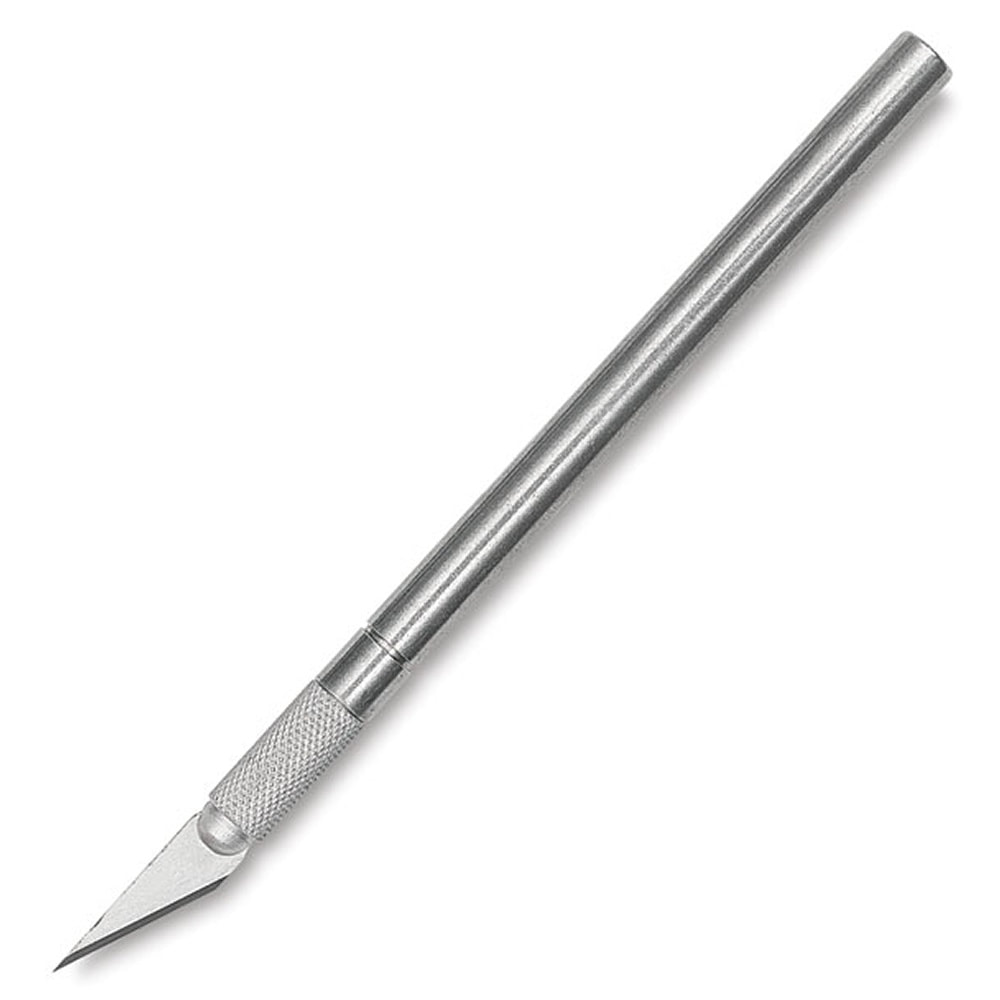
Craft knifeCreating fine lines
Many artists use a craft knife to scratch out details in their work |
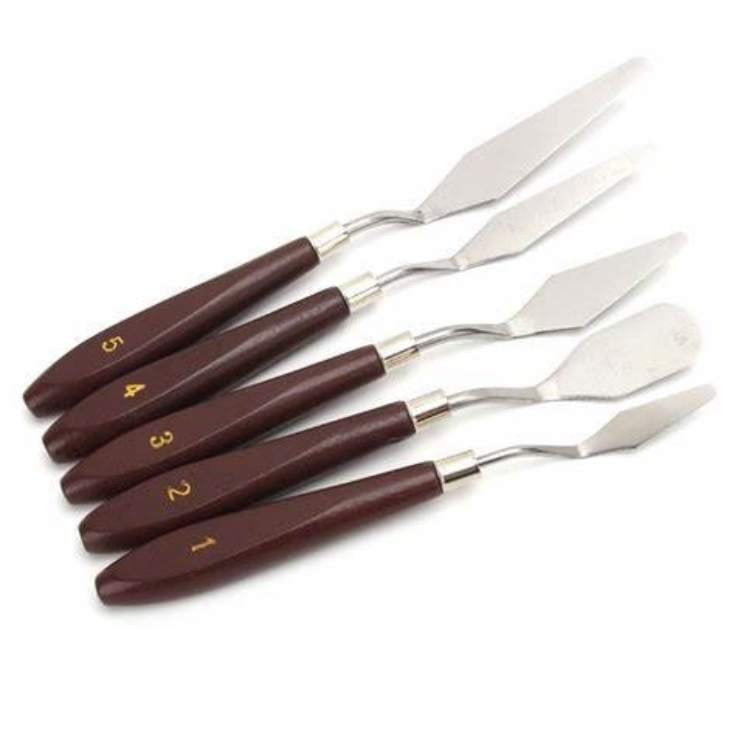
Palette knivesApplying and scratching textures out
A palette knife is useful for manipulating the |
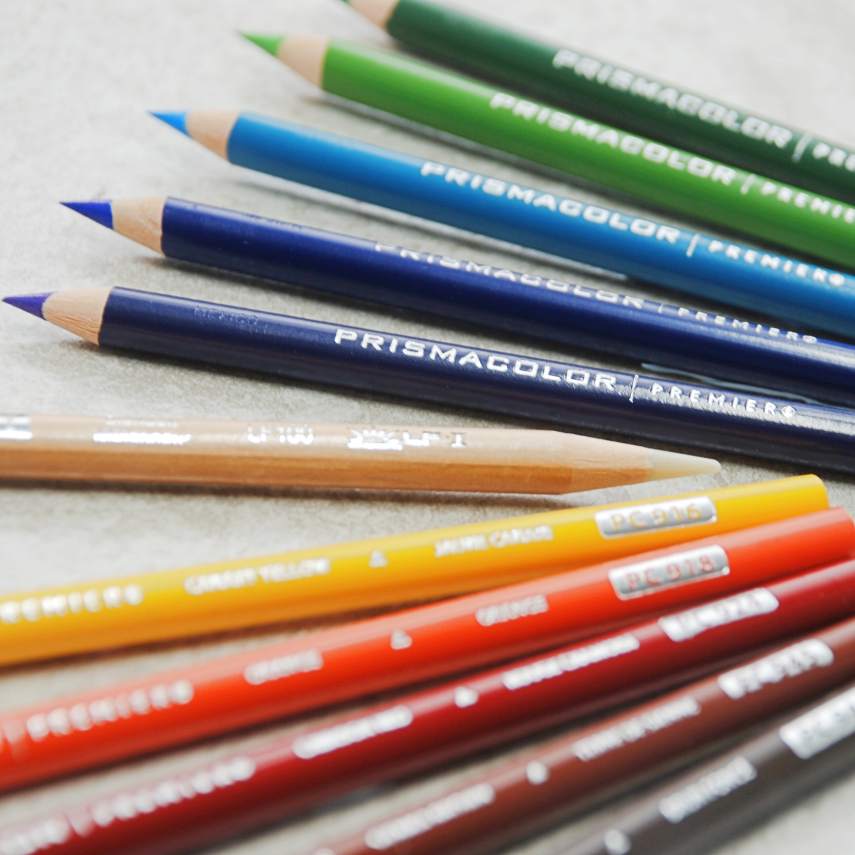
Coloured pencilsFine detail
About coloured pencils in oil pastel work. |
5. Accessories
An additional list of products that you may find of use. Which eraser is best for pastels? Two putty rubbers, firm and soft can both play a part in your pastel journey. You need something to apply your outline before you apply any pastel to your paper. This can be done with a few different products which we cover below. A wet cloth and dry hand towel is recommended, the reason why is explained below.
Oil pastels fixativeA putty eraser is a kneadable rubber particularly suited to pastels. The soft variety can be pulled apart and manipulated into any shape allowing you to lift colour from the paper. Remold to hide the pastel and you can continue this way until you have removed all the pastel you need. The firm v cannot be used in the same way as the soft one, but acts purely as a normal eraser does. It can soften colour or remove layers almost entirely. Both ideal for the pastel kit.
|
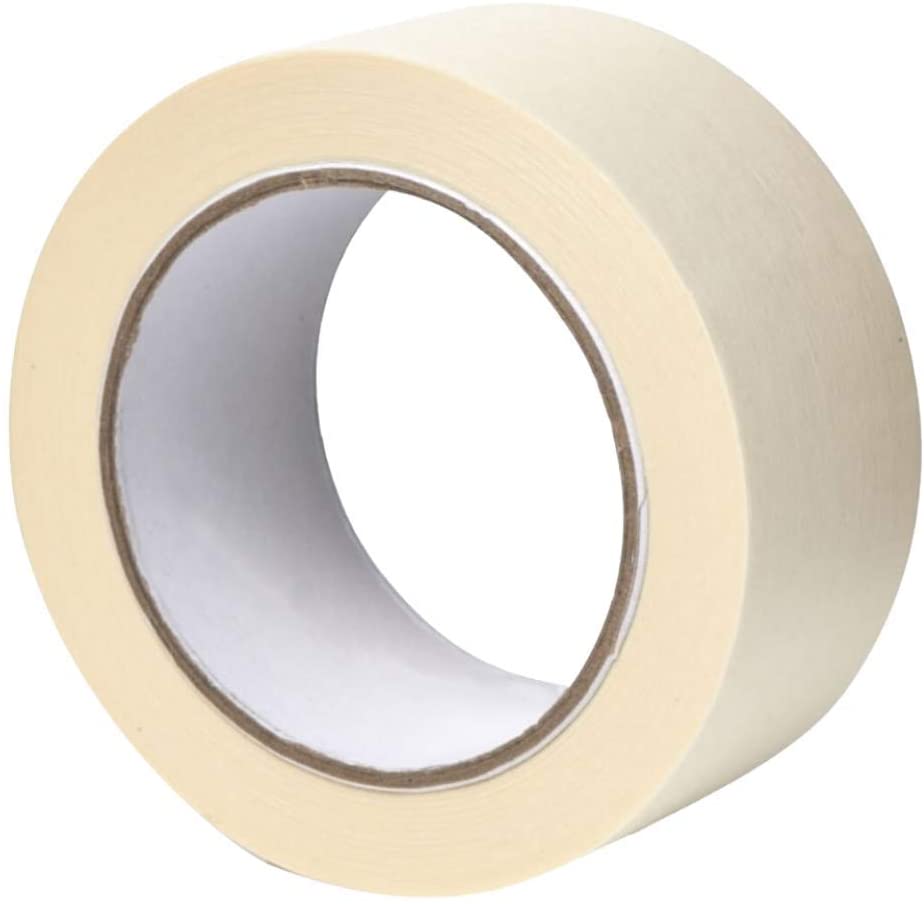
Masking tapeThe Outline. Which products should you use to create your outline for a pastel drawing? There are a few choices and it is a case of trial and error dependant on the paper you are using. You could use a HB-2B graphite pencil, or transfer you outline using Tracedown or upon applying a layer of the Ghiant transfer spray. These may prove difficult to erase before laying down your pastel and so you may prefer to use a pastel pencil instead so any future layers blend seamlessly. Trial your choices before starting your drawing.
|
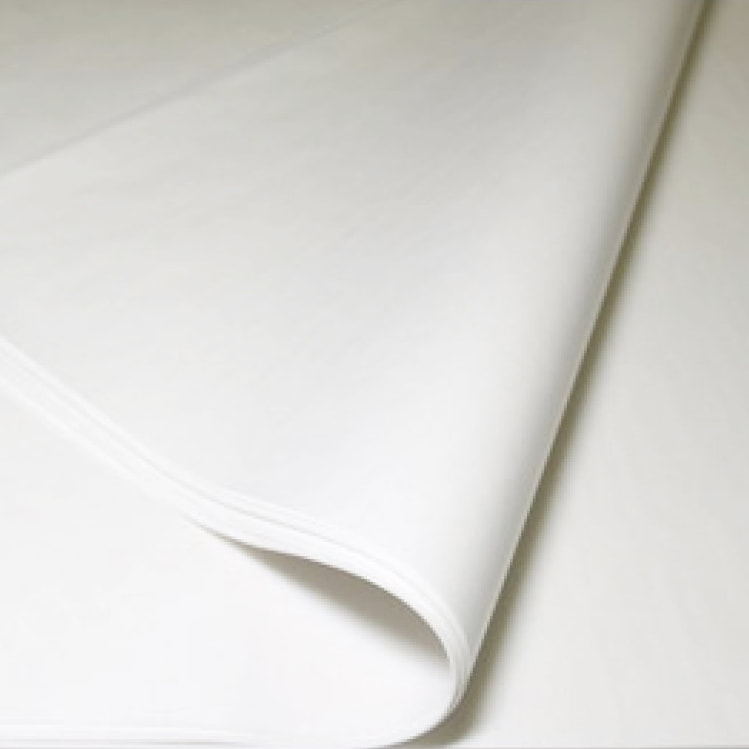
Grease resistant paperGlassine is a smooth and glossy paper that is air, water, and grease resistant. It is also acid-free and has multiple uses for an artist. When working with pastels, having a sheet of this beneath your hand will stop you smudging your pastels. Any pastel portrait being stored or wrapped for delivery should be encapsulated in one of these sheets for protection. It can also protect your portrait between sessions so it does not get damaged. A multi-functional product that can be purchased in individual sheets or as a pack (cost-effective option)
|
Layering and application - stage by stage
Adding layers
Blending
Scraping
More layers
Blending
Scraping
More layers
|
|
|
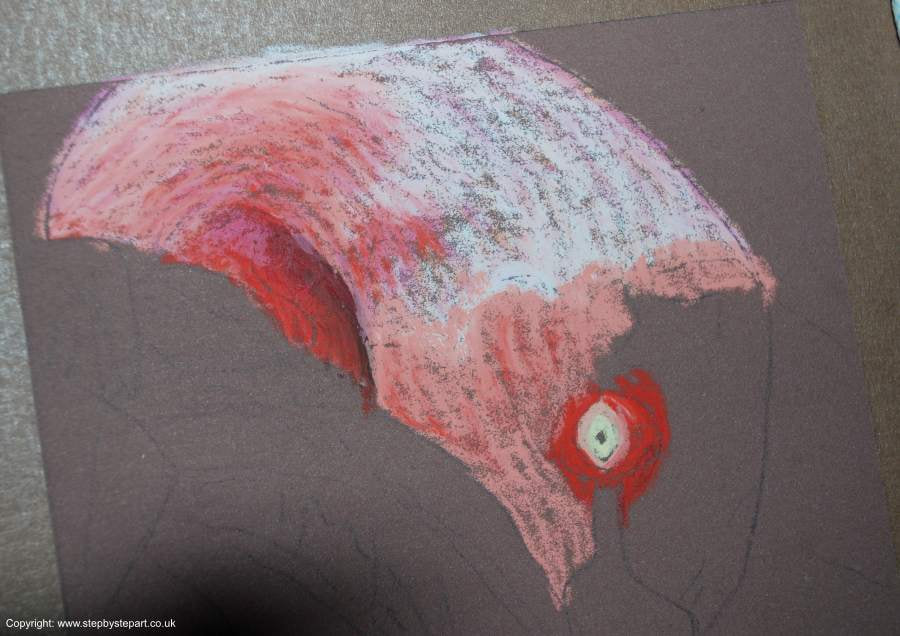
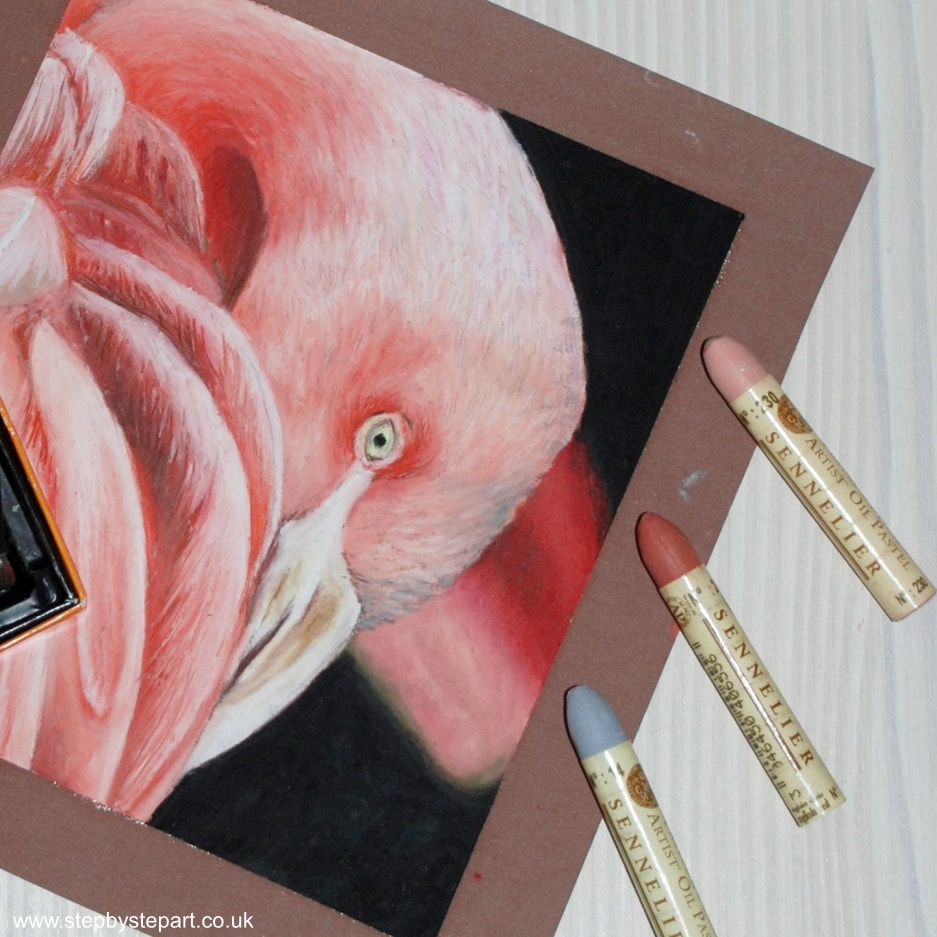
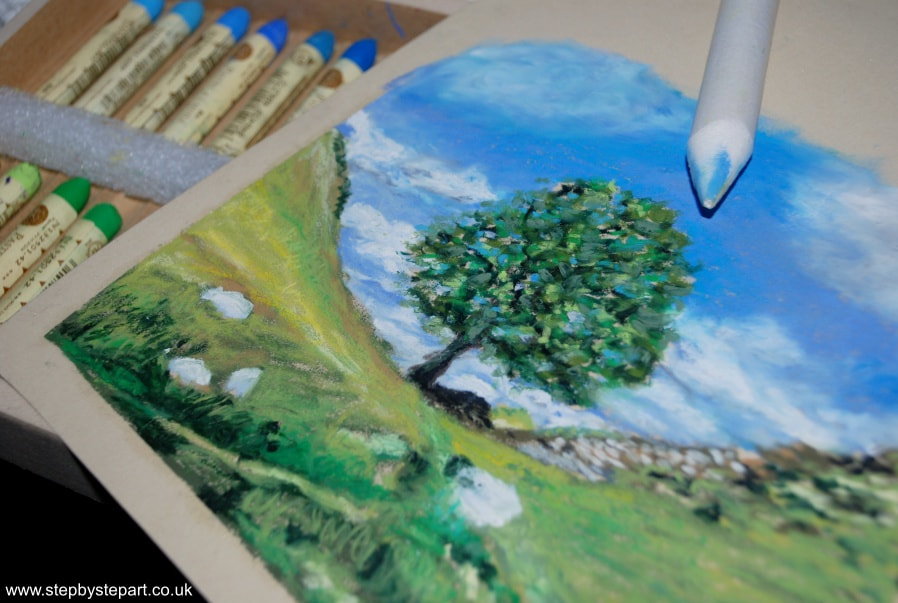
The initial stage is to lay down the values, taking care not to apply heavy layers and saturate the paper. Note the paper can still be seen beneath the pigment, as it is important that there is enough scope to blend the pastel into the peaks of the paper in preparation for the next layer (adherence)
|
Once all the values have been applied, I use a clean paper blender to to soften the edges which will leave a smooth layer for the base. The paper blender may not look clean, but I always ensure than any excess pigment has been removed by wiping over a tissue beforehand.
|
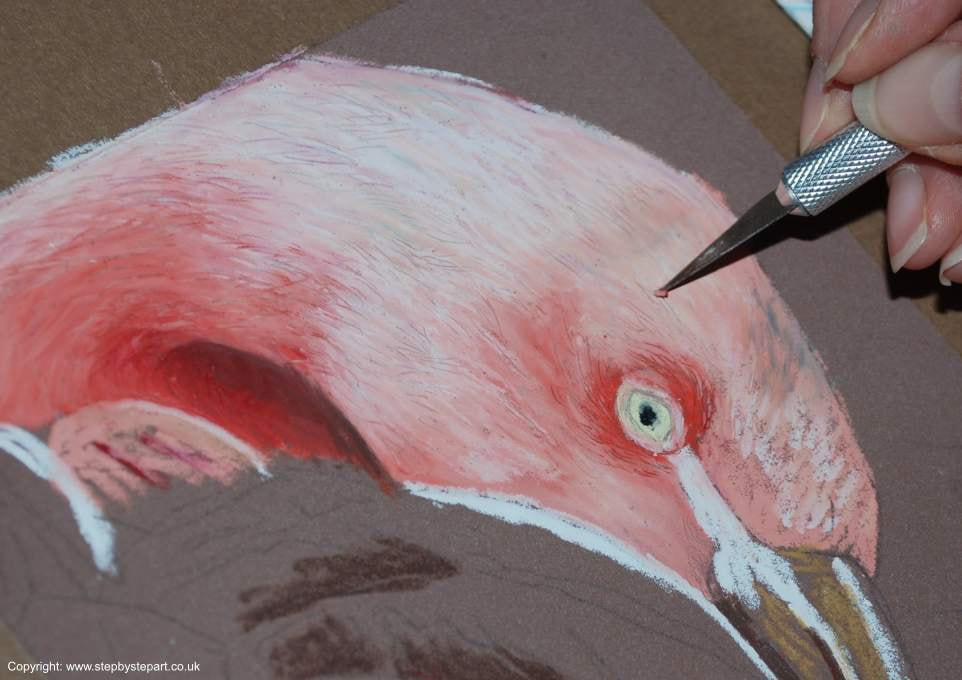
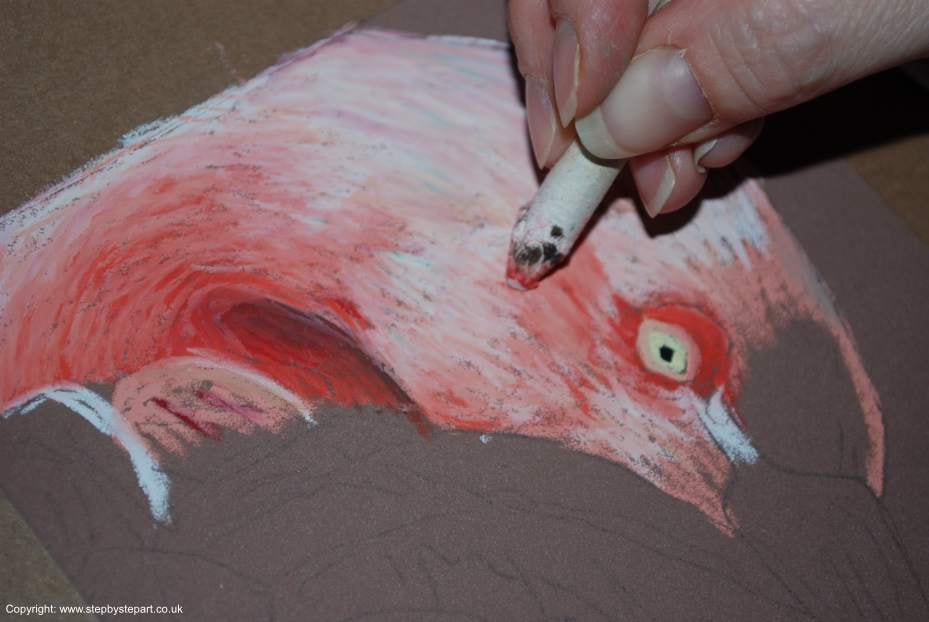
On top of the initial base layers, I begin to build up the layers. As I am using the Sennelier oil pastels, which are soft and creamy, applications will be thicker, so to accentuate fine detail, I use a craft knife to scrape out the pastels and create the shape of the feathers.
|
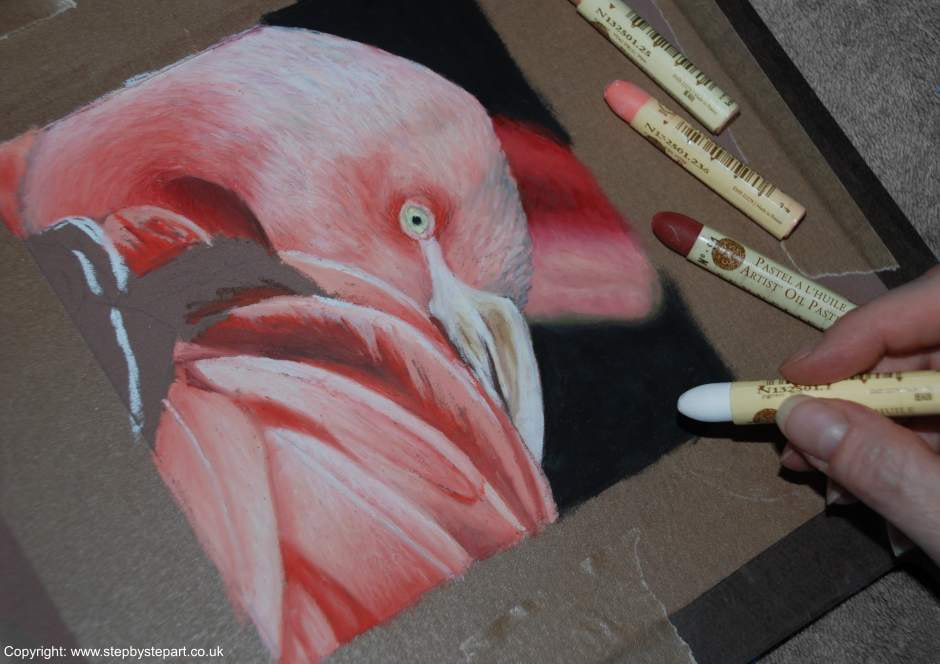
I continue this process, taking each section one at a time, ensuring that I do not apply the layers too heavily, too early. The fine detail can always be manipulated using the craft knife.
|
|
DID YOU KNOW?
A pastel can be classified as a drawing when there are sections of the paper left untouched. A pastel portrait may be called a 'painting' when the paper is fully covered. This is subjective and you may prefer to use the name interchangeably. Some may argue that all pastel portraits are drawings. Like anything in art, there are no set rules and you can use whichever term you prefer.
A pastel can be classified as a drawing when there are sections of the paper left untouched. A pastel portrait may be called a 'painting' when the paper is fully covered. This is subjective and you may prefer to use the name interchangeably. Some may argue that all pastel portraits are drawings. Like anything in art, there are no set rules and you can use whichever term you prefer.
Our soft pastel articles
|
View all our articles covering soft pastels, accessories and tutorials
|
Find out more about Unison, one of the most popular soft pastels. Made in the heart of Northumberland in the UK.
|
Why not try one of our soft
pastels tutorials
|
Looking to become a commission based artist? This article may offer some useful pointers to get you started.
|
ADAPT THIS TO EVERYTHING YOU HAVE LEARNED ABOUT OIL PASTELS. YOU DON'T HAVE TO APPLY A LIKE FOR LIKE. DELETE UNECCESSARY SECTIONS.
What are the differences between pastel brands?
Every pastel can be categorised as student or artist quality. Although it is not always evident which classification a brand may fall, the price can provide a good indicator and this is the yardstick used for the suggestions below. It is by no means precise and we have not clarified any of these suggestions with the companies.
So, what are the differences between student and artist quality?
Artist quality pastels are made using high-quality, natural pigments which make them highly lightfast. They contain a small amount of binder that helps to hold the pastel together which makes them more opaque and the colour more intense. Student quality pastels tend to be lower quality pigment mixed with chalk & binder, this means the pigment is more translucent in application and less lightfast. There are also cheap, non-branded pastels, but these offer very little for the pastel novice. They are chalky, dull in colour and less pliable and it is better to avoid these entirely.
Buying your first set of Pastels

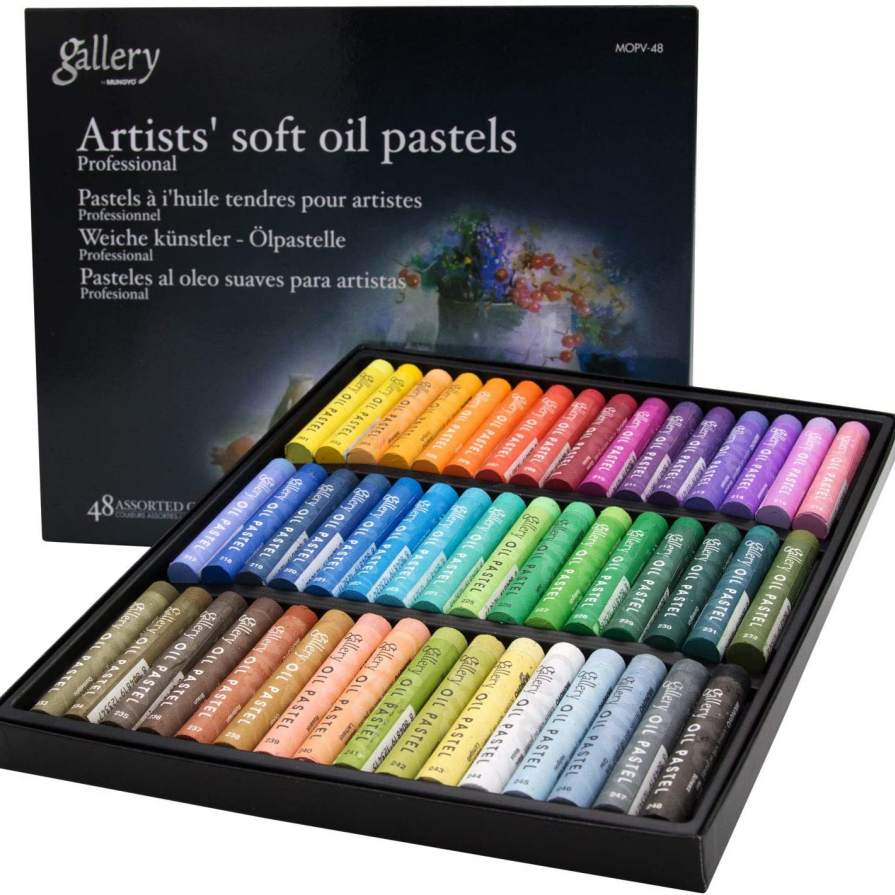
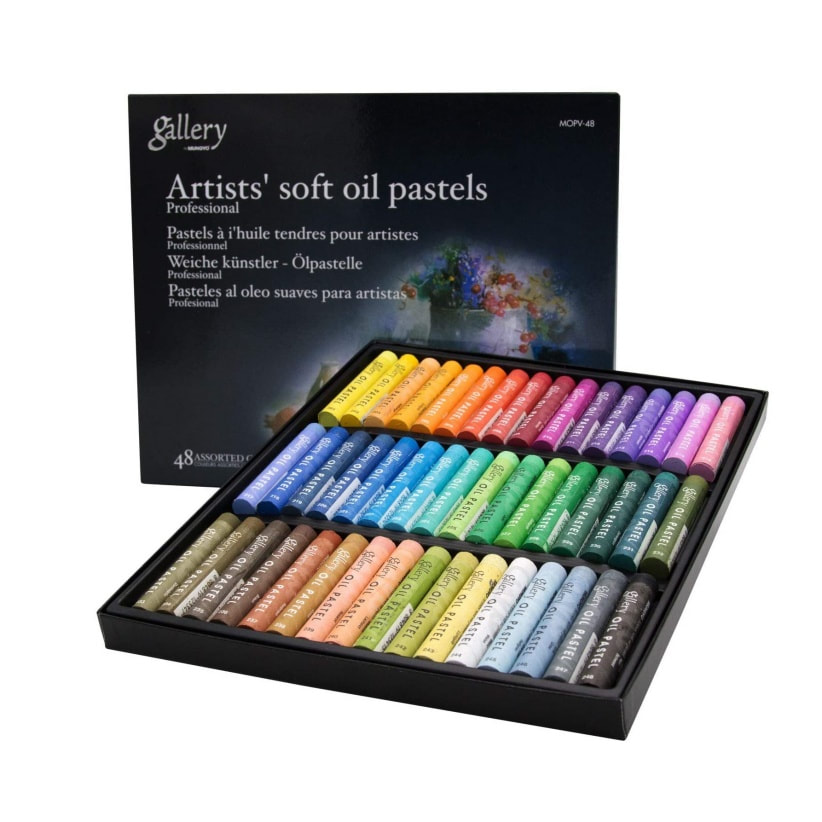
The Artists soft oil pastels by Gallery, are great for the novice. They can be found under the brand names Mungyo or Hashi, but they are the same product. They are available in boxes of 24, 36, 48 and 72. Ideal for learning the techniques and economical enough, that if they are not the medium for you, you haven't spent too much. Their pigments are not as vibrant as artist brands, but you can create some great pieces of work whilst you practice your techniques. You can mix them with other brands. A cost-effective way of extending the life of expensive pastels is to apply base layers using the cheap brand.
|
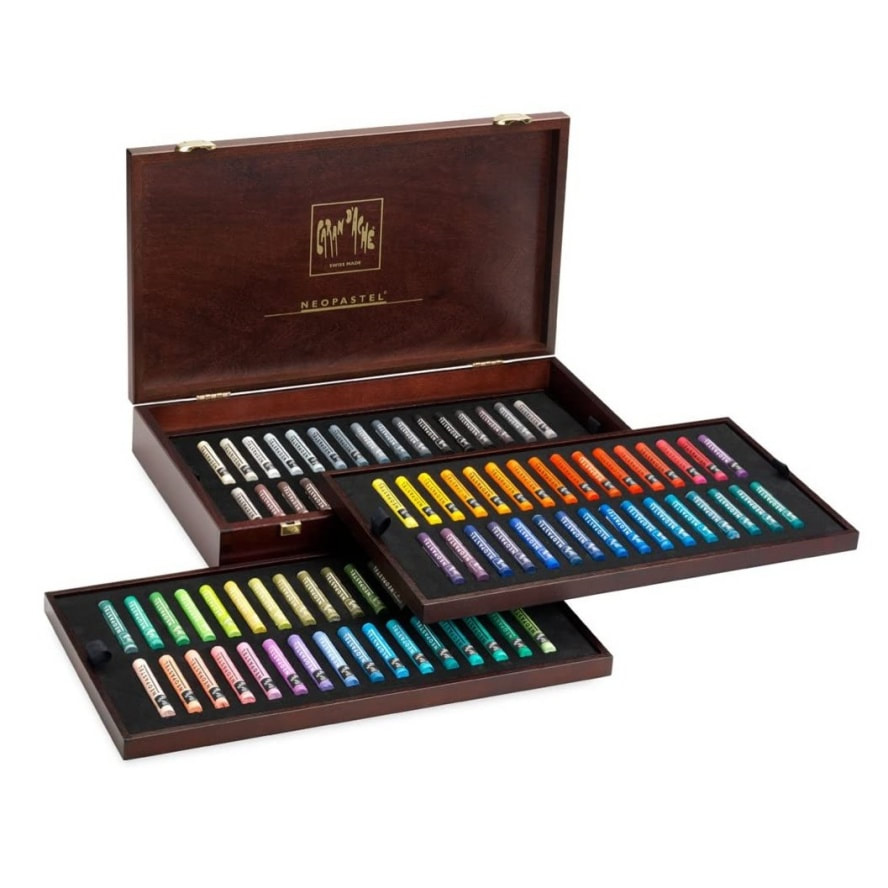
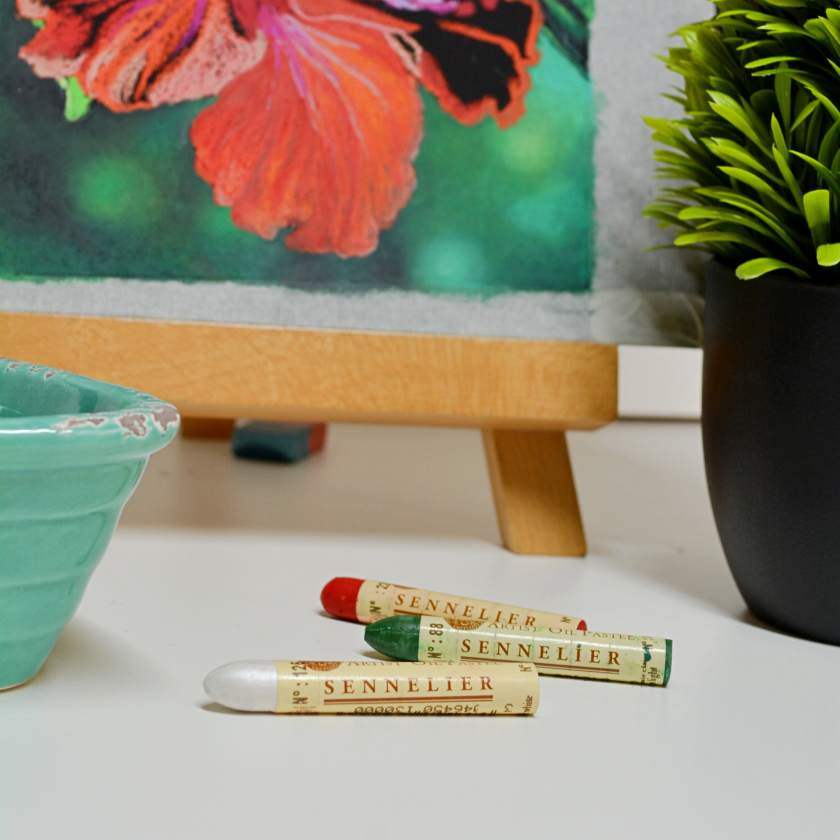
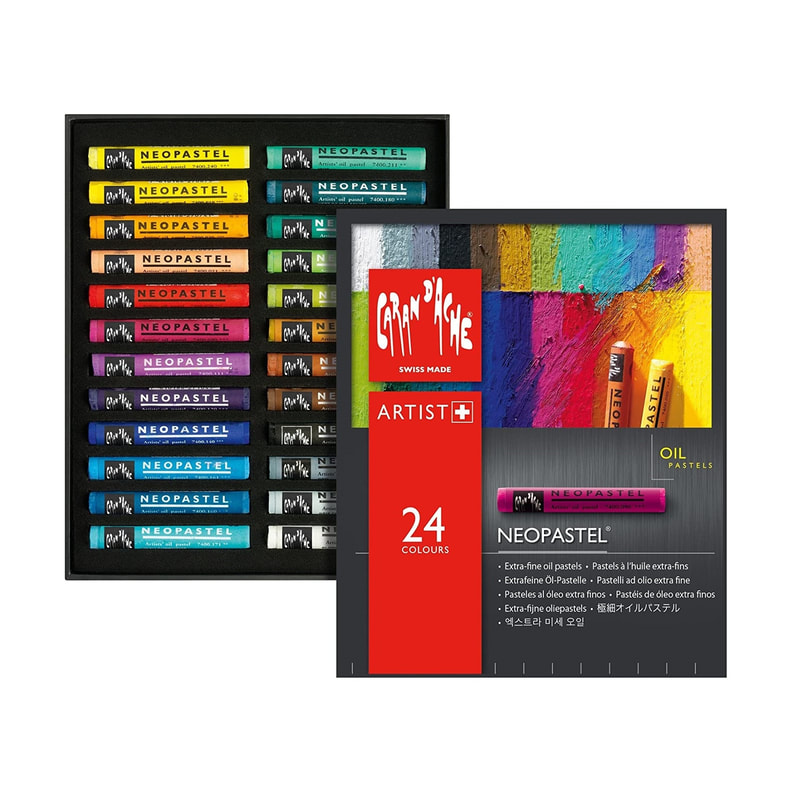
The Neopastel by Caran d'Ache, are professional quality oil pastels with superb smoothness and blendability. These pastels are absolutely dustless and a little drier than the Sennelier oil pastel.
|

Soft pastels like Unison are certified as artist grade. They are made from the finest traditional pigments and each one is rolled by hand. Due to this, they are expensive but the quality, application, lightfastness and pigmentation is notable making them well worth the cost. Not all soft pastels are made using the same ingredients and low priced brands will be of lesser quality.
|
Buying your first set of pastels should not be overwhelming. You do not need to spend a fortune on a high-quality range when you are learning. If you find the medium is not for you, at least you won't have spent too much money on products that you end up giving away. Visit any art shop in-store or online and you can find pastel sets with price tags between £3.00 - £300.00 (sometimes more!) Buy a starter kit to begin with. We offer some suggestions, but product availability will vary depending where you live.
It is not important to buy the largest set so you own every colour possible. You can extend your palette by mixing colours. If you specialise in a certain subject, you may find you only need a small collection. For instance, if you are a landscape artist you may find a set that offers all the colours you need for this subject. Before spending your money, ensure you can buy individual pastels (open stock) locally or online. You can then buy the colours you need rather than wasting money on a full set with pastels you may never use. When buying pastels, check for the ACMI label (AP or LP). These products have undergone extensive toxicological testing before they are granted the ACMI certification seal. You may need to contact a company direct if you cannot find this information on the packaging, or search the internet.
SUITABLE SURFACES
WHICH SURFACES ARE SUITABLE - CANVAS, PAPER, BOARD, WOOD, ALUMINIUM ETC - MENTION ABOUT PROTECTING WITH GESSO WHERE REQUIRED
Papers
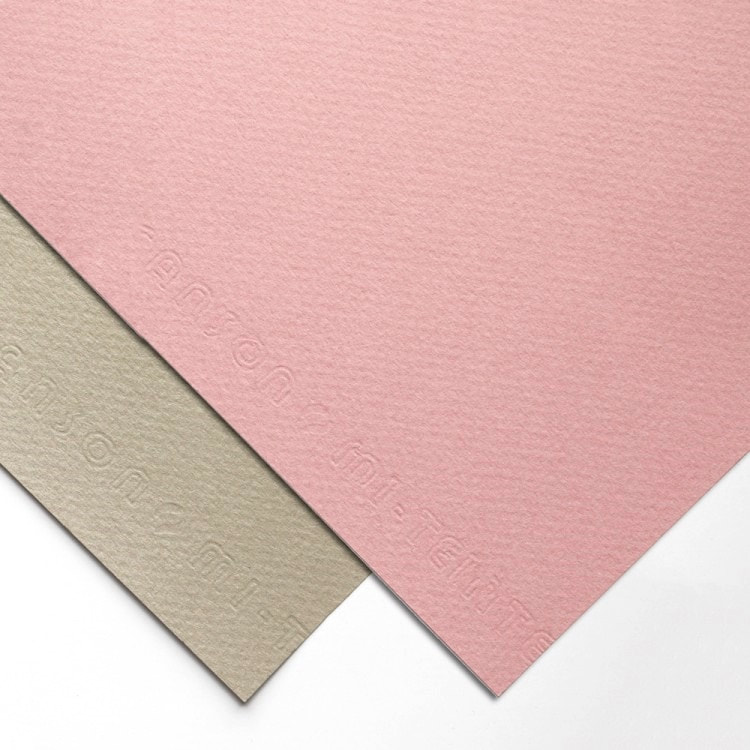
Pastel papers vary from texture to weight and there is no perfect paper that is suitable for every artist. Buying a few trial packs is a low-cost way of trying out a selection of papers and see which one(s) suits your own artistic style and preferences the best. New papers are coming on to the market all the time, so you may think you have found the perfect paper, but a new paper can always transcend expectations.
We cover three of the commonly used pastel papers below.
We cover three of the commonly used pastel papers below.
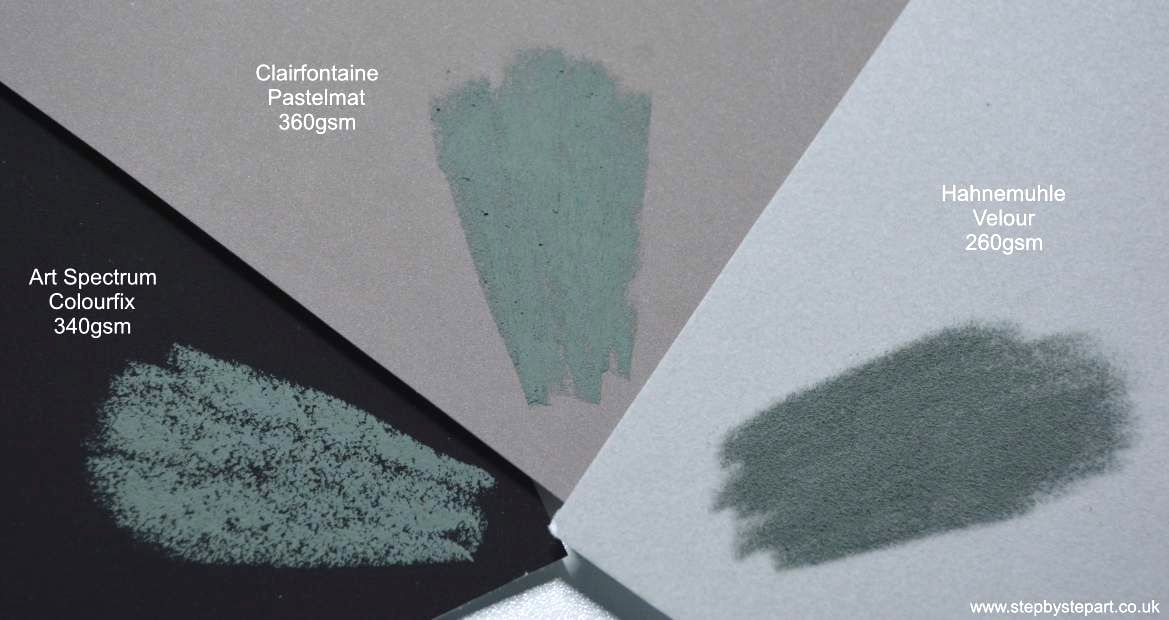
Art Spectrum Colourfix has a notable tooth. Clairfontaine Pastelmat is very fine and the Hahnmehule Velour has a soft, fibrous surface. Each one provides a very different effect to the other and it is worthwhile trying them all and see which one(s) you prefer. There are positives and negatives for each and it all comes down to the subjects you create and your own conclusions. The Pastelmat paper is likely the most utilised by artists but its usefulness does depend on the type of pastels you use and how many layers you like to apply. A heavy-tooth paper like Colourfix will wear down soft pastels more than hard pastels but it will hold more layers. The velour paper also holds many layers but it can suffer from pastel drop and can be challenging for those new to pastels, although we do suggest you try it.
Click any of the links below to visit the websites of pastel artists who work with each corresponding surface. These artists have been selected intentionally as their work is highly detailed, clarifying whichever paper you choose, you can create expressive drawings, deeply intricate paintings and anything in between.
ADD A SHORT PARAGRAPH ABOUT WAYS OF FRAMING AN OIL PASTEL PAINTING. MENTION THEY NEVER DRY AND THAT DEBRIS WILL STICK TO THE PORTRAIT IE HAIRS ETC.
Discuss the varnishing process recommended by GOLDEN
Hints & Tips
Here are a few recommendations when working with soft pastels. As you proceed in your journey, there will be more useful suggestions that you could add to the list. Let us know yours.
|
DO: √ For best effect, work dark to light and from background to foreground. √ Minimise pastel drop spoiling your art by working from top to bottom √ Layer by applying one colour over another before blending together. It is not necessary to blend each colour before applying the next unless you are adapting the colour to create a specific look. √ Full sized sticks are best when covering large areas, smaller, half size sticks can be used for creating the fine detail - break a full sized stick in half keeping one side sharp for fine lines and using the other half for base tones. |
DON'T: X Don't saturate your paper too quickly. Coarse papers will hold more layers than fine papers. X Never blow excess dust from your paper. Work upright so the dust falls away naturally or use a soft (clean) brush. X Do not eat or drink whilst working with pastels. Wash hands thoroughly and take your break away from your workstation. X The heavier the paper (a larger gsm number), the coarser the paper. Do not use your fingers to blend pastel on coarse papers, use blending tools. X Keep pets out of the room when working with pastels, especially birds. |
Ways to protect an oil pastel painting
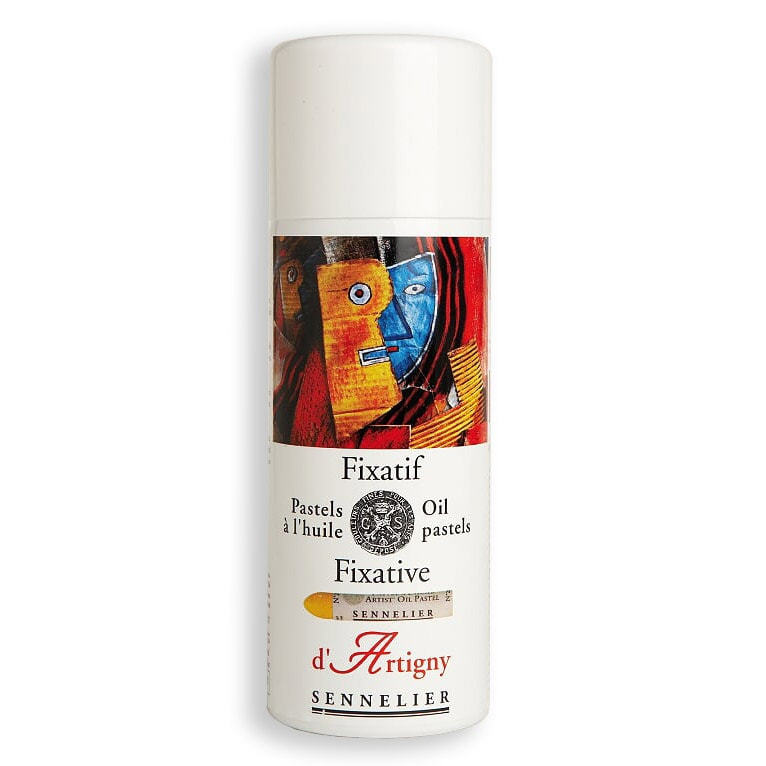
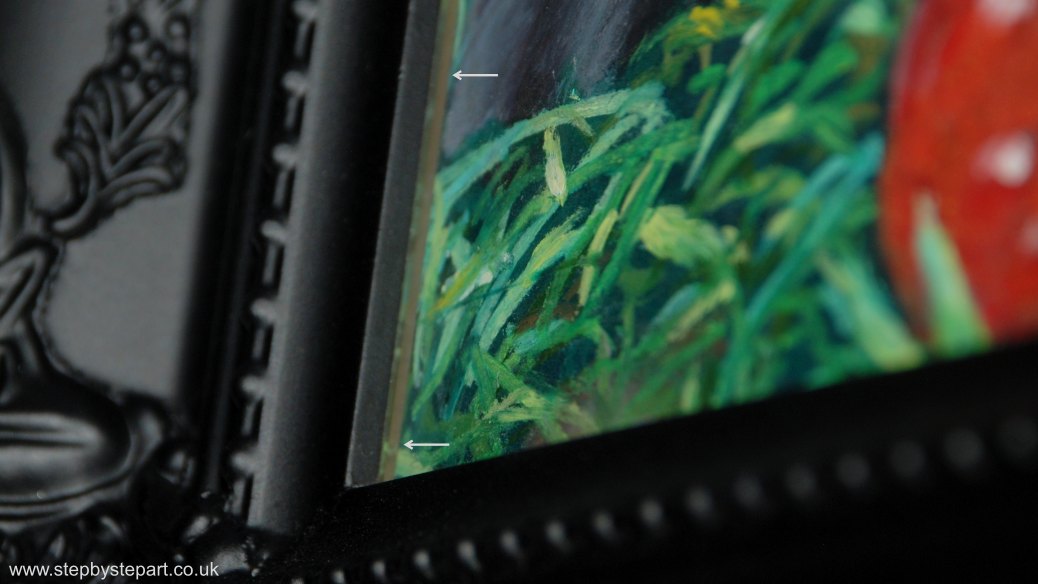
Unlike oil paint, oil pastels do not dry, so an oil pastel drawing must be protected. Sennelier has created an aerosol fixative that can be sprayed over the finished portrait, which provides some protection, but the best way to protect an oil pastel painting is to frame it behind a protective barrier like glass or acrylic glass. Ensure there is a space between the painting and the glass to avoid direct contact.

|
|
Any safety issues with oil pastels? Check.
Pastels are classed as non-toxic or low in toxicity. Pigments like Cadmium and Cobalt are found in many mediums but they are most toxic in 'dust-form', a safety issue which only matters if ingested and this would need to be via extremely large quantities to have an effect on health, so we mention it here purely for awareness. If you work with pastels on a regular basis, we provide you with some good working practices to keep dust to an absolute minimum and safety at the forefront of your working day. When buying pastel products, always look for the ACMI label (AP or LP). These products have undergone extensive toxicological testing before it is granted the ACMI certification seal.
- To minimise the amount of pastel floating around in the air, particularly if you work with pastels full time, cover everything with a sheet of bubble wrap or newspaper. It is best to keep pastels in their boxes or tins allowing you to store them cleanly and safely.
- Don't blow excess pastel dust from your paper. This escapes into the air and may get into your lungs.
- Work on an upright easel so dust falls naturally
- You may choose to wear a mask when working with pastels to minimise inhalation. Especially recommended for those with asthma or other health issues.
- HEPA filters help to keep the air clean and removes dust in the atmosphere. This can be beneficial in reducing any allergies you may suffer from too.
- Keep pets out of the room when working with pastels, especially birds.
Pastel brand articles
Click on any of the images below to find out more about each product in our online articles.
Gallery oil pastelsArticle to follow
|
Caran d'Ache NeopastelArticle to follow
|
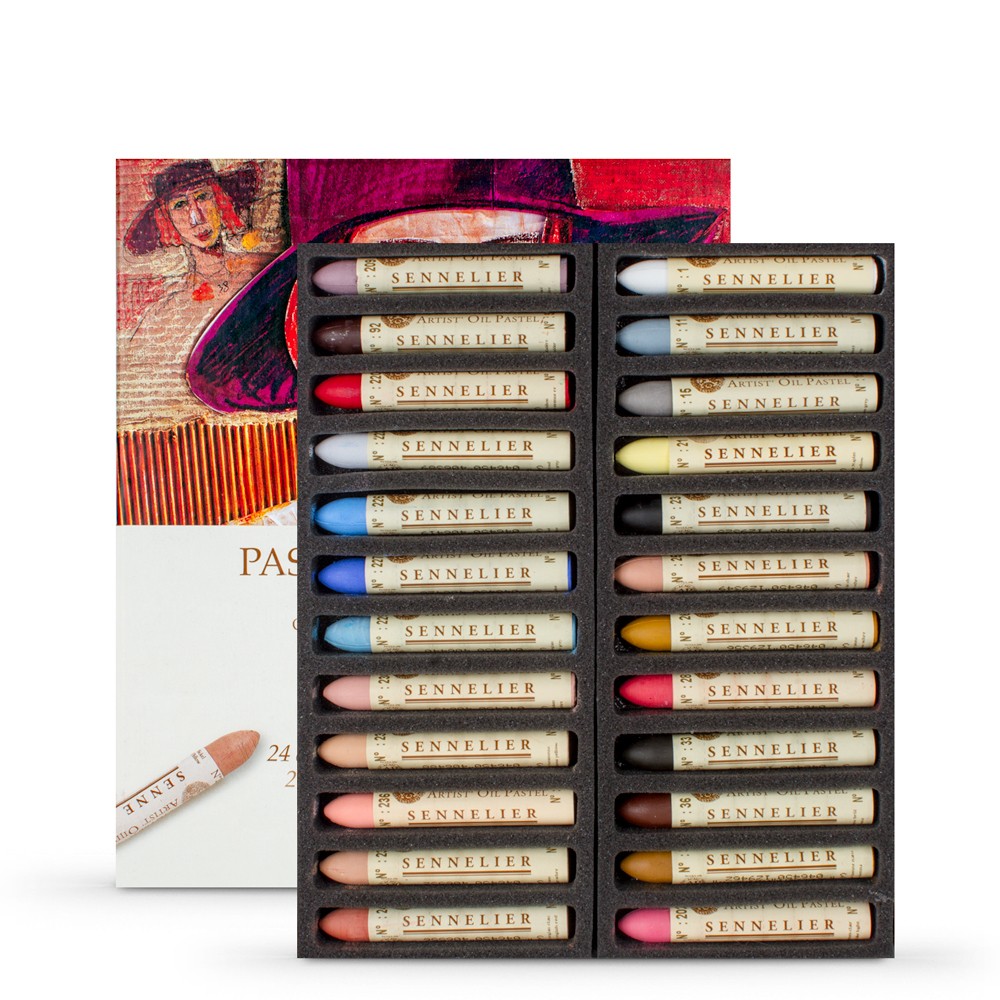
Sennelier oil pastelsLink to article after including resized and compressed image
|
Oil Pastel Tutorials
Try one of our step by step tutorials for pastel artists
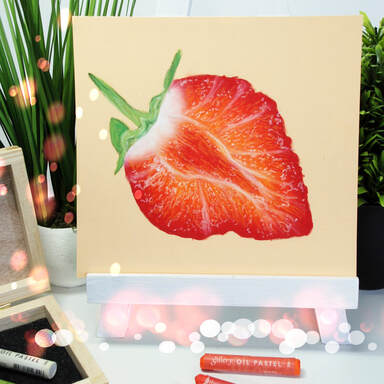
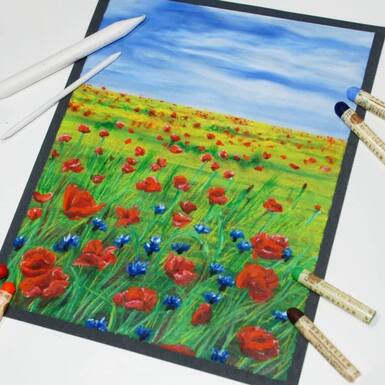
We have a selection of tutorials for pastel artists. If you are new to pastels, the 'juicy strawberry' tutorial was designed for newbies to the medium. It explains application, blending and layering. If you are looking for something a little more challenging, we will be adding more tutorials in the coming months. All our tutorials are provided with step by step guidance, which include a colour chart so you can work with your own pastel brand.
...BEGINNERS...
|
|
MORE PASTEL TUTORIALS WILL FOLLOW
Why not request a subject?
Use our Contact form to get in touch
FROM KEN BROMLEY re: Blog post
Working with oil pastels is an area we haven’t covered at all on the blog. And also given you are in the middle of writing an article on acrylics then I think we should go down the oil pastel route. It’s a product customers are drawn to but are not sure how to use them, so I think it would be great if you could write something about them. Something along the lines of a beginners guide to using oil pastels and maybe some of the main techniques for using them.
Common questions we are asked are;
· how are they different from soft pastels?
· what surfaces are suitable to use oil pastels on?
· does the finished painting needs varnishing?
· do you rub them to blend?
· can you use solvent to blend?
We normally keep our posts to around 600 words, but that is not set in stone and we have options around splitting it into two if needed. We also like to start each subheading with an image, are you able to do this? If not we can take some images in house, just let me know.
WRITE ABOUT OIL PASTELS AND THEIR ATTRIBUTES
INTRODUCTION TO OIL PASTELS AND THEIR ATTRIBUTES
Oil pastels are a very underrated, yet they are such a versatile medium. They offer infinite possibilities for the artist, due to the wide variety of techniques available. They are smooth and creamy, formed in a compact stick, and manufactured from a non-drying oil and wax binder. Each brand provides a diverse combination of quantity of the binder, which make them to varying degrees of hardness and softness. Oil pastels provide high pigment content
" scribble drawings are basically fun doodles that strive for energy, movement & atmosphere rather than precision and exactness. They are a wonderfully liberating, very relaxing and a relatively quick and easy way to draw. In this tutorial I will show you how to create your own scribble drawing with Graphic pencils which you can then embellish with colour. " WRITE SOMETHING LIKE THIS FOR OIL PASTELS
CHECK KB BLOG FOR IDEAS (PHOTOS)
PHOTOS OF Sycamore Gap on Fisher400 or UArt, Haze on Pastelbord and Green shoes on Pastelmat
Beginners guide to using oil pastels; include the following questions:
WHAT PRODUCTS YOU WILL NEED - INCLUDE A SHORT SECTION DISCUSSION ABOUT TYPE OF PASTELS TO BUY AND PAPERS?
The oil pastels
You don't need a wide selection of products when working with oil pastels. A few oil pastels, a suitable surface and a blending tool, will provide you with the minimal to create your first painting. Depending on your budget, you may opt to buy a cheap set of oil pastels, which offers a wide ranging colour palette, however cheap products usually provide low pigment content, and this can make the difference between loving oil pastels and loathing them. Look out for an introductory set of pastels or simply buy a handful of colours via open stock, and see how they compare.
The surface
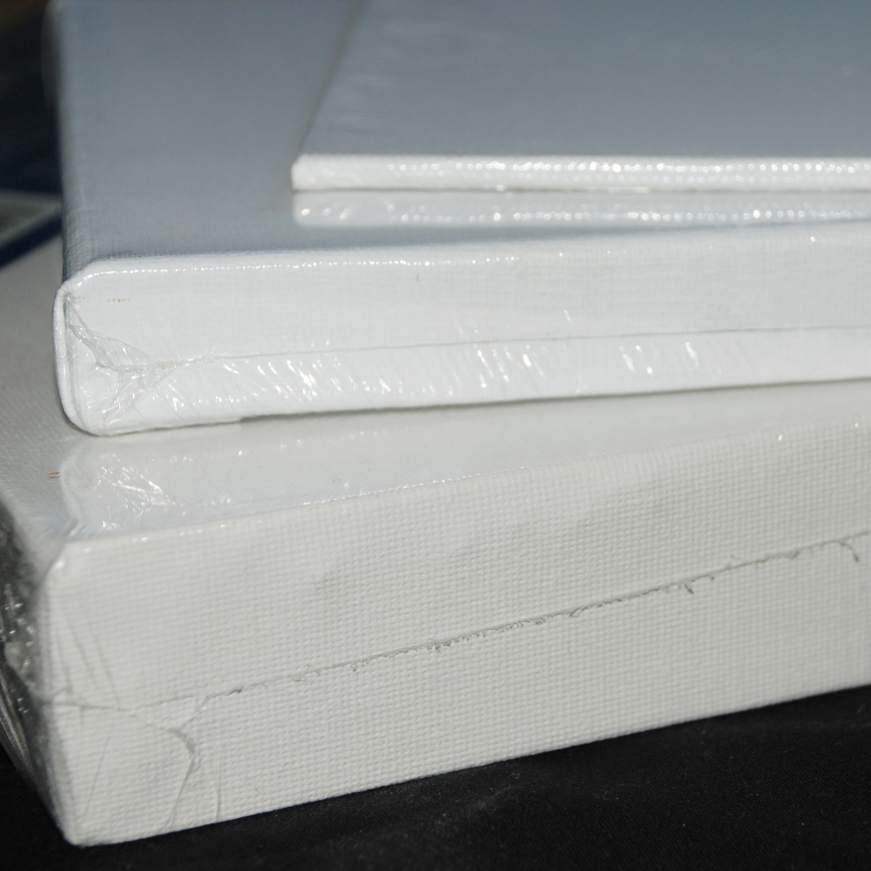
Oil pastels can be applied to far more surfaces than just paper, providing there is a tooth to hold the layers. Simply searching for pastel papers, bring up a wide variety of choice. The samples provided in this article were produced on Clairfontaine Pastelmat, Ampersand Pastelbord and the Fisher400 surface, which is the most abrasive of the three, and allows for far more layers.
Accessories
Oil pastels can be rather messy, and the best way to keep hands clean, are by blending with paper stumps and tortillions. Keep the tips of your pastels clean by having a few sheets of kitchen towel to hand, and wiping any excess pigment from the pastel onto the towel to avoid cross contamination.
There are other tools that can be acquired as your technique improves, but this will vary, depending on your artistic style.
There are other tools that can be acquired as your technique improves, but this will vary, depending on your artistic style.
Include a sample of paintings, pastels and accessories here
|
How are they different from soft pastels?
PROVIDE SAMPLES OF
What surfaces are suitable to use oil pastels on?
Does the finished painting needs varnishing?
Do you rub them to blend? Can you use solvent to blend?
Maybe turn these questions into what can you use to blend oil pastels?
There are numerous tools that you can use to blend oil pastels. Your fingers can do the job, but this can be messy or if the paper is particularly coarse, not ideal. Products like paper blenders and tortillions are ideal, or a transparent blender which Sennelier have created. You can also create a blend purely by the application of pastel on pastel.
Can you mix oil pastels with oil paints?
Oil pastels and oil sticks are very different products. You can mix oil sticks with oil paint, but as oil pastels never dry, it is not recommended that you mix oil pastels and oil paint together. You can apply a thin layer of oil pastels as an outline (this needs rewriting) but too thick a layer could make the base of an oil painting unstable.
