Drawing a Weasel using acrylic paints on Pastel board/paper
Artist level: Intermediate
This tutorial shows you how to create a Weasel using acrylics on Ampersand Pastelbord. The Pastelbord has a fine grain surface which aids the blending process, allowing for smoother finishes. You can instead use Pastelmat paper which has the same surface as the Pastelbord. Acrylics may seem quite challenging when you first start but remember, if you make a mistake you can easily correct it so you do not need to concern yourself too much. It takes time to get the right balance of tone and detail so you may wish to purchase a paint pad and build up your portfolio before choosing an expensive canvas board like the Ampersand brand.
Each stage presents a series of images and written explanations so you can follow each section easily.
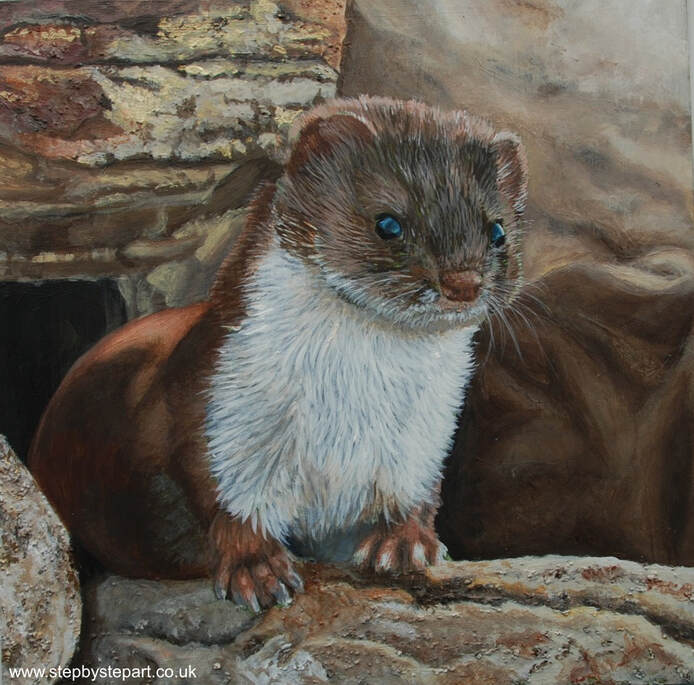
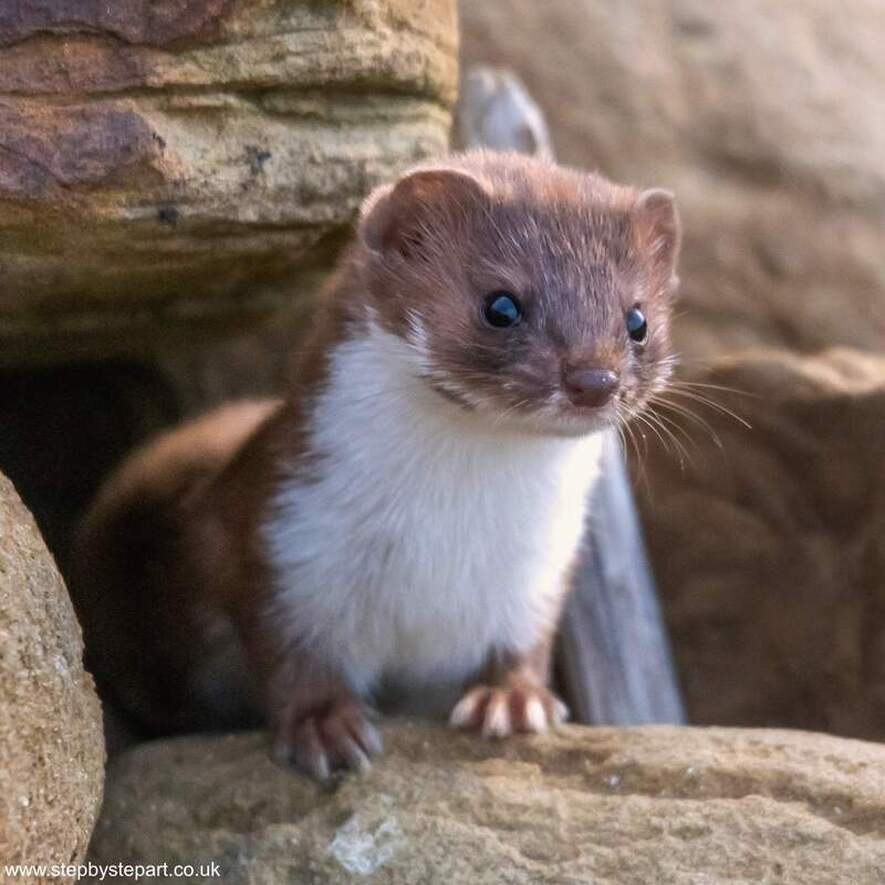
You can find the reference image below. You can screen grab and print out or view on a tablet whilst reading the instructions on a smartphone or computer. The colours used in this demo are from the GOLDEN Heavy Body acrylics range, but the tones used are readily available in most acrylic ranges, so using the acrylics you already own should suffice.
I hope you enjoy this tutorial and if you would like to request a subject to include in a future mini tutorial, please get in touch!
Each stage presents a series of images and written explanations so you can follow each section easily.
You can find the reference image below. You can screen grab and print out or view on a tablet whilst reading the instructions on a smartphone or computer. The colours used in this demo are from the GOLDEN Heavy Body acrylics range, but the tones used are readily available in most acrylic ranges, so using the acrylics you already own should suffice.
I hope you enjoy this tutorial and if you would like to request a subject to include in a future mini tutorial, please get in touch!
The Products you will need
Pastelbord or Pastelmat/Colourfix smooth - Acrylic paints
Collection of small bristle brushes - Clean Eraser - Soft brush
Support Used: Ampersand Pastelbord Acrylic range Used: GOLDEN Heavy body
Collection of small bristle brushes - Clean Eraser - Soft brush
Support Used: Ampersand Pastelbord Acrylic range Used: GOLDEN Heavy body
The reference image
Colours you will need
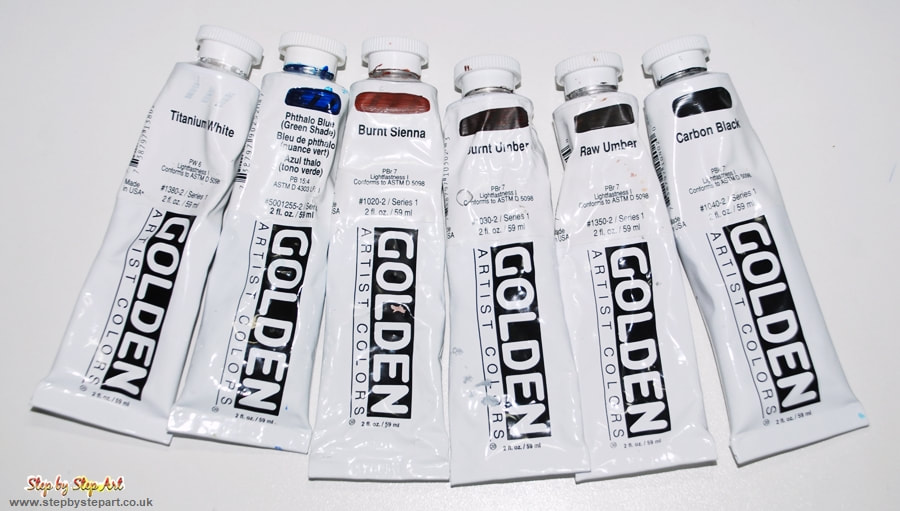
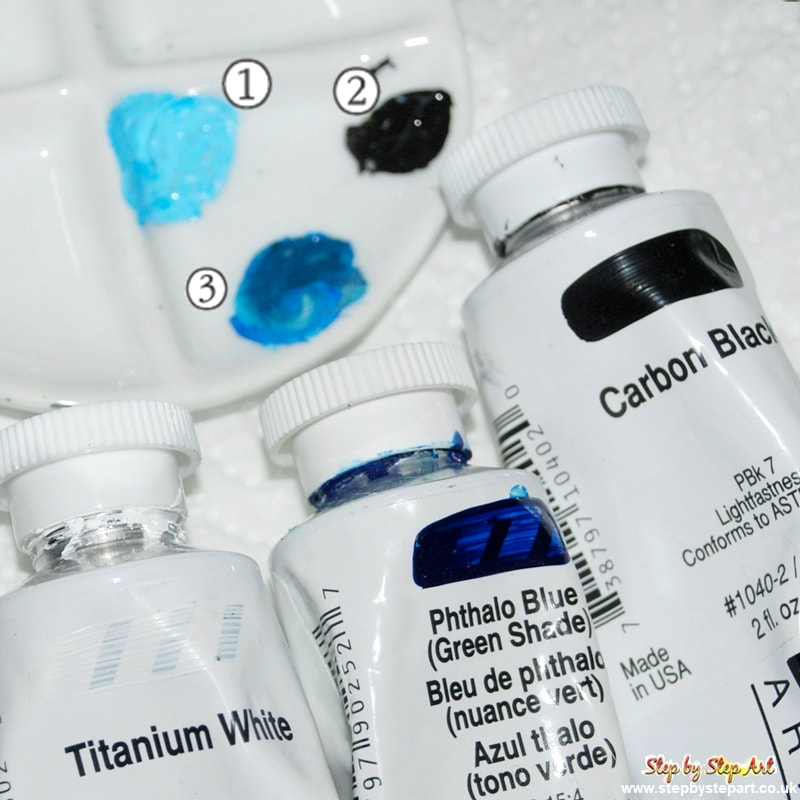
The 6 colours used in this tutorial are:
* Titanium white * Phthalo Blue * Burnt Sienna * Burnt Umber (Warm base) * Raw Umber (Cool base) * Carbon Black
Choose the colours from your own paint range, or simply mix the colours up from the paint you have. It is not important to only use Carbon Black for instance, use the black paint you have. Similarly with the white. Titanium white is more opaque, so is much brighter.
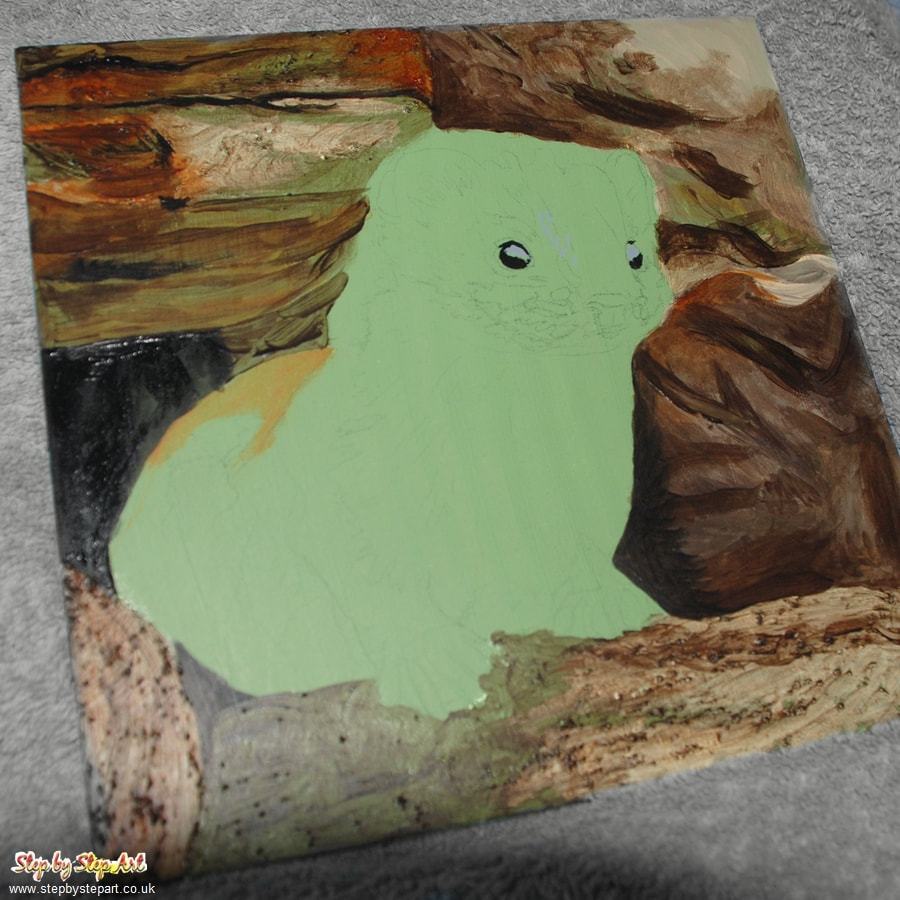
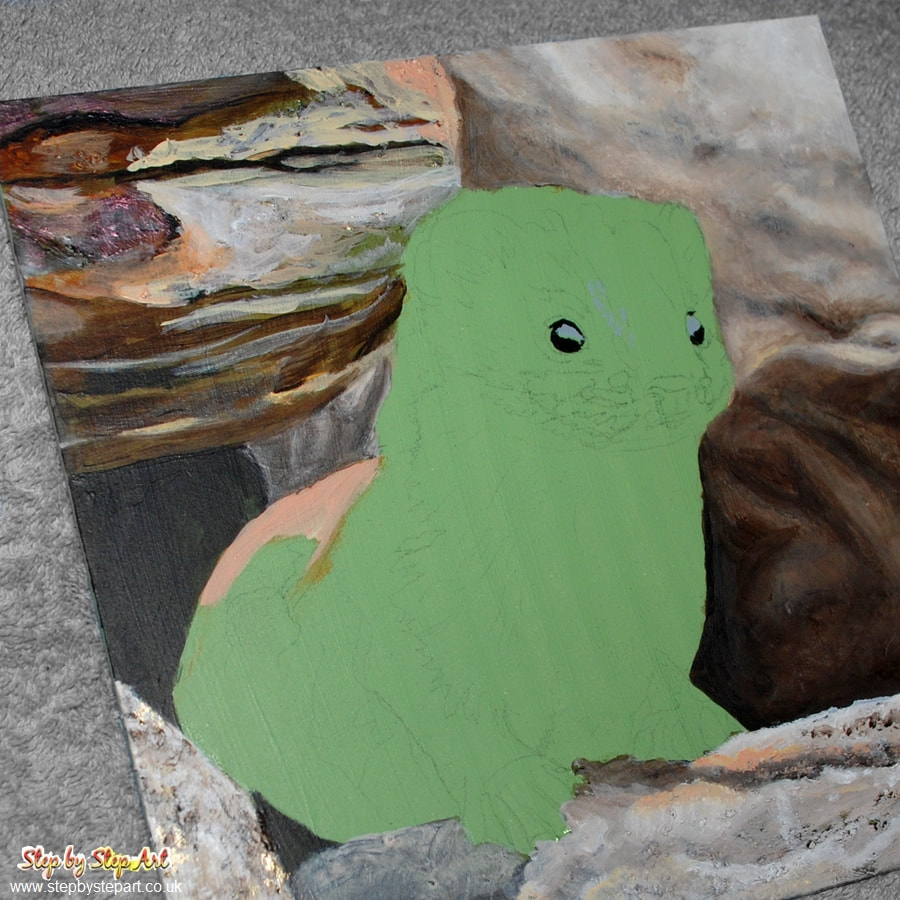
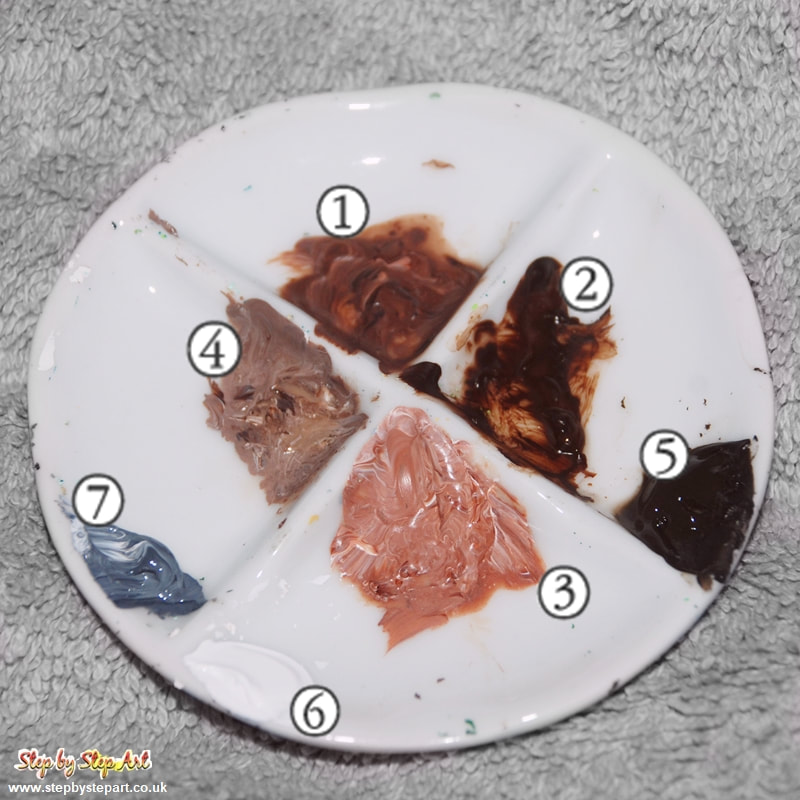
Canvas base tone
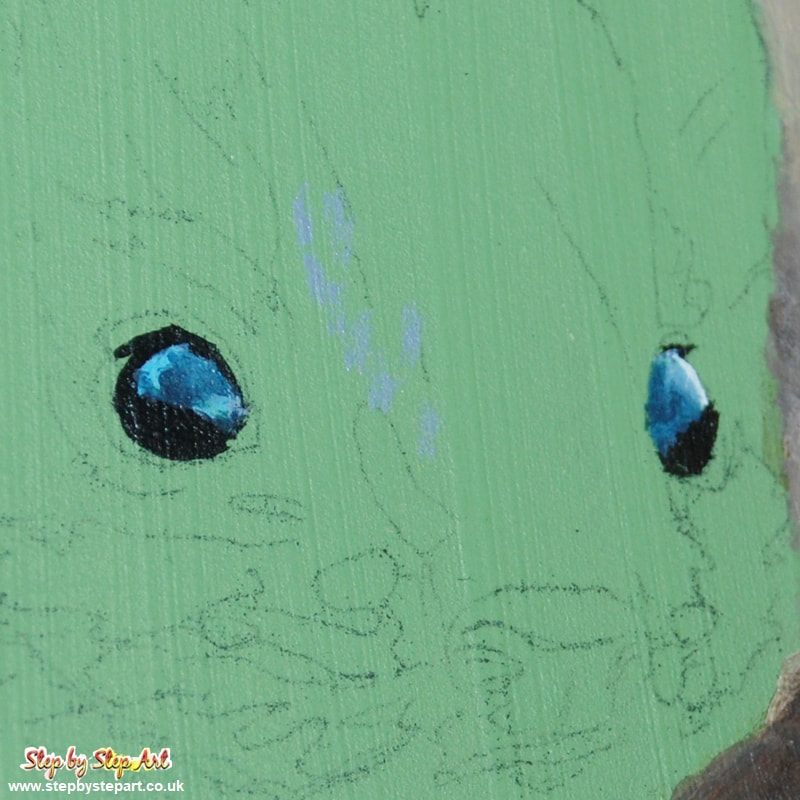
You will note that the base tone of the canvas we used is green. This is simply due to the fact that the canvas had previously been used and the green tone was applied over the top so the canvas could be used again. We do not promote this tone as being a suitable base with which to create the painting of your weasel as a white surface will be far easier.
Depending on the size of your drawing, you will only need to mix a small amount of paint. The amount you use will vary on the size of your canvas/paper. Ideally, mix a larger amount of paint, than seen in this photo to stop your paint drying out too quickly and allow yourself some time to create the detail. I recommend that you apply a drop of water to the palette before you place your paint over the top but do not mix together. This will help to keep the paint supple and stop it from drying out as fast. As I do not like wasting paint, and work quickly, I only needed a tiny amount of paint. Adding any water to such small amounts will simply dilute the pigment and create a wash.
Brush head sizes

IMPORTANT TIPS:
* The amount of paint you need will depend on the size of your painting.
* When mixing a new colour, it is better to mix too much than not enough.
* Store extra paint in a seal tight container to stop it drying out.
* Applying paint over a wet surface makes blending easier.
* When taking a break, cover the paint palette with cling film and store in a cool place.
* Adding drops of water onto the paint palette will help to keep the paint supple during use but do not mix the paint and water together.
You can read more tips on working with acrylic paint on our tonal background tutorial
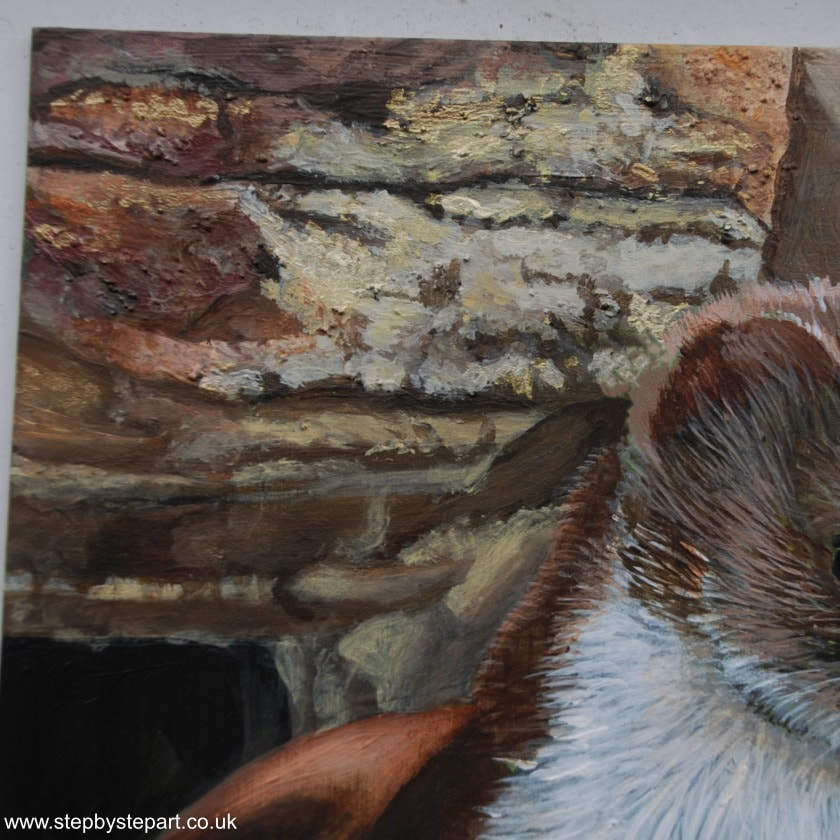
This tutorial explains in detail how to paint the weasel but we do provide a short section on how to create the same background you can seen in the reference. It is rather complex and if you are new to acrylics, it may be better to add a simple background tone or leave the background empty. However, if you're here looking for an extra challenge, you can scroll down the page to get to the section where we show you how to create this very background.
Good luck!
Good luck!
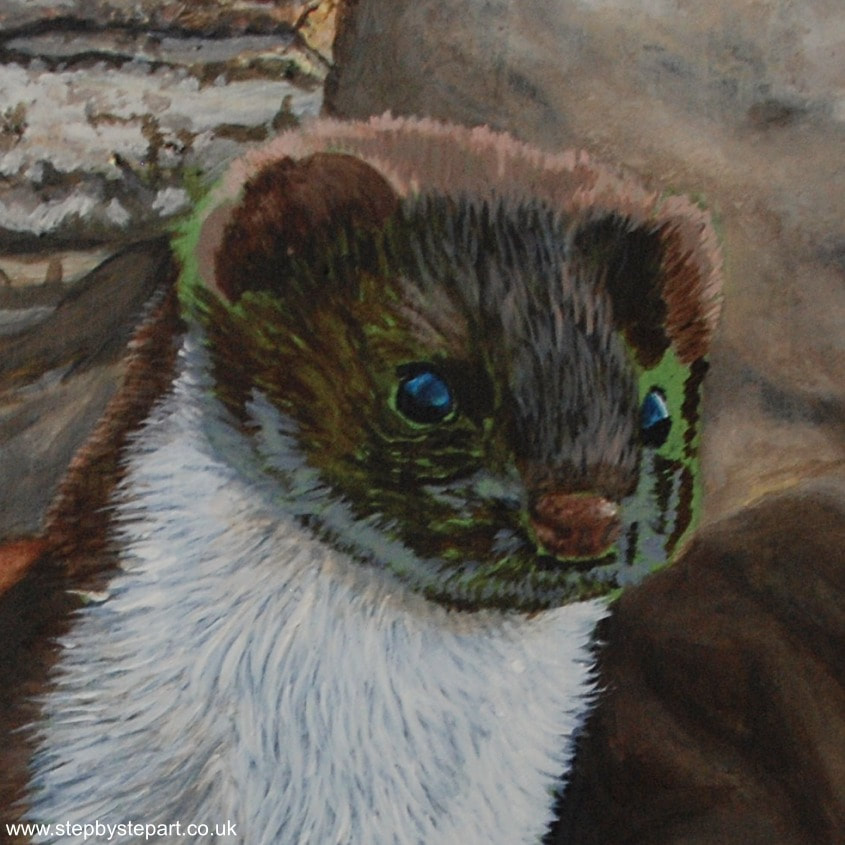
1. Tonal detailing of the back
|
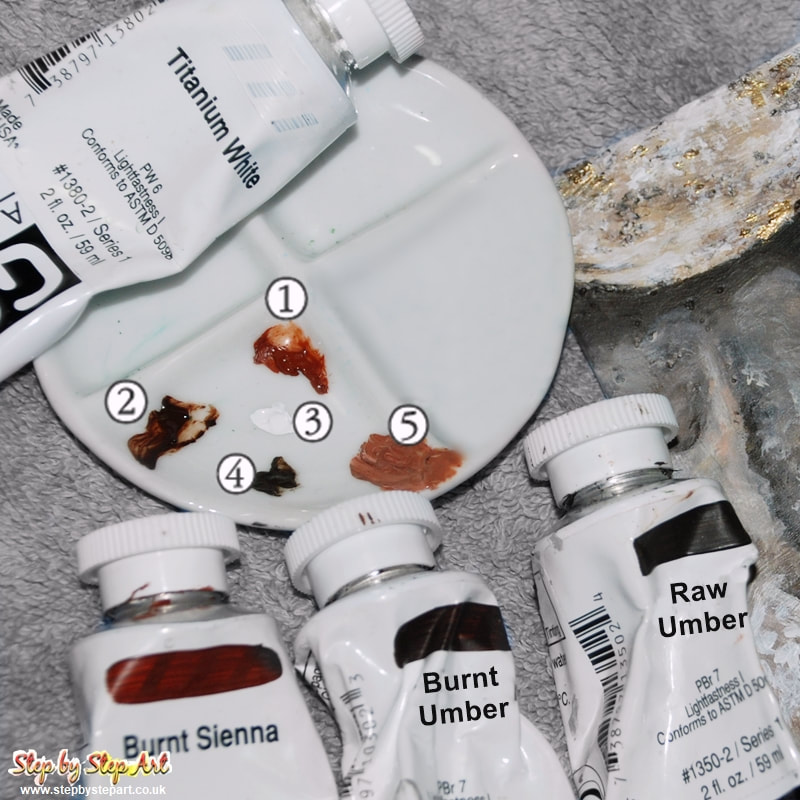
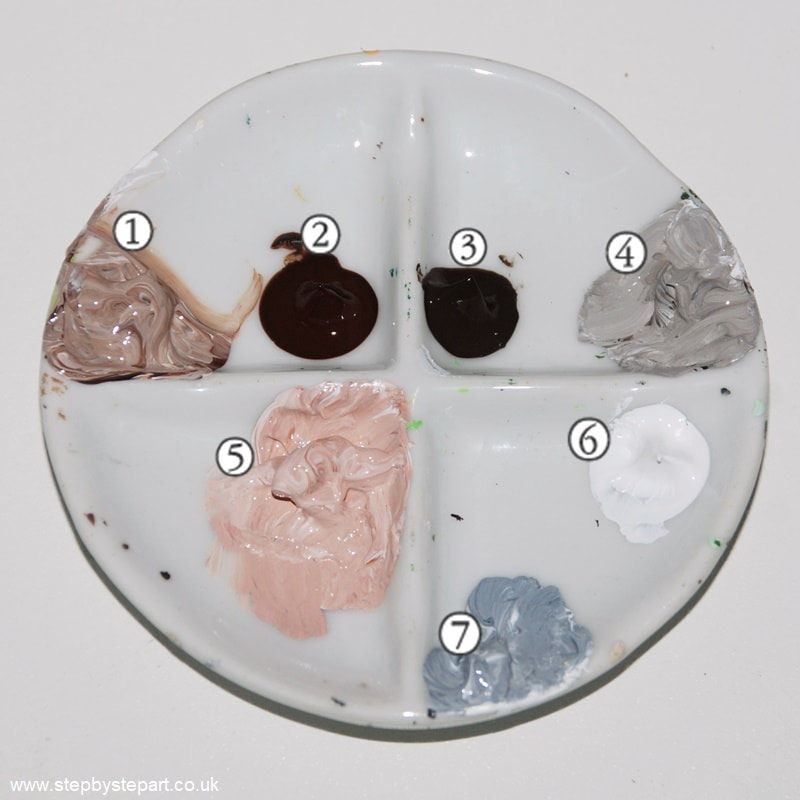
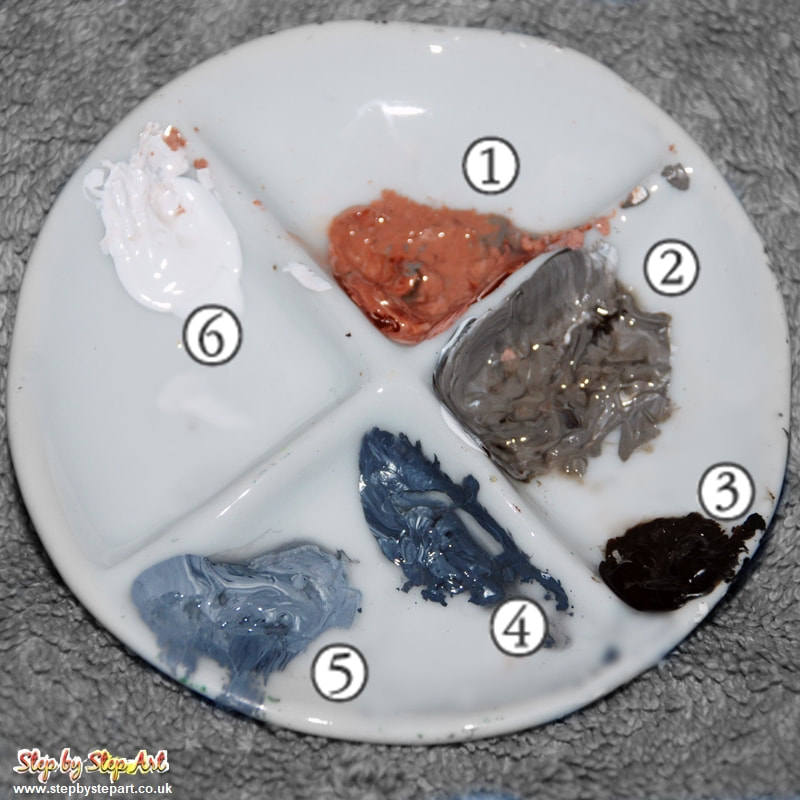
Paint Needed: Titanium white, Burnt Sienna, Burnt Umber, Black and Raw UmberColour mixes:
1. Burnt Umber & Burnt sienna/Titanium white mix 90/10% 2. Burnt Umber 100% 3. Burnt sienna & Titanium white 60/40% 4. Raw Umber/ Titanium white 70/30% 5. Raw Umber 100% 6. Titanium white 100% 7. Grey - mixed from 30% Black and 70% Titanium white Note: Always mix a little more paint than you think you will use. You can easily add more into your palette of a pure colour, but adding to a mix afterwards will change the tone.
|
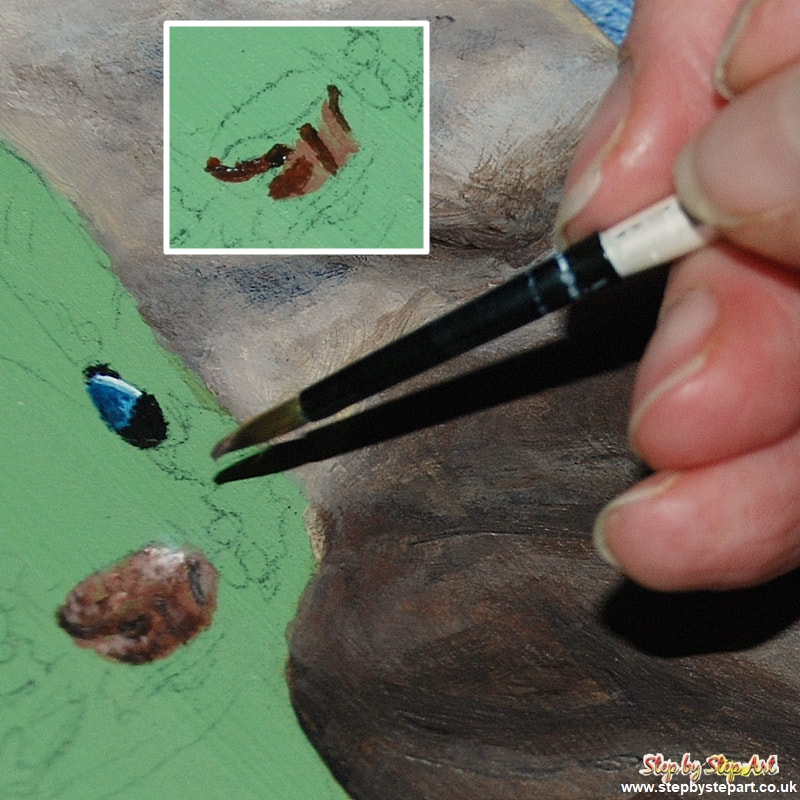
Before applying any paint, ensure you keep within the outlines of your drawing so perspectives are kept in check. If your original outline is faint, apply a heavier outline. The paint will cover any lines you create unless you have watered your acrylics down to a colour wash. In this case, keep the outlines light. When blending separate tones together, try using a clean, semi-dry brush. Dip in water and use a piece of kitchen roll to absorb some of the water before using for blending purposes. This will help to soften edges between colour transitions. Using a wet brush during the blending process will simply force the colours together into one mass, instead of 'softening' edges. For this tutorial, we will call this technique the 'dry-blend'
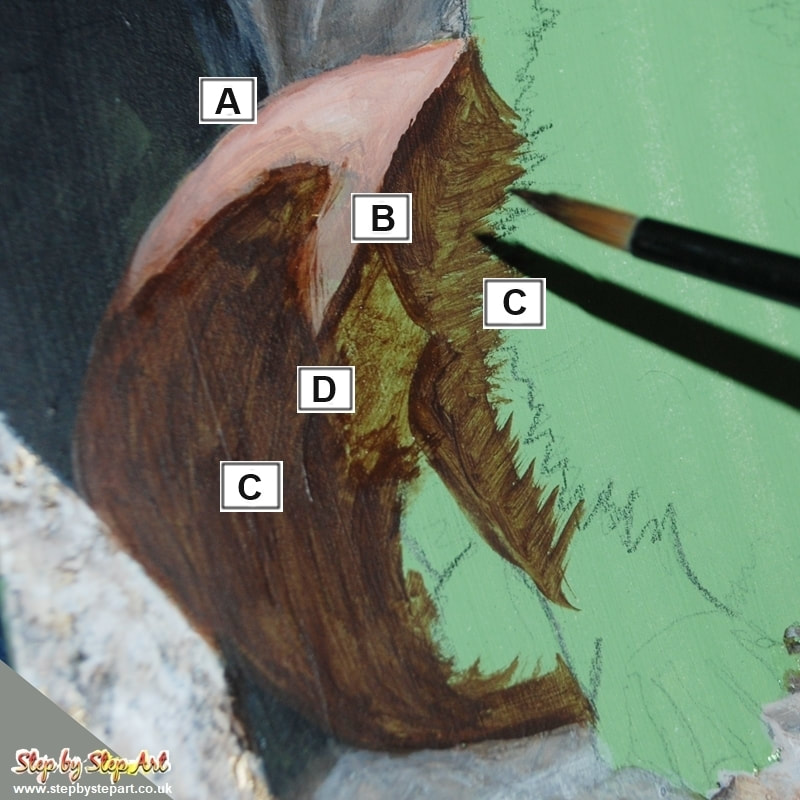
Begin on the light patch first (A) Use brush size 4 and apply colour mix 3. Whilst the paint is still wet, add a small amount of white to the midpoint which will 'create' the highlight. Ensure you blend well using the dry-blend technique. Soften the joint between A and C. Apply mix 4 along the line and dry-blend. With the 8 brush, loosely apply Burnt Umber over the large area marked C. Add a little water to your brush and loosely apply Burnt Umber down the leg (B & C) Add a little more water and apply over area D.
|
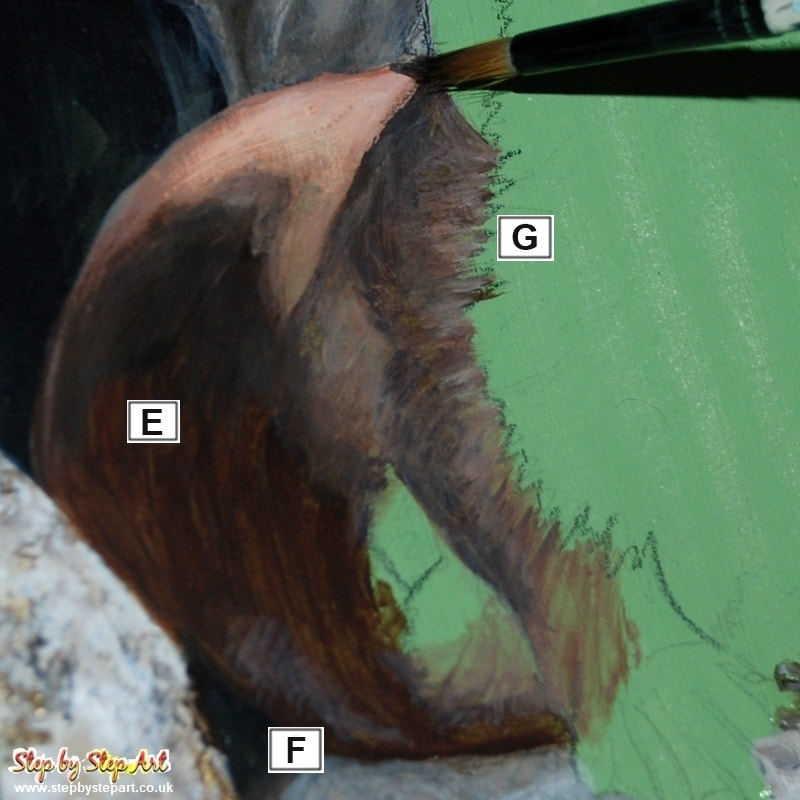
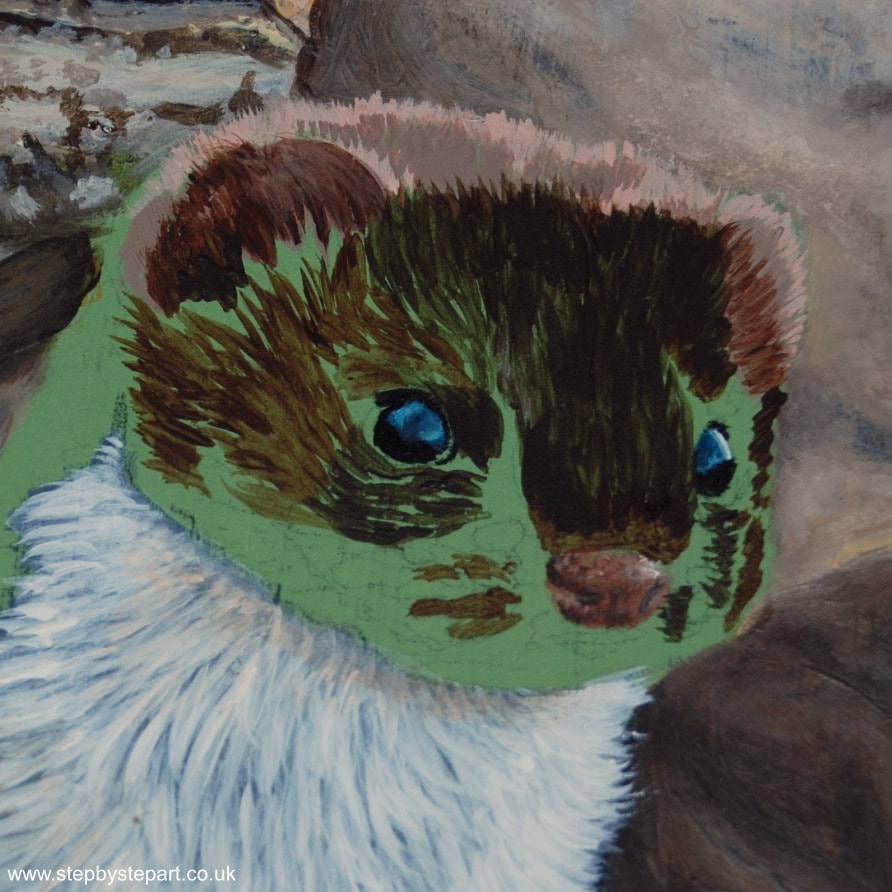
Using brush 8, apply Raw Umber over the darkest points on the back. These are mostly concentrated in area E & F. If you are using Pastelbord/mat or watercolour paper, wet your support before applying paint, as this will aid blendibility. Apply colour mix 4 to mid-section (area D in previous photo) and using brush 4, apply individual marks over the leg area G. Follow the application shown in the image as this will help to create the shape of the leg. will Add a light wash of col. 4 to create the faint highlight in area F.
|
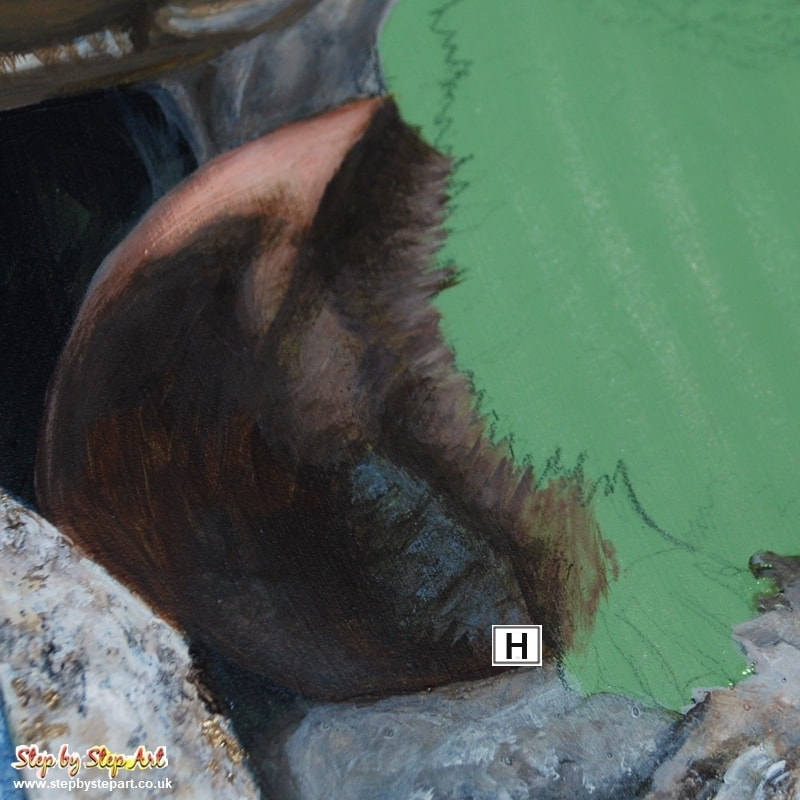
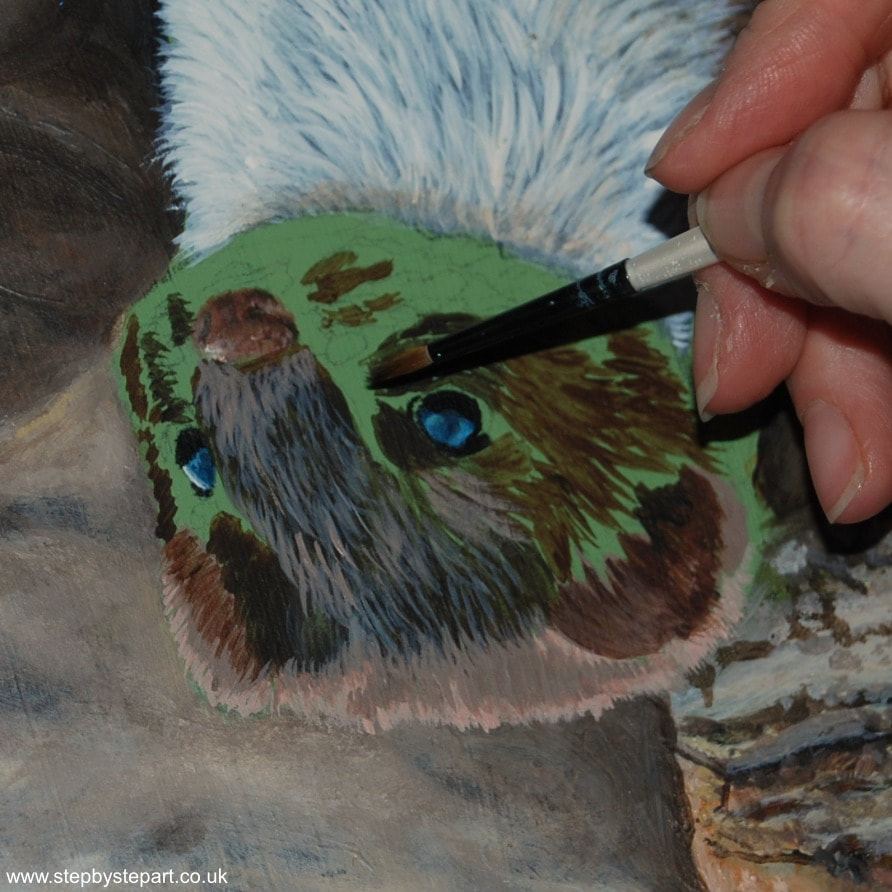
Using brush 4 and a loose wash of col. 7, apply over area H. Darken shadows further using Raw Umber. Ensure tones taper off seamlessly into lighter coloursusing the dry-blend technique which will help to soften edges. The aim is to ensure applications join together seamlessly which will create depth and shape if done correctly. If this is your first go, do not worry if you don't achieve it this time, practice makes perfect as they say. Try wetting your paper/support beforehand and reapply your colour washes which can help.
|
2. Feet and chest area
|
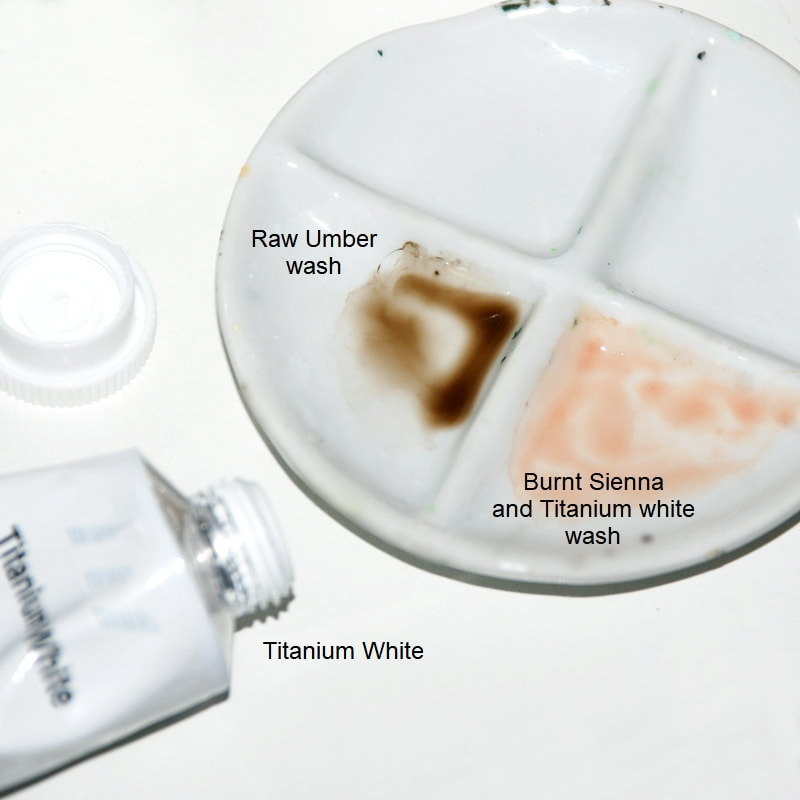
Paint Needed: Titanium white, Burnt Sienna, Black and Raw UmberColour mixes:
1. Burnt sienna/Titanium white mix 70/30% 2. Raw Umber/Titanium white mix 70/30% 3. Raw Umber 100% 4. Black/White mix 70/30% 5. Black/White mix 10/90% 6. Titanium white 100% Brush size: 4, Rigger brush Note: Always mix a little more paint than you think you will use. You can easily add more into your palette of a pure colour, but adding to a mix afterwards will change the tone.
|
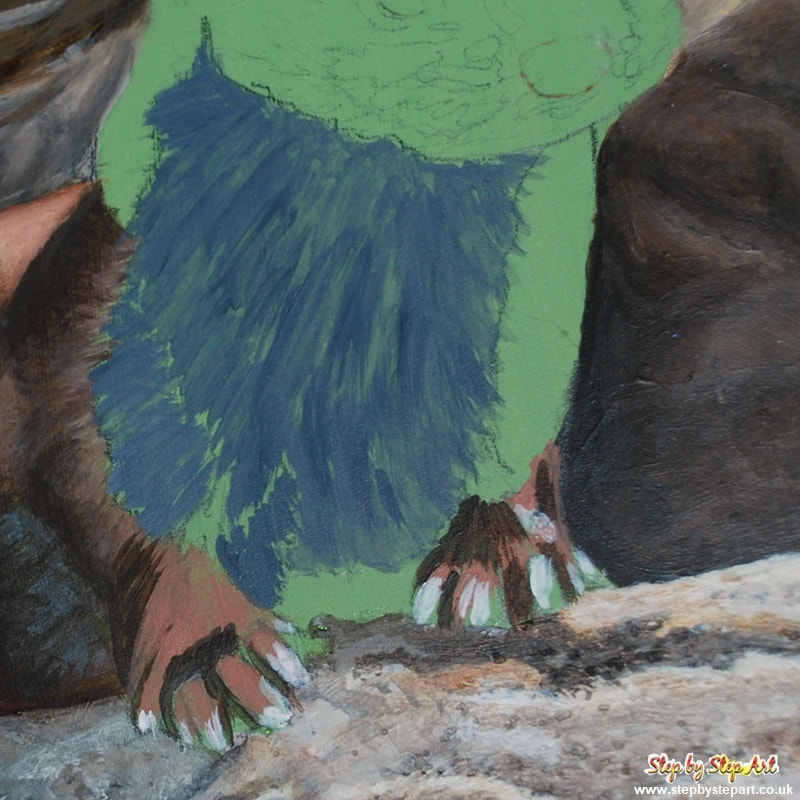
Before moving on to the chest area, define the outline of the toes using Raw Umber (3). This ensures you don't lose the outlines as you build up your colours. With brush 8, apply a wash of dark grey paint (col. mix 4) over the chest area leaving the right section untouched for the moment. We will come back to this later. Apply the paint in the direction of the fur as this will guide you as you begin to add lighter tones. Feet next. With brush 4, apply col. mix 1 over the majority of the feet leaving the nails exposed for the Titanium white layer. Expand on the Raw Umber application over the feet and between toes. Finish with the white on the nails. The layers are loose at this stage, you will continue to fill these areas as you go along.
|
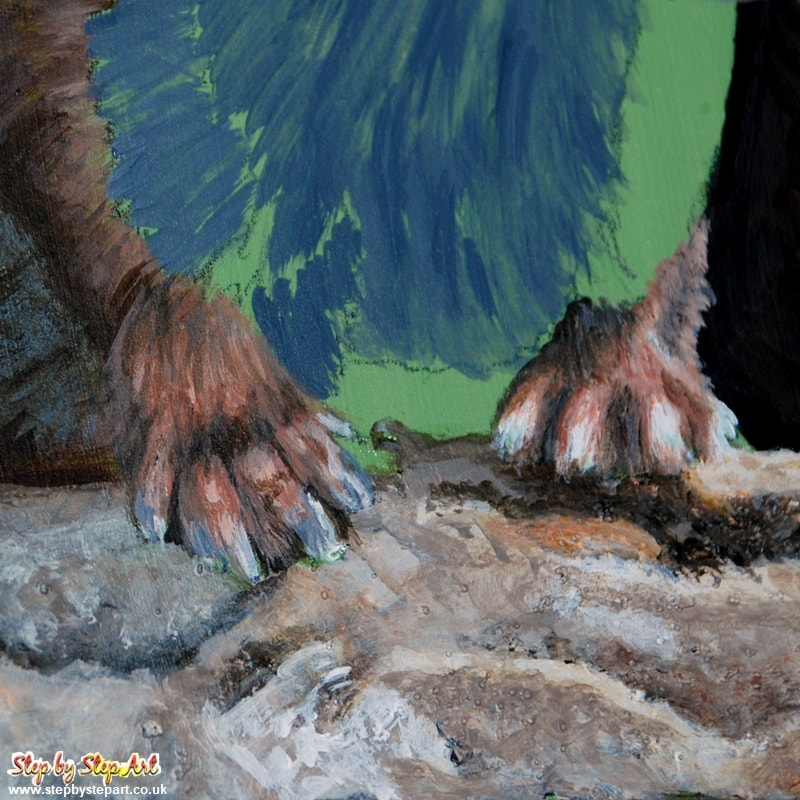
In an area where fine lines are required, a rigger brush is recommended. This can be difficult to use if it is your first time so we suggest you practice a little before using it on your painting. A thin, shorter brush will not achieve the fine lines a rigger brush can. Where you placed your darkest shadows, it is important to ensure they are not covered entirely by further tones or you may need to re-apply. Following on from the Sienna base, define the shape of the claws working between col. mixes 1 and 2. Add white into the mix so you create lighter tones of the two. Apply grey tones around the claws of the left-facing foot using col. mix 4 and follow up with col. mix 5. Reapply any shading with Raw Umber. Once you are happy, move on.
|
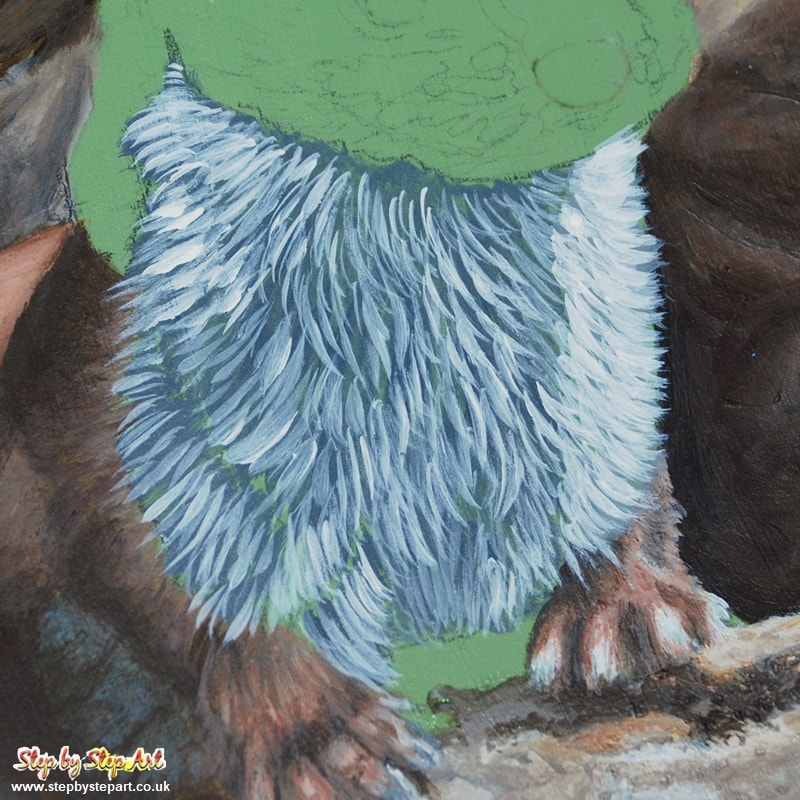
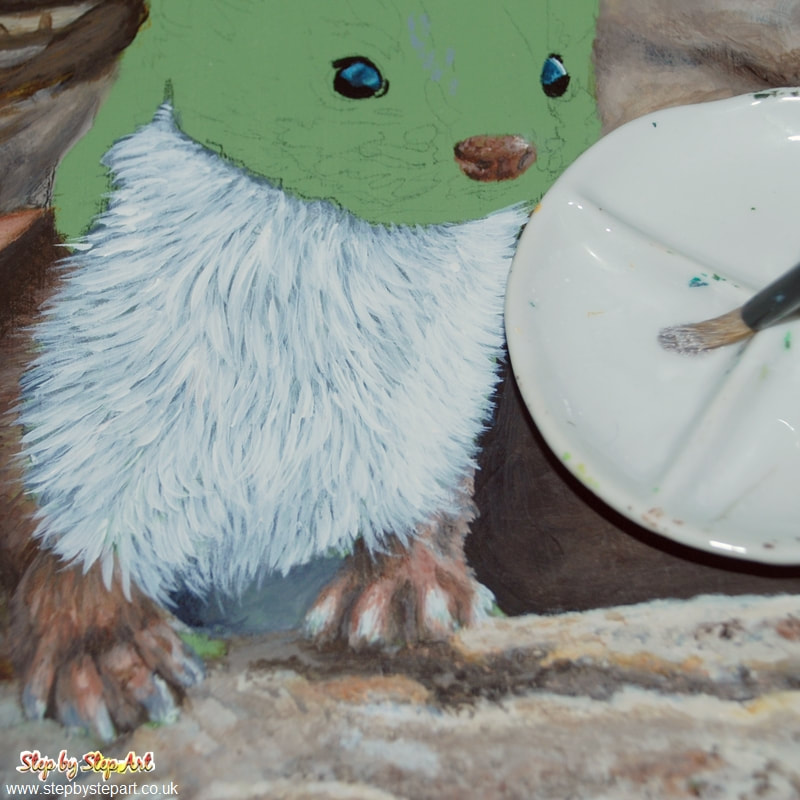
We will now begin to work up the light fur on the chest. To create movement and depth, each stroke is applied individually using a 4 brush. Using Titanium white, create the lightest section of fur first. Next, move onto to filling in the fur on the rest of the chest area. You will note that the fur has been applied facing different directions, this will help create the shape of the overlap going onto the leg and back. This will be used as guidance for further layers. As we previously applied a dark grey base tone, you will note that this will dampen the brightness of the white paint down somewhat. This is good as it plays a part in shading and this is what helps you achieve realism. Define the brightest highlights once again before moving on to the next stage.
|
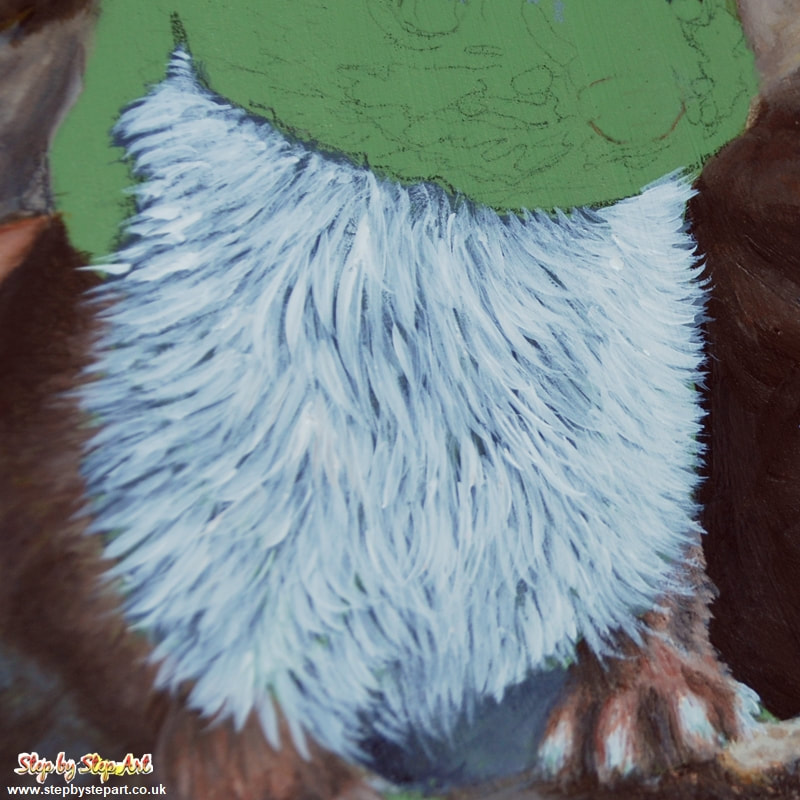
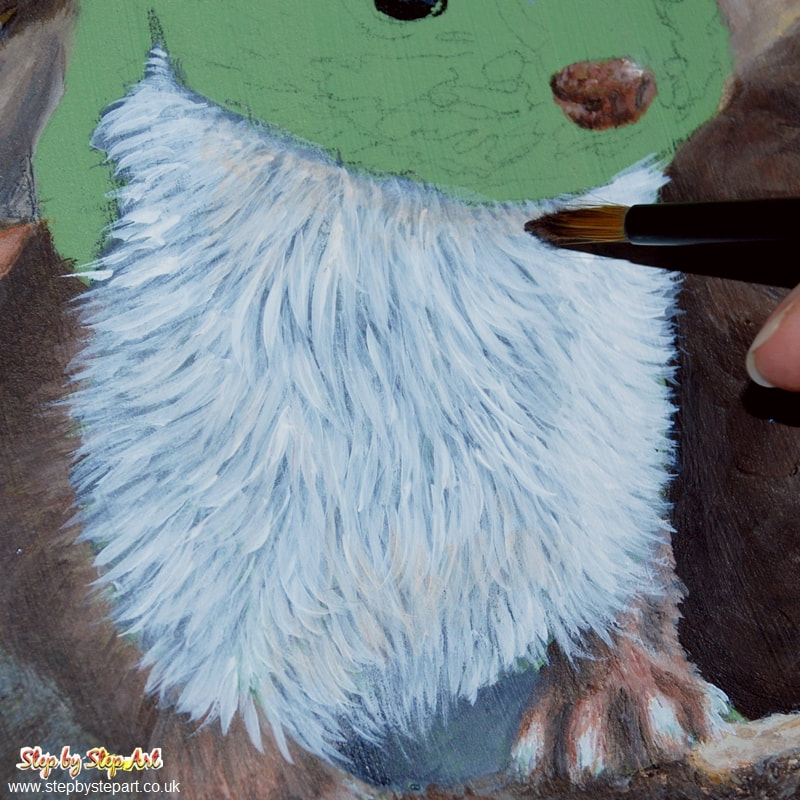
Fill in the shadow below the weasels belly using a mixture of the two greys and a little black. Apply the dark grey first and then introduce the light grey whilst the paint is still wet. Add a small amount of black to the darkest point next to the left-facing foot. Dry-blend to soften edges. If you need to pull colour out, do so with a wet brush and re-blend. Once dry, we can apply a second layer of Titanium white (brush 4) over the whole area. It is important to ensure that the right section of the chest must look brighter than the rest of the area as this is where sunlight is hitting the fur in the reference image. Do not create uniformity in your brushstrokes or your application, this will flatten your painting. Leave some areas a little darker than others which will help to define the curves of the legs and belly. If you need to lighten the are further apply a wash comprised of 70%/30% water/Tita.white.
|
Tonal washes over the chest area
|
Paint: Titanium white, Burnt Sienna and Raw UmberColour washes:
1. Titanium white 100% 2. Burnt Sienna/Titanium white 50/50% 3. Raw Umber/Titanium white 50/50% Brush size: 4 and 8/11 The amount of water you choose to mix with the Titanium white will depend on how white you need the fur to be. If the area is dull from previous applications, to brighten the white fur up, just mix in less water.
|
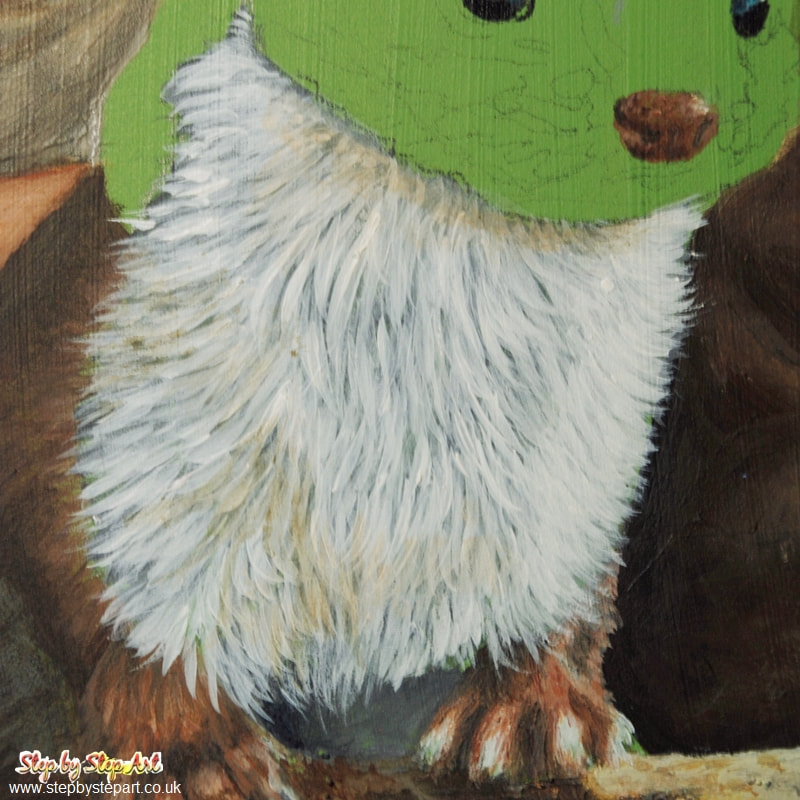
White wash application. If you need to lighten the fur more, apply a wash with the consistency of a watercolour application. To mix, a 70%/30% water/Tita.white balance should do it. You can use a large brush for this as it helps you to cover the area faster. As it dries, the water evaporates leaving behind the remnants of white paint and this helps to lighten your tones more effectively without overdoing it.
|
Now we need to define the shadows. Add water to mix 2 (if you haven't already), to the consistency of watercolour. With brush 4, begin at jawline and brush downwards. This adds a faint shadow to the neckline. The darkest point should be just below this line tapering down to fade. At the tips, press your finger over the edge to soften. Repeat on the area between the legs also.
|
Apply a wash of Raw Umber beneath the neckline and inner, left leg to add 'further shading'. This should be a tint, barely notable but enought to create definition and shape. If you feel it is too dark, using a wet your brush, lift some of the colour out. The simple effects you have covered in this section may be small but they help to achieve the 3-dimensional detail for the realistic finish you are aiming for.
|