How to draw realistic facial features in graphite pencil - Step by step art tutorial
Artist level: Beginners
Written: February 2021
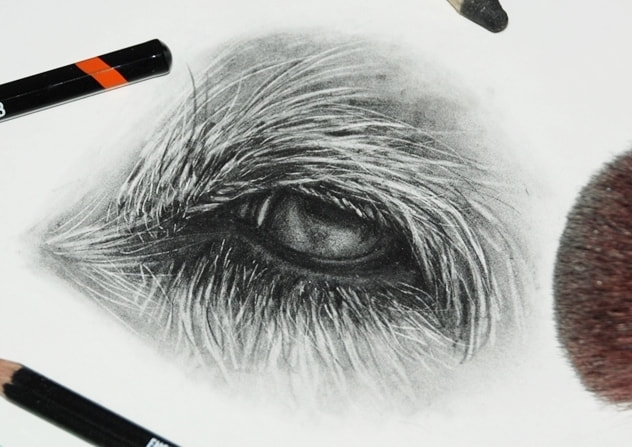
This tutorial is aimed at those looking to learn how to draw facial anatomy using graphite pencils. This tutorial begins by applying the dark values and subtracting to create the highlights and definition. Simplicity is key and we don't expect you to draw each section anatomically perfect, the essential aspect is the correct application.
The paper used is the Strathmore Bristol 500 Vellum. It has a fine tooth which helps grab pigment easier, enhancing saturation.
I used the two pencils from the Derwent Onyx range, but these resemble the B and 5B grades. As a simple study, I use the Onyx Medium pencil for initial sketches and the Dark grade for everything else, applying more pressure where I need darker shading whilst relaxing the pressure for lighter areas. I have selected a few erasers that make the process easier, however a single eraser is sufficient, providing it has sharp corners. I provide the information of each product used, should you wish to seek them out and add them to your own inventory. You can use them with other mediums too. This is the technique that I personally tutor, but you will find other artists that may teach a different technique. There is no right or wrong way, choose the one that works best for you as you progress.
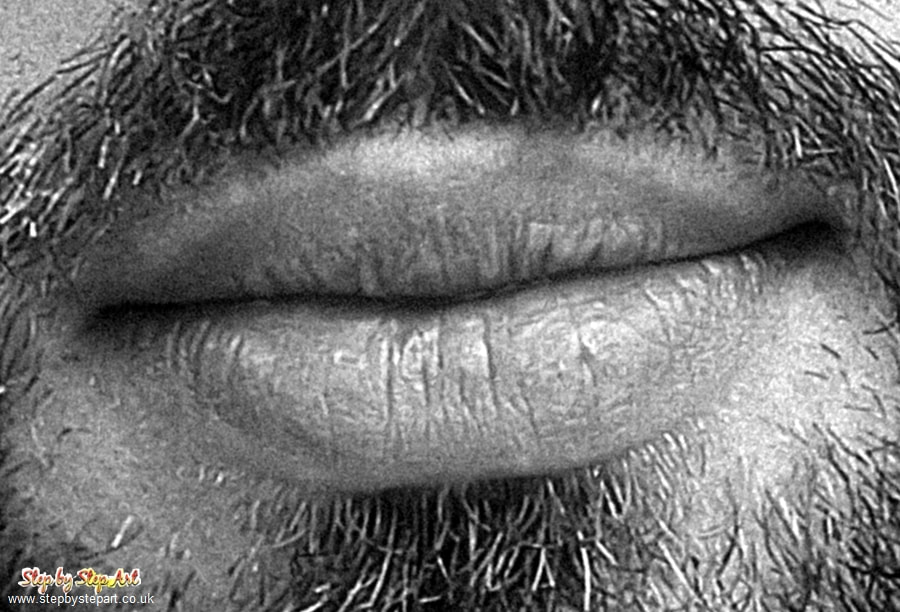
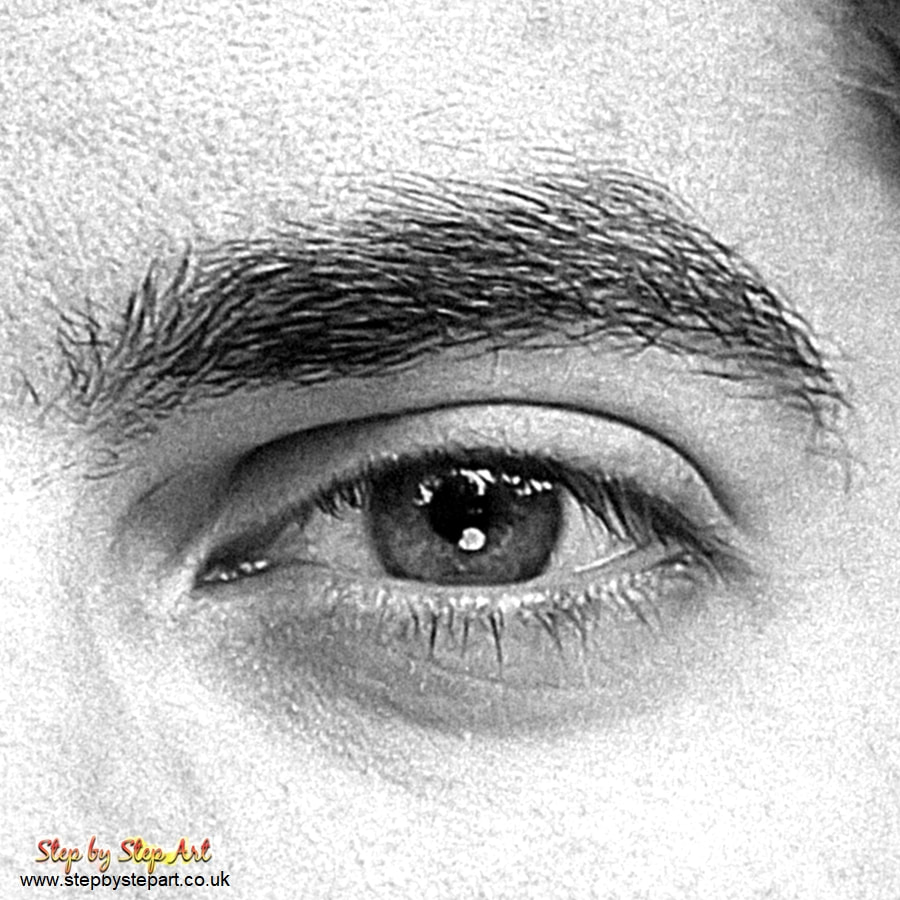
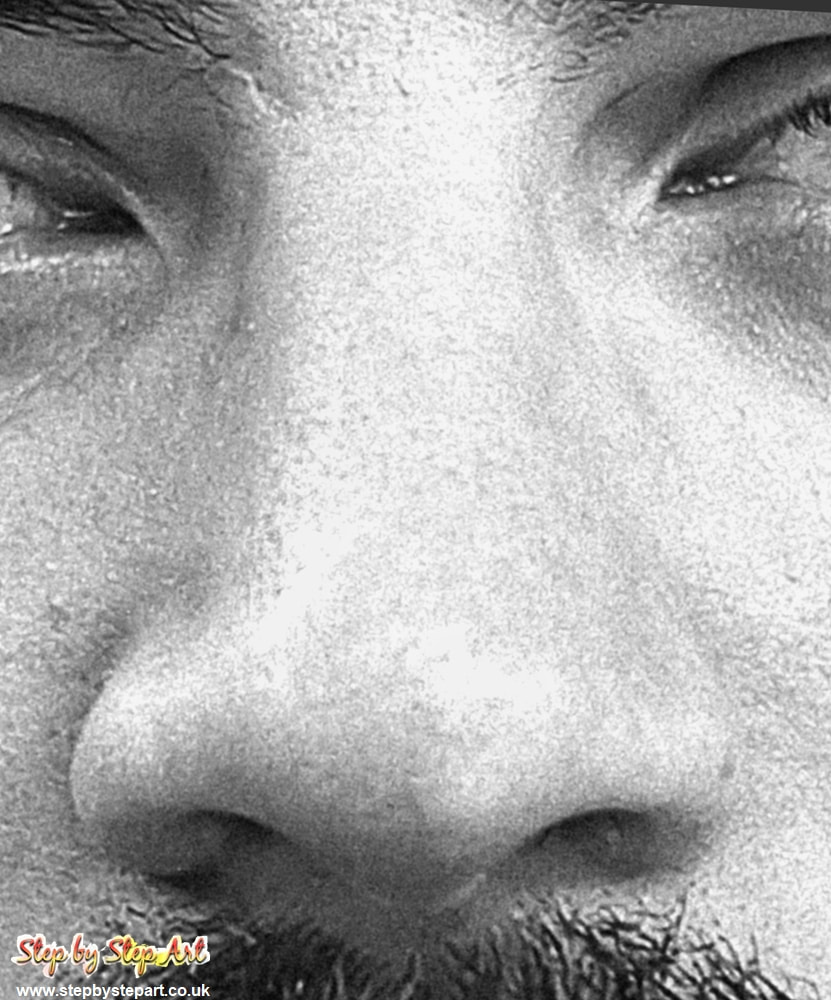
The reference image can be found below, which you can screen grab and print out or view on a tablet whilst reading the instructions on a smartphone or computer.
Enjoy!
The paper used is the Strathmore Bristol 500 Vellum. It has a fine tooth which helps grab pigment easier, enhancing saturation.
I used the two pencils from the Derwent Onyx range, but these resemble the B and 5B grades. As a simple study, I use the Onyx Medium pencil for initial sketches and the Dark grade for everything else, applying more pressure where I need darker shading whilst relaxing the pressure for lighter areas. I have selected a few erasers that make the process easier, however a single eraser is sufficient, providing it has sharp corners. I provide the information of each product used, should you wish to seek them out and add them to your own inventory. You can use them with other mediums too. This is the technique that I personally tutor, but you will find other artists that may teach a different technique. There is no right or wrong way, choose the one that works best for you as you progress.
The reference image can be found below, which you can screen grab and print out or view on a tablet whilst reading the instructions on a smartphone or computer.
Enjoy!
The Products you will need
Graphite pencils, Paper, Clean Eraser, Clean tissue, Soft brush
Optional: Pencil eraser, Electric eraser. Paper blenders or Tortillions
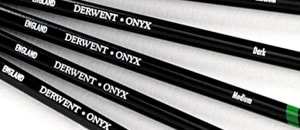
Graphite pencils used: Derwent Onyx Medium & Dark
Alternative: B and 5B
Paper used: Strathmore Bristol 500 Vellum
Alternative: Hot pressed watercolour paper
Optional: Pencil eraser, Electric eraser. Paper blenders or Tortillions
Graphite pencils used: Derwent Onyx Medium & Dark
Alternative: B and 5B
Paper used: Strathmore Bristol 500 Vellum
Alternative: Hot pressed watercolour paper
The tools needed for this tutorial are minimal. Although this tutorial uses 2 pencils, the Onyx Medium (B) pencil is only used for the outline and this can be created with the Dark grade or 5B pencil instead. You can darken layers by applying more pressure n the pencil, to create lighter layers, you only need to apply soft pressure. The Strathmore Bristol Vellum paper can be replaced with any brand of cartridge paper. If it has a slight tooth, it will grab the pigment better. Smooth paper does not give the same depth of shading as one with a tooth and you may need to apply far more layers too. As there is little grip, more pencil is lifted during blending. The erasers found in the image can all be used in conjunction with each other, making it easier to erase large and small areas. A standard eraser is multi-functional, as you can use both the edges and the corners, so it is not necessary to have every product shown here.
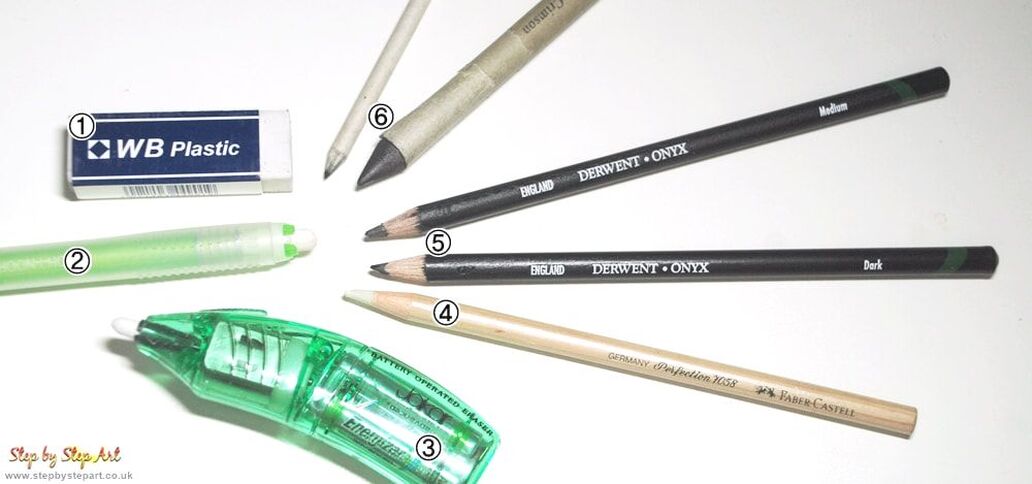
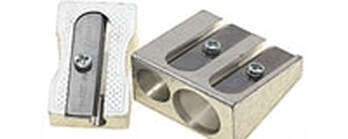
1.Polymer eraser - Ideally, your eraser has sharp corners. Ensure it is only used for graphite pencils.
2.Pen eraser - Round edges help to evenly lift pigment.
3.Battery powered eraser - More powerful. Can strip back layers of pencil or help to create sharp highlights
4.Faber Castell Perfection pencil eraser - Used for gentle removal of pencil. Easier to handle small areas in pencil form.
5.Derwent Onyx pencils - Pencils ideal for sketching and out-in-the-field work
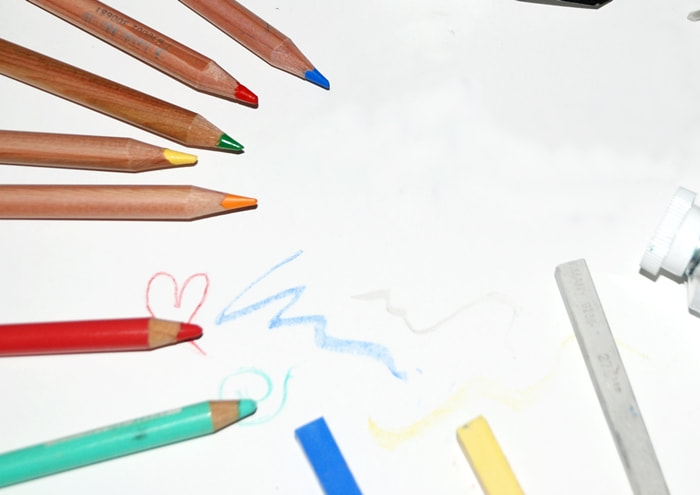
6.Paper blenders - Blend pencil or use to apply a soft grade of graphite to larger areas. Can also be used with coloured pencils and soft pastels
7. (Not shown) Soft brush to erase dust from your paper after erasing.
2.Pen eraser - Round edges help to evenly lift pigment.
3.Battery powered eraser - More powerful. Can strip back layers of pencil or help to create sharp highlights
4.Faber Castell Perfection pencil eraser - Used for gentle removal of pencil. Easier to handle small areas in pencil form.
5.Derwent Onyx pencils - Pencils ideal for sketching and out-in-the-field work
6.Paper blenders - Blend pencil or use to apply a soft grade of graphite to larger areas. Can also be used with coloured pencils and soft pastels
7. (Not shown) Soft brush to erase dust from your paper after erasing.
IMPORTANT TIPS:
* Ensure your pencils are sharp before you start. The side of the lead is used as well as the point.
* Graphite pencils smudge easily, so to avoid transferring natural oils onto your paper from your hands, have a clean sheet of paper to lean on whilst working on your drawing.
* After erasing, do not blow on your paper. Natural oils from your skin and specks of saliva could damage your work and you may not be able to repair it.
* The natural oils in your fingertips are the reason why you should only blend graphite pencil with a tissue or with other blending accessories.
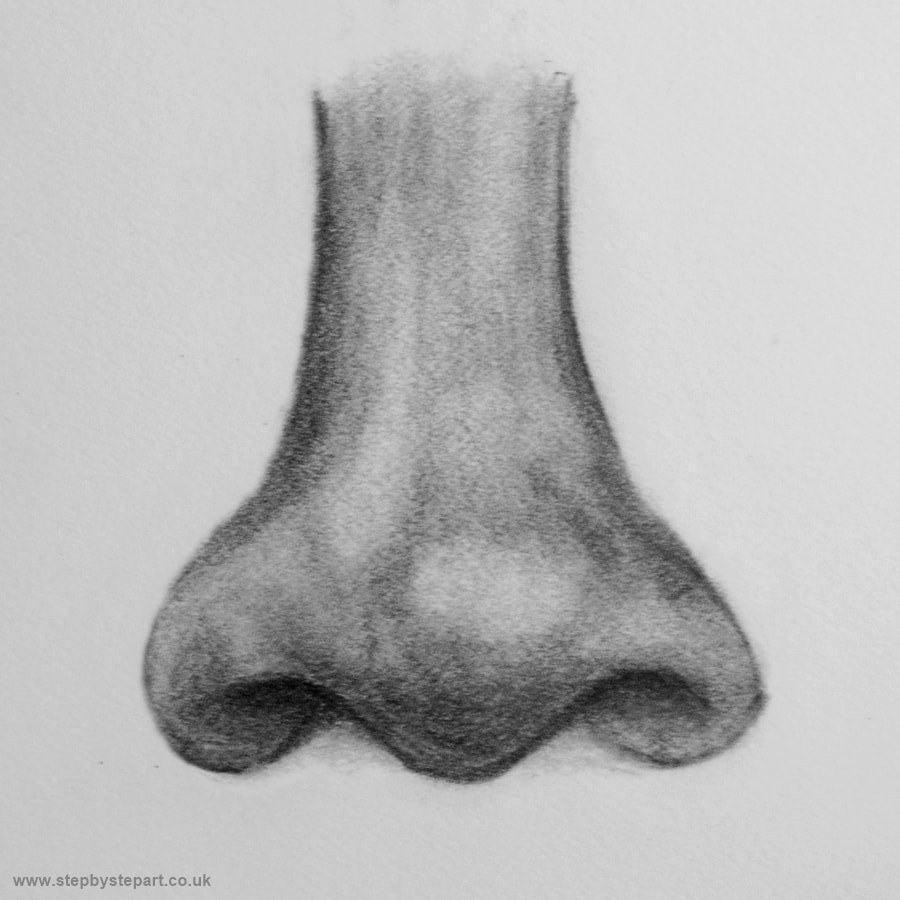
Nose
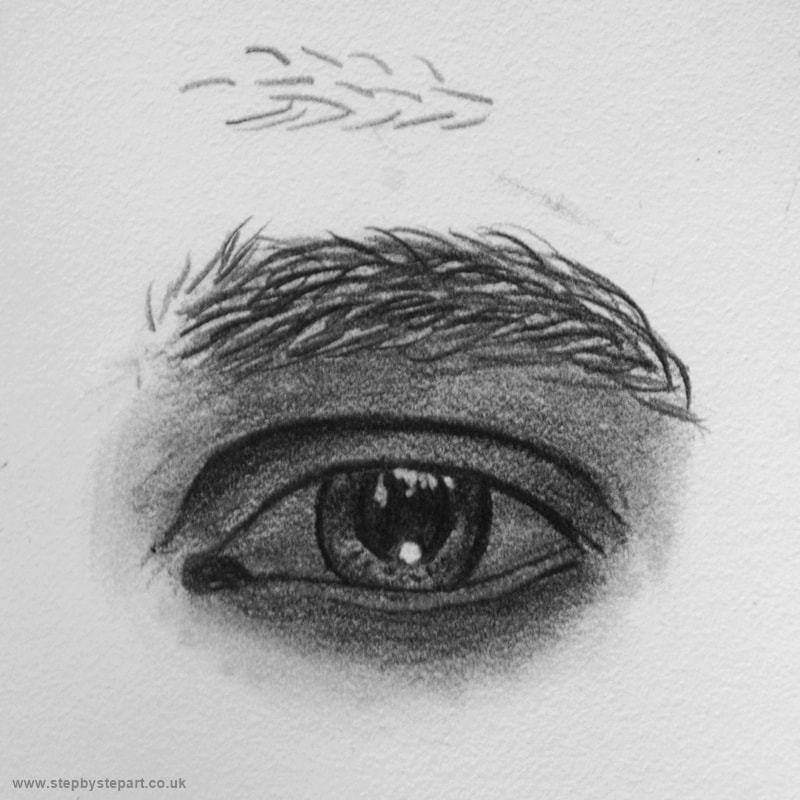
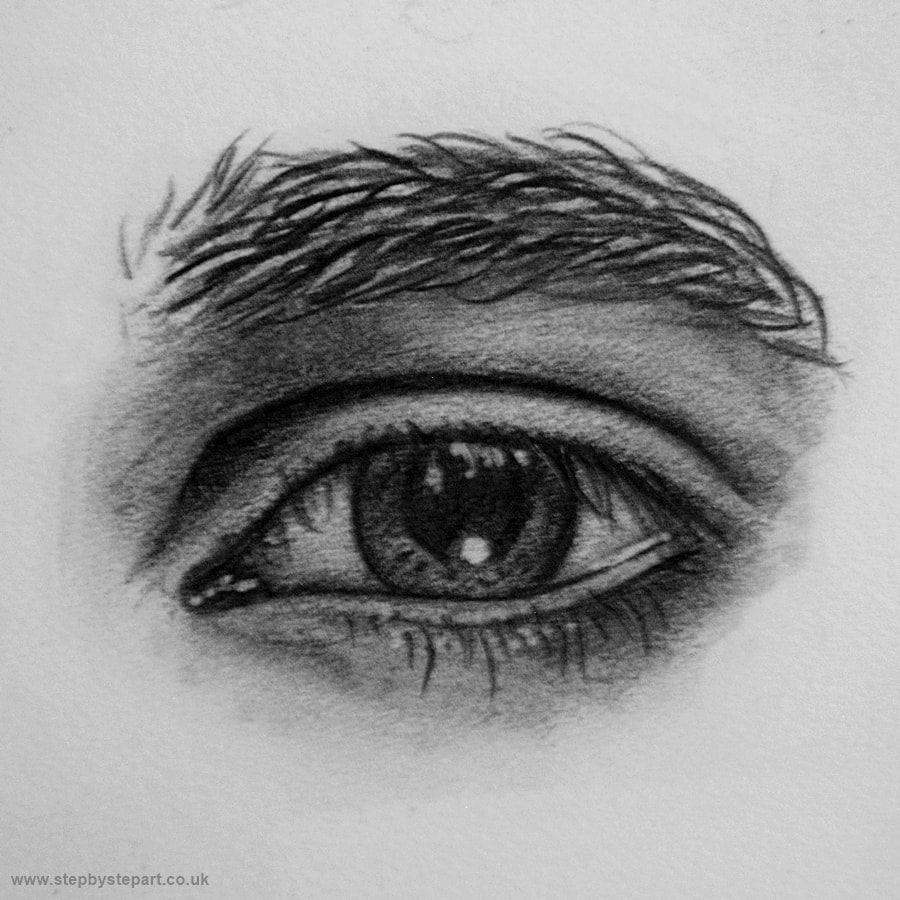
The nose is a good place to begin if you have never drawn facial features before as it is has a simplistic form. It eases you into the stages of application in preparation for the slightly more challenging, mouth and eyes. The process is much the same for each stage, but the nose is less complex.
|
|
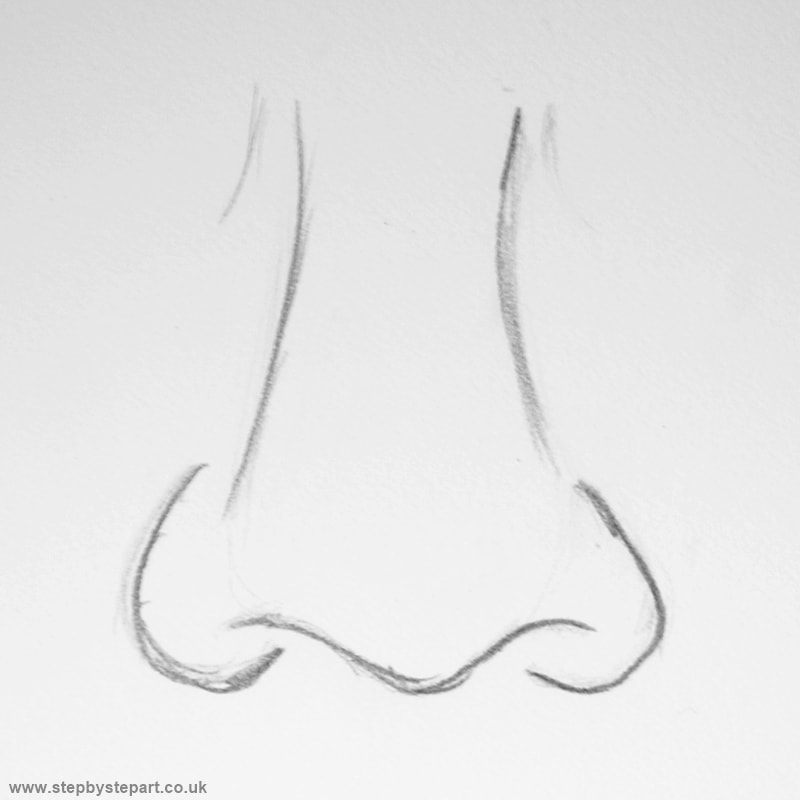
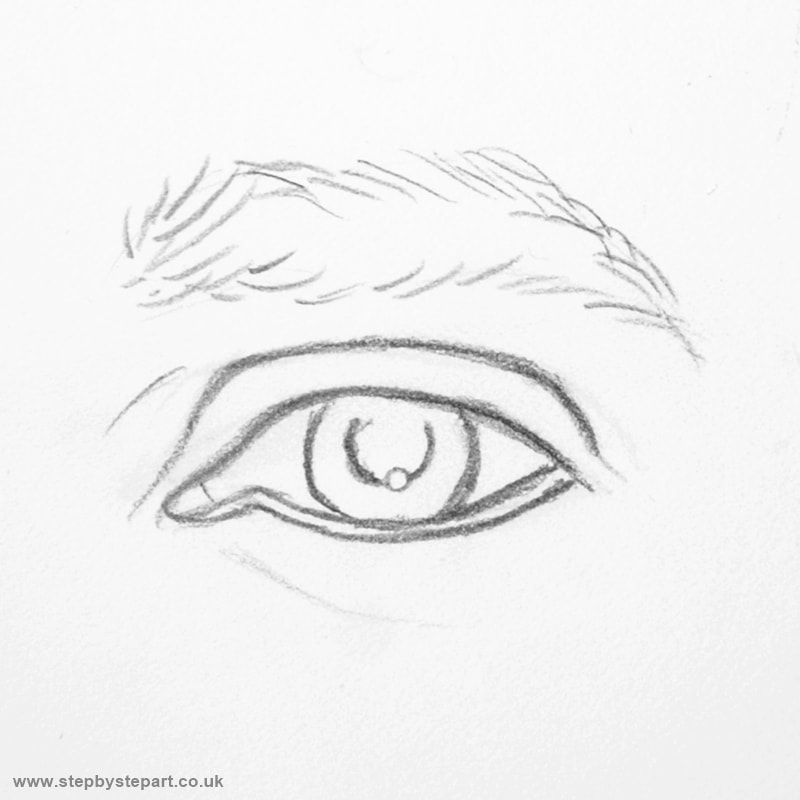
1. Outline - Start by sketching the outline with the Medium (B) pencil. Try and get your drawing as accurate as the photo but as you are not drawing the whole face, accuracy is not important here. Erase excess lines, then draw over the line, applying heavy pressure using the Dark (5B) pencil.
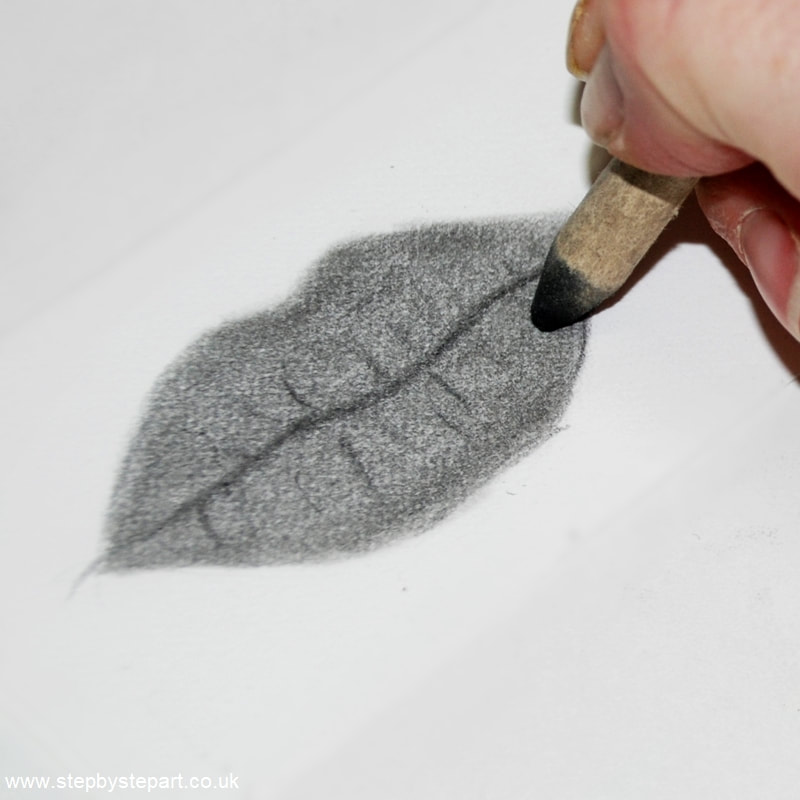
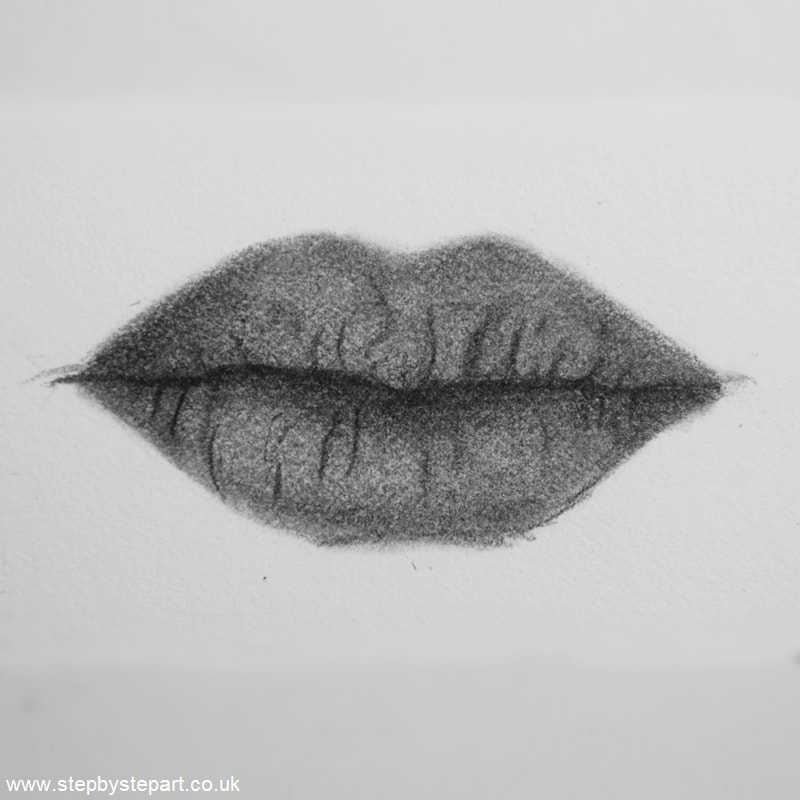
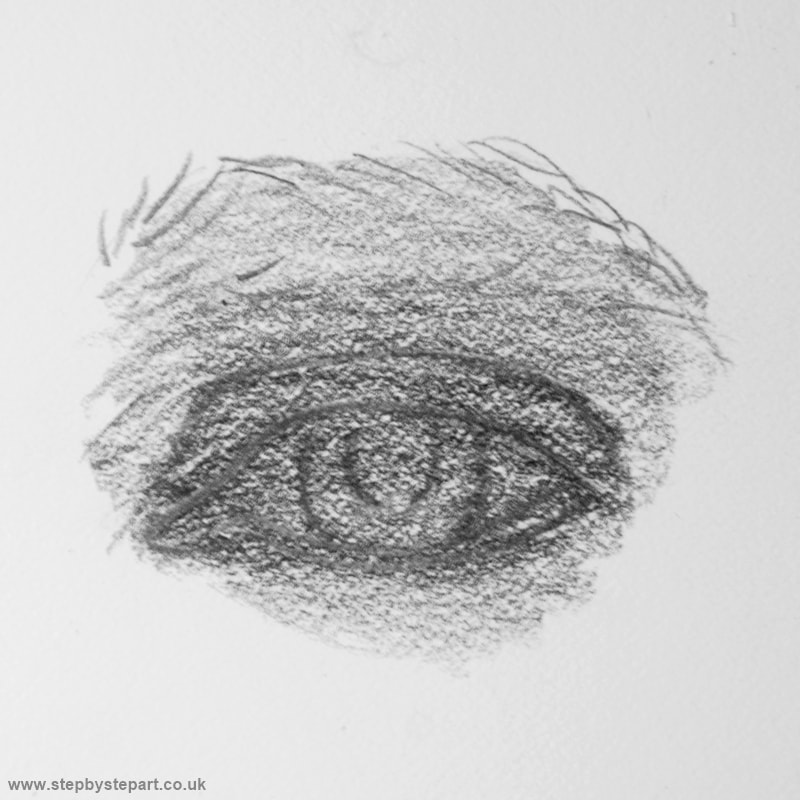
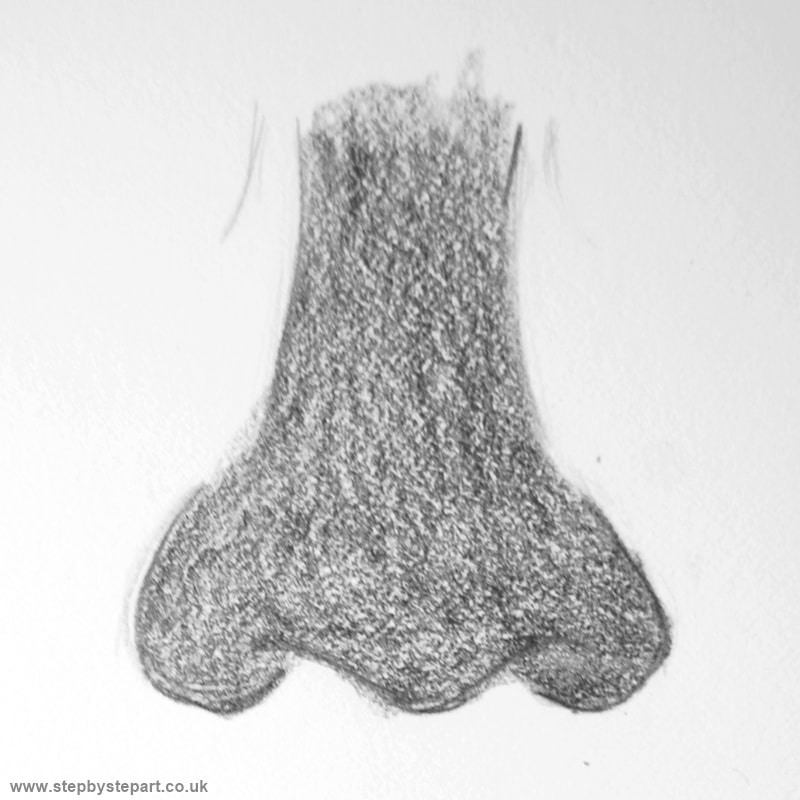
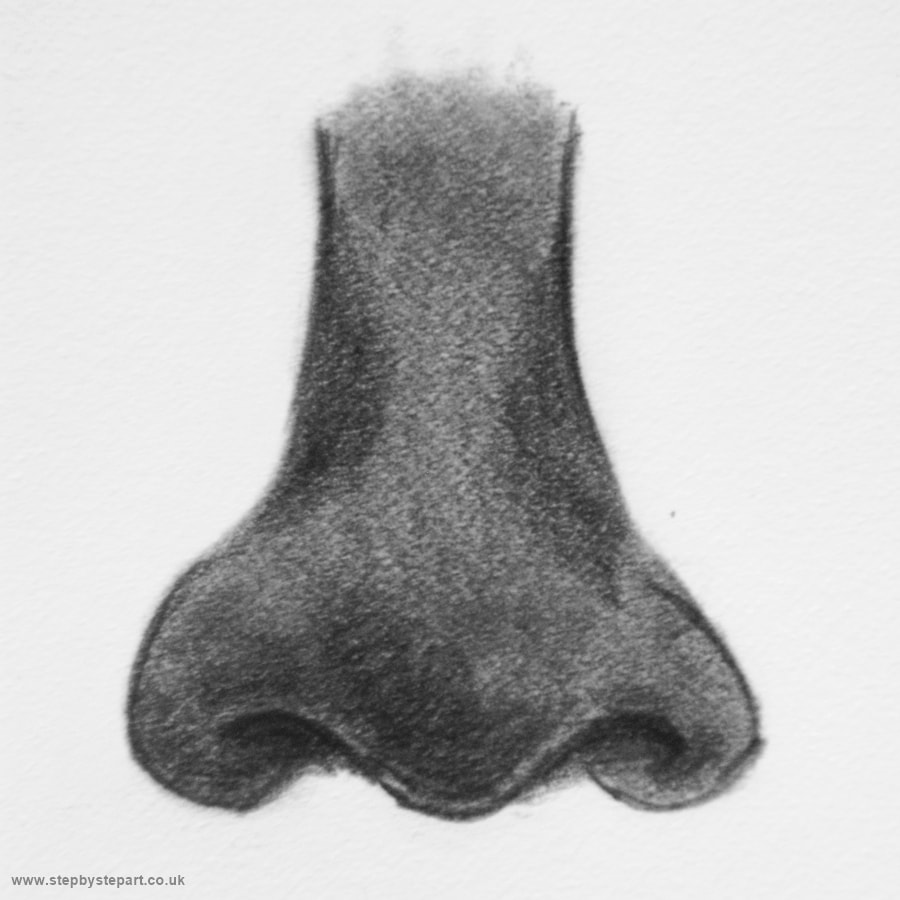
2. Base - Holding your pencil horizontal, and using the length of the lead, apply a deep base with the Dark (5B) tone. Keep within the lines where possible. The base application should be dark enough so that the outline has almost disappeared.
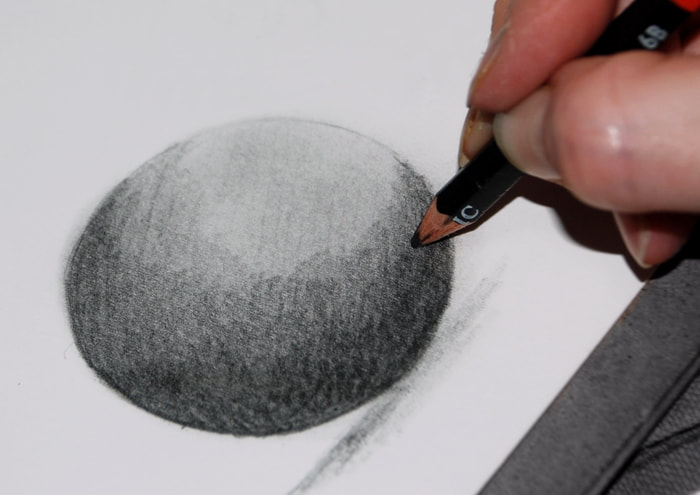
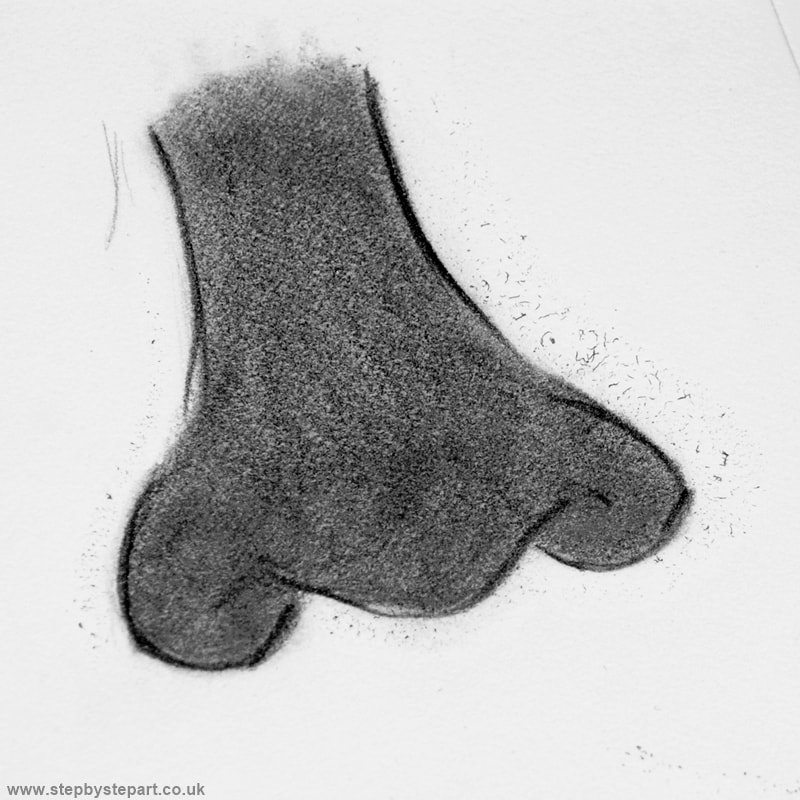
3. Blend - Using a Blending stump, tortillion or a clean tissue, the latter you can wrap around a pencil or your finger for more control, blend using circular motions. This will soften any noticeable pencil lines and create a dark base with which to lift highlights in the next stage. Erase any excess pencil from the outer edge.
4. Shade - To help create shape, deepen the shade of the darker areas of the nose using the Dark (5B) grade.
5. Reblend.
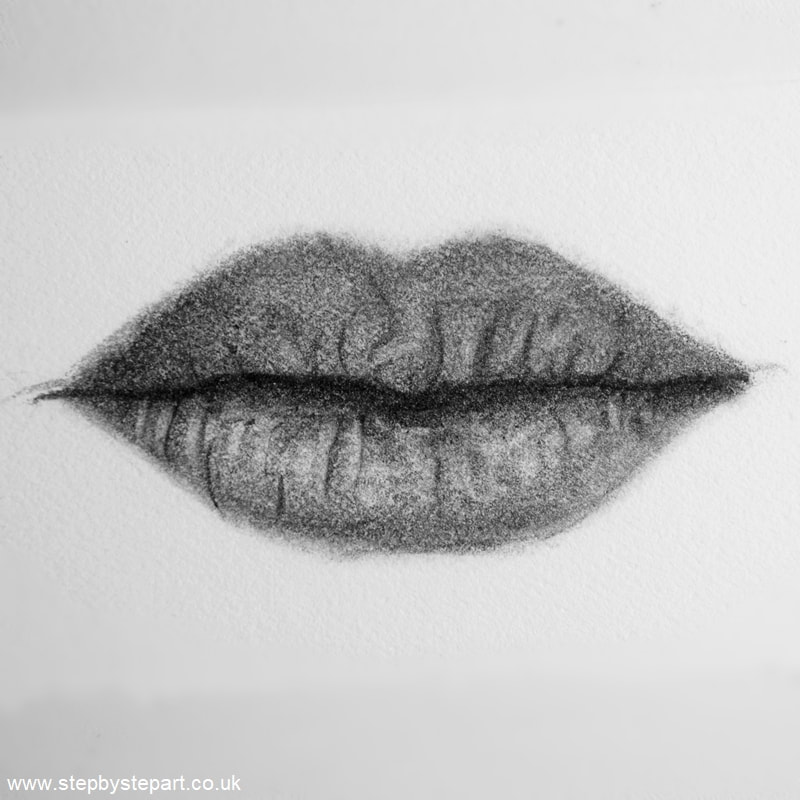
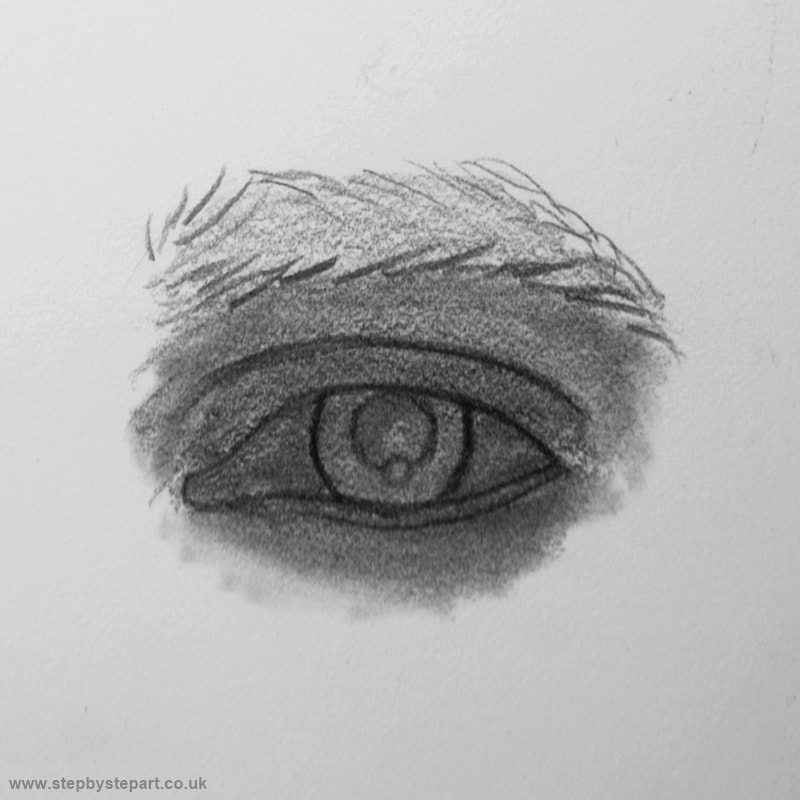
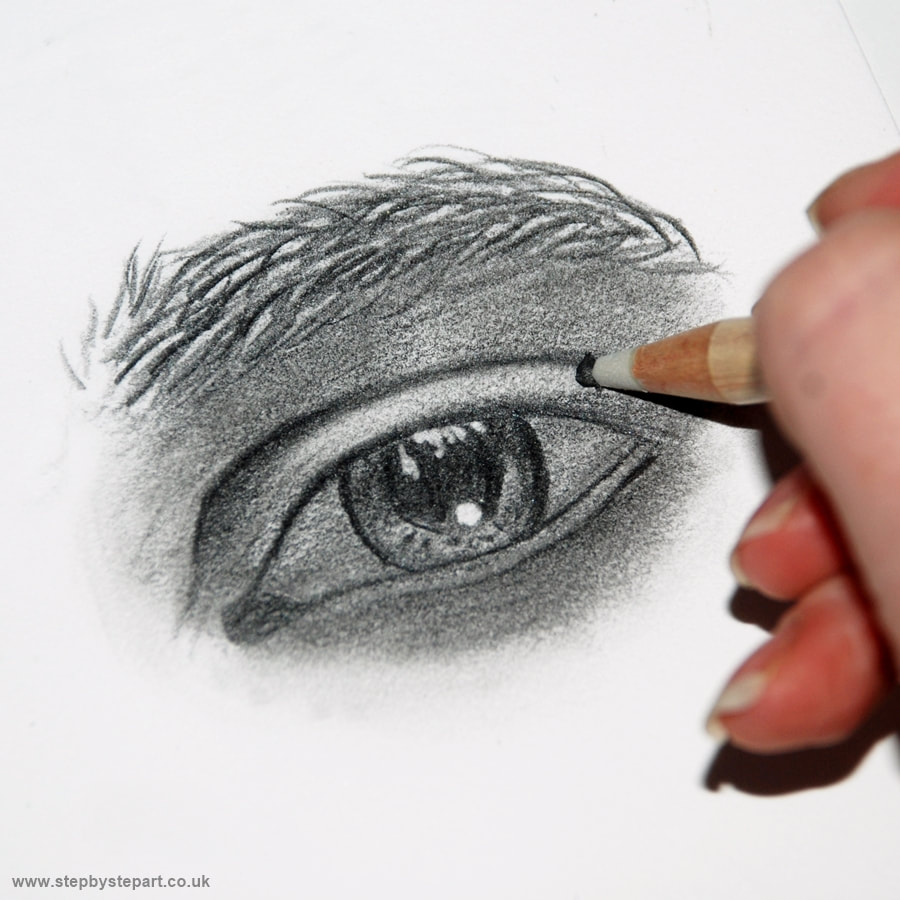
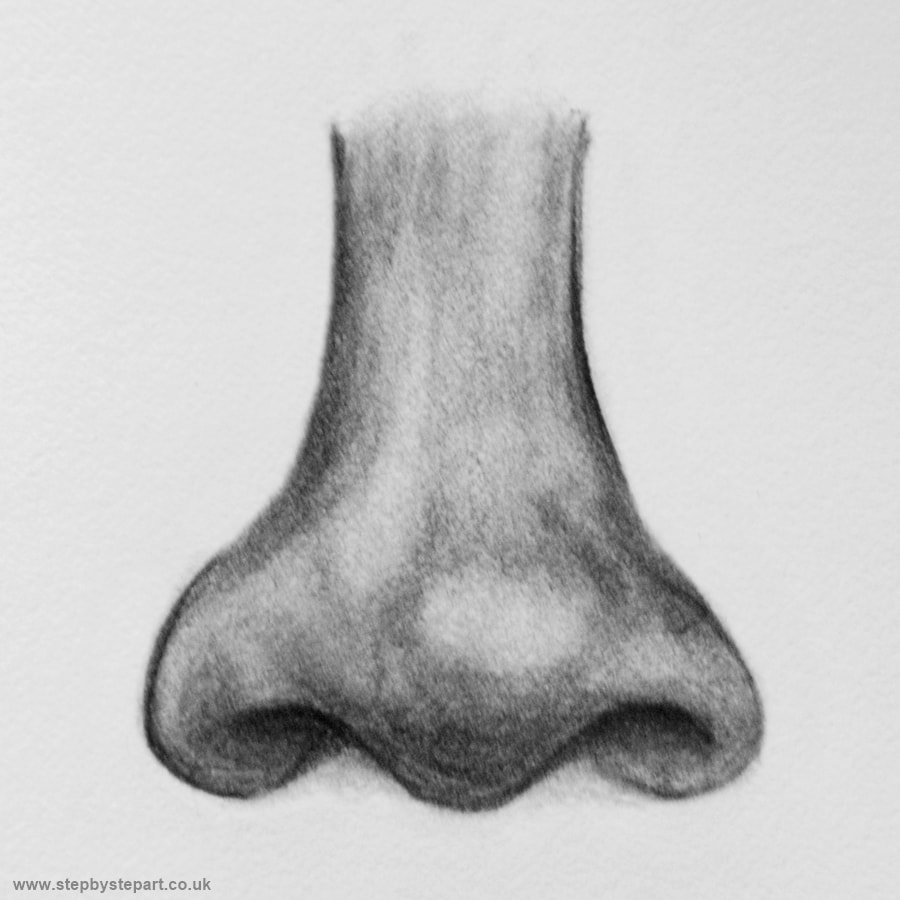
6. Erase - Using the pointed edge of your eraser (or use a pencil eraser for tighter control), erase areas on the nose where you wish to create the highlights, this will help to define its shape.
7. Blend - The important thing to remember is that there should be no hard edges, so you will need to soften the edges of your highlights using your chosen blending tool each time you erase.
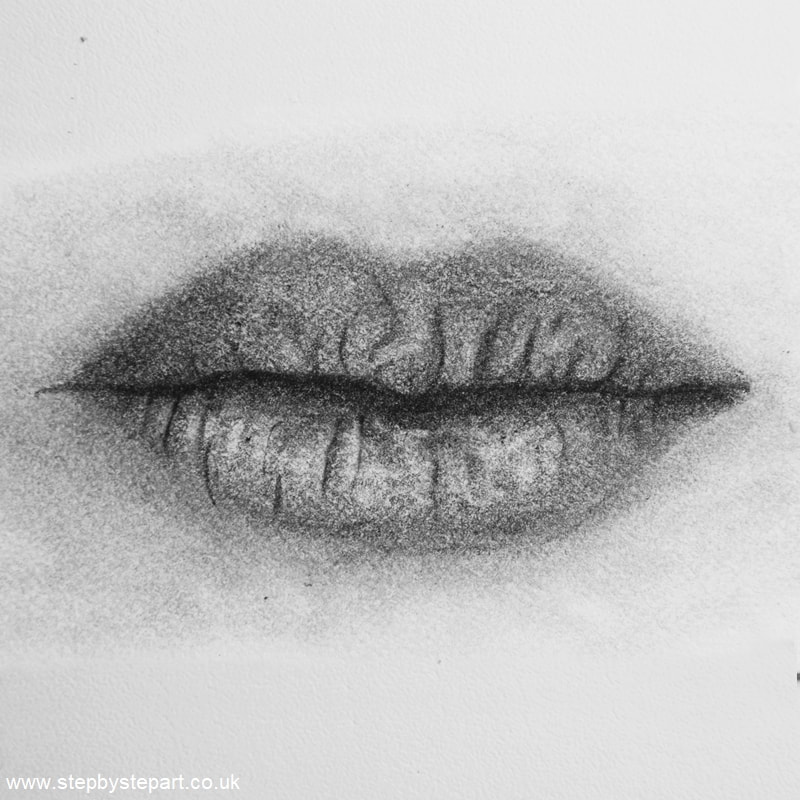
8. Finalise - Darken the nostril with the Dark (5B) pencil and smooth the edges below to soften out.
The more realism you wish to create depends on the depth of application you have already applied. If the shading is quite pale, the highlights won't be as noticeable and you may need to reapply. Repeat stages 2 - 7 again until you have built up a suitable balance of depth and light.
2. Base - Holding your pencil horizontal, and using the length of the lead, apply a deep base with the Dark (5B) tone. Keep within the lines where possible. The base application should be dark enough so that the outline has almost disappeared.
3. Blend - Using a Blending stump, tortillion or a clean tissue, the latter you can wrap around a pencil or your finger for more control, blend using circular motions. This will soften any noticeable pencil lines and create a dark base with which to lift highlights in the next stage. Erase any excess pencil from the outer edge.
4. Shade - To help create shape, deepen the shade of the darker areas of the nose using the Dark (5B) grade.
5. Reblend.
6. Erase - Using the pointed edge of your eraser (or use a pencil eraser for tighter control), erase areas on the nose where you wish to create the highlights, this will help to define its shape.
7. Blend - The important thing to remember is that there should be no hard edges, so you will need to soften the edges of your highlights using your chosen blending tool each time you erase.
8. Finalise - Darken the nostril with the Dark (5B) pencil and smooth the edges below to soften out.
The more realism you wish to create depends on the depth of application you have already applied. If the shading is quite pale, the highlights won't be as noticeable and you may need to reapply. Repeat stages 2 - 7 again until you have built up a suitable balance of depth and light.