How to create a dogs' eye
in Graphite Pencils
Written: December 2019
Artist level: Intermediate
Welcome to this tutorial showing you how to create a dogs eye in graphite pencils, using embossing tools & erasers which will help to achieve extra realism in your work. This Tutorial is for artists of all calibres and none, explaining in detail the process that will help you create your own portrait and showing you how effective an embossing tool can be. If you do not have these items in your art kit, you could use a wooden skewer instead, however I would recommend you purchase a set as they are extremely useful and if you like detail in your graphite work, the emboss tools are a must. This is not the only way to work with graphite pencils, other artists may use a different technique but this is the one that works best for me.
This tutorial uses only 4 pencils and the range I use are the Derwent Graphic, however most pencil ranges have the same grades and so you will get the same effect regardless of which brand you use.
The reference image can be found below, which you can screen grab and print out or view on a tablet whilst reading the instructions on a smartphone or computer.
Enjoy!
IMPORTANT TIPS:
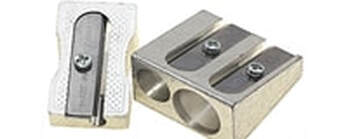
* Ensure your pencils are sharp before starting, the side of the lead will be used for applying base tones and the fur applied using the point.
* Graphite pencils smudge easily, so to avoid transferring natural oils on to your Art paper from your working hand, ensure you have a clean sheet of paper to lean on whilst working.
* Never blow onto your paper after erasing, saliva can damage your Artwork which you may not be able to repair.
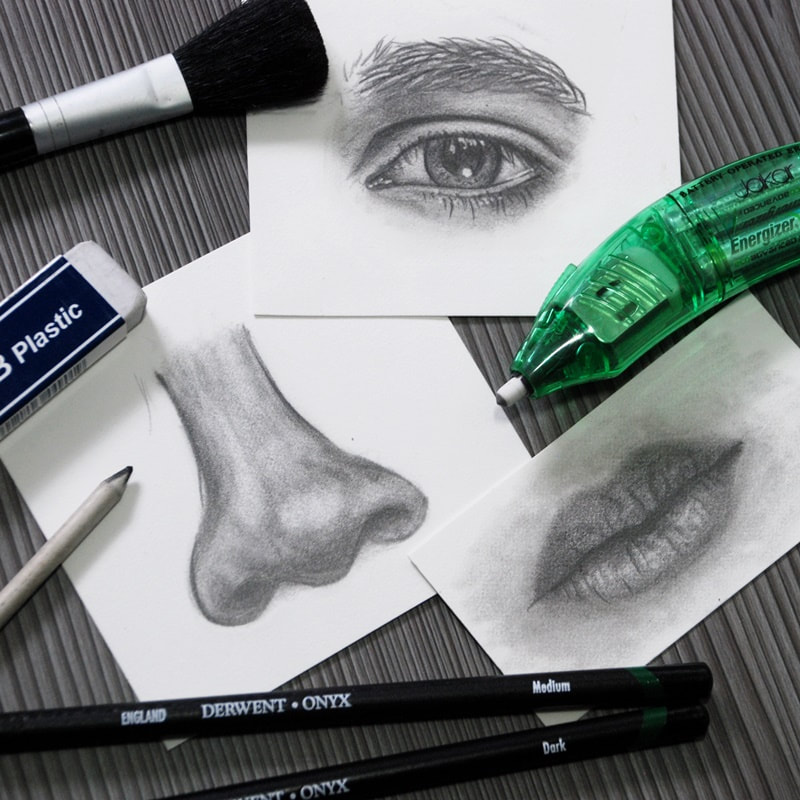
The Products you will need
Smooth white Art paper, Clean Eraser, Emboss/Indent tools, Electric eraser (optional) or pencil eraser, Clean tissue, Clean and soft brush.
Also have a sheet of clean paper for leaning on so you do not touch your working paper at any point and smudge the graphite laid down.
Graphite pencils needed: 2B, 4B 6B, 8B
Paper Used: Strathmore Bristol 500 plate Graphite pencils Used: Derwent Graphic
Click here to see some graphite pencil product recommendations
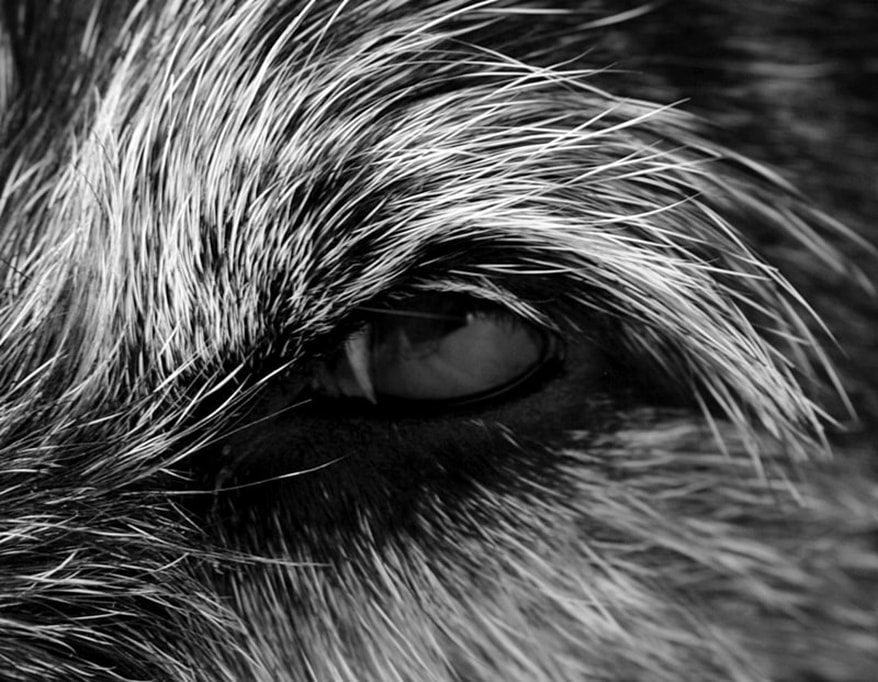
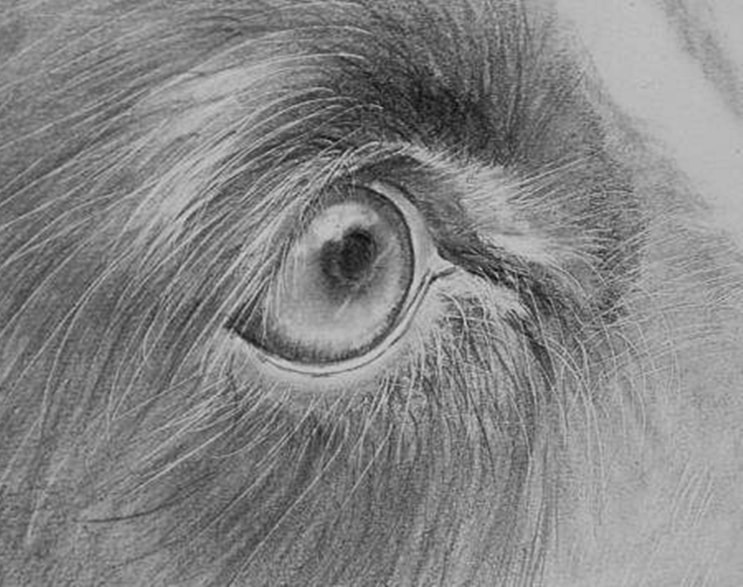
Reference Image
Embossing/Indent Tools
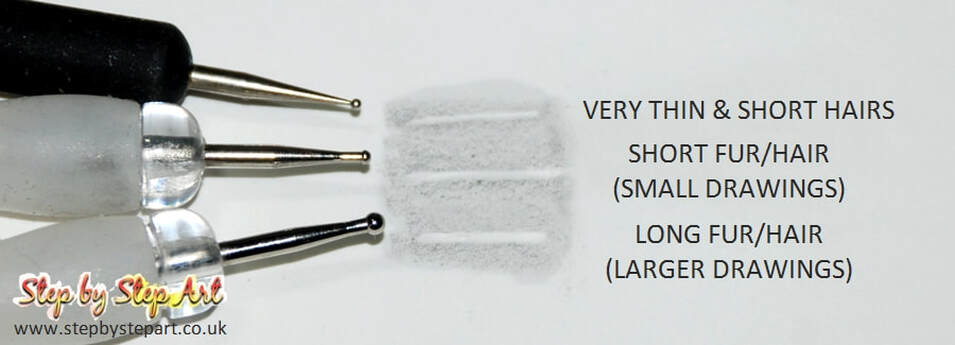
An indent or emboss tool can be used for numerous art projects such as clay sculpting or painting however these are one of those products that should be in every pencil artist's kit as they can help achieve highly detailed work, cutting out the struggle of trying to add in highlights later on in your work which can be very difficult. You can buy single or sets of embossing tools with different sized peaheads, from extremely small to large, having a choice will allow you to choose the best option for the size of your portrait and how much detail you wish to add to your work. For this sample, I only used one size, and the one you chose for your drawing will depend on how big you draw the eye. This image is around 4" square and so used one which is about 1mm width.
|
|
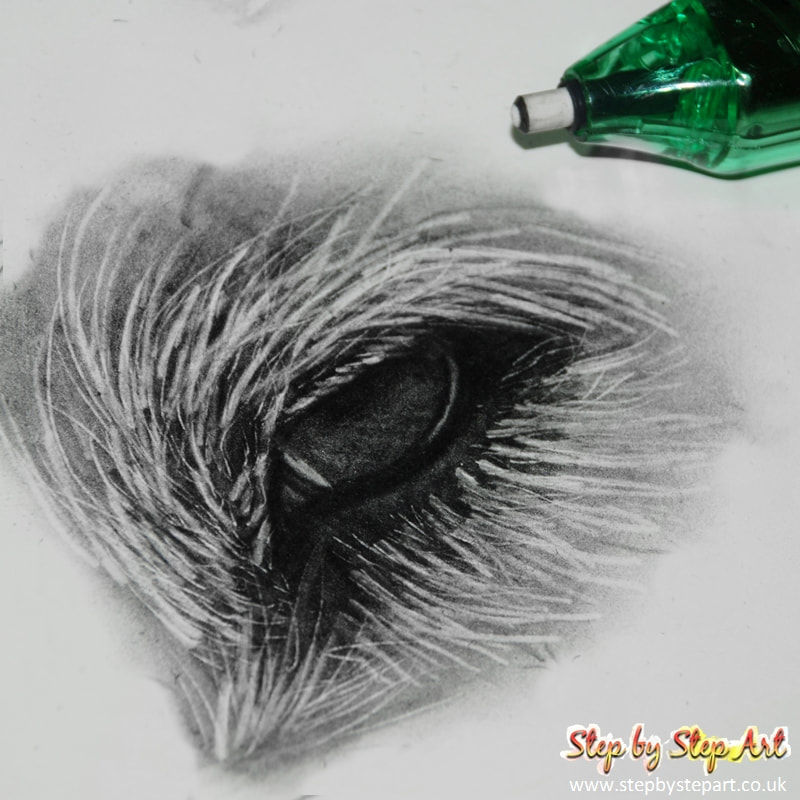
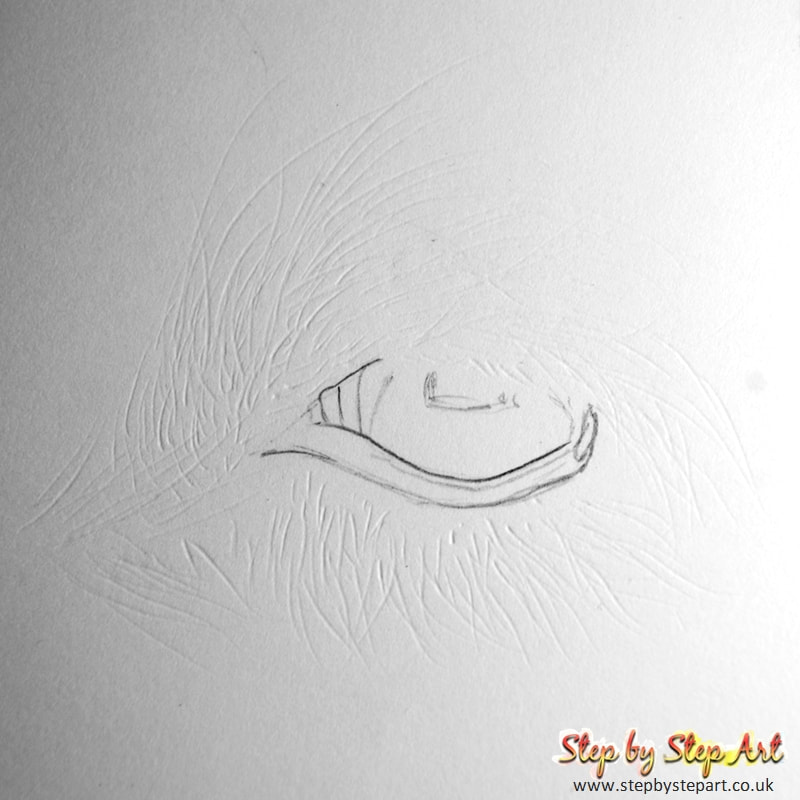
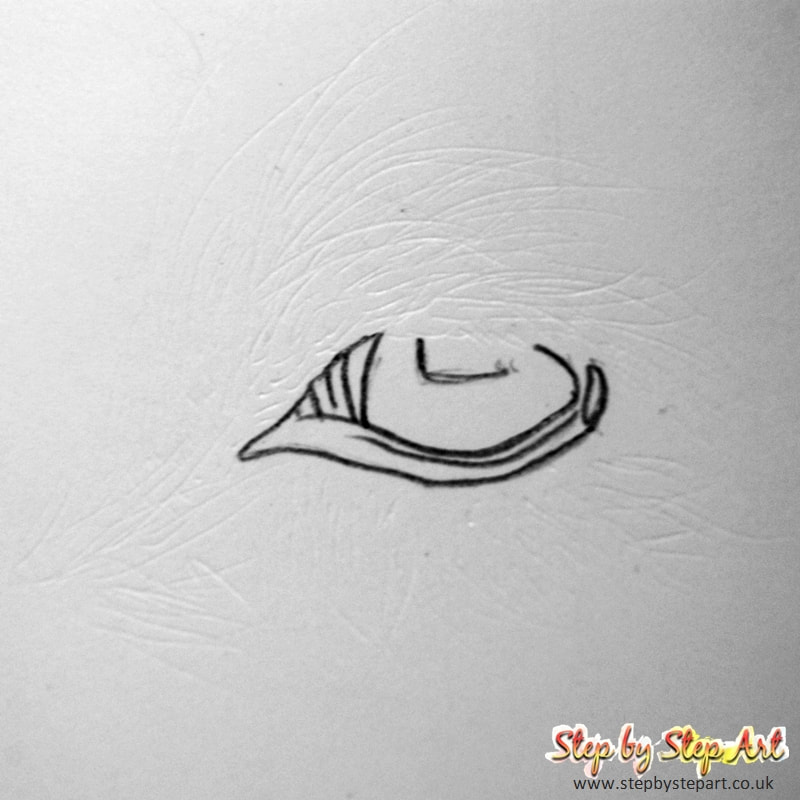
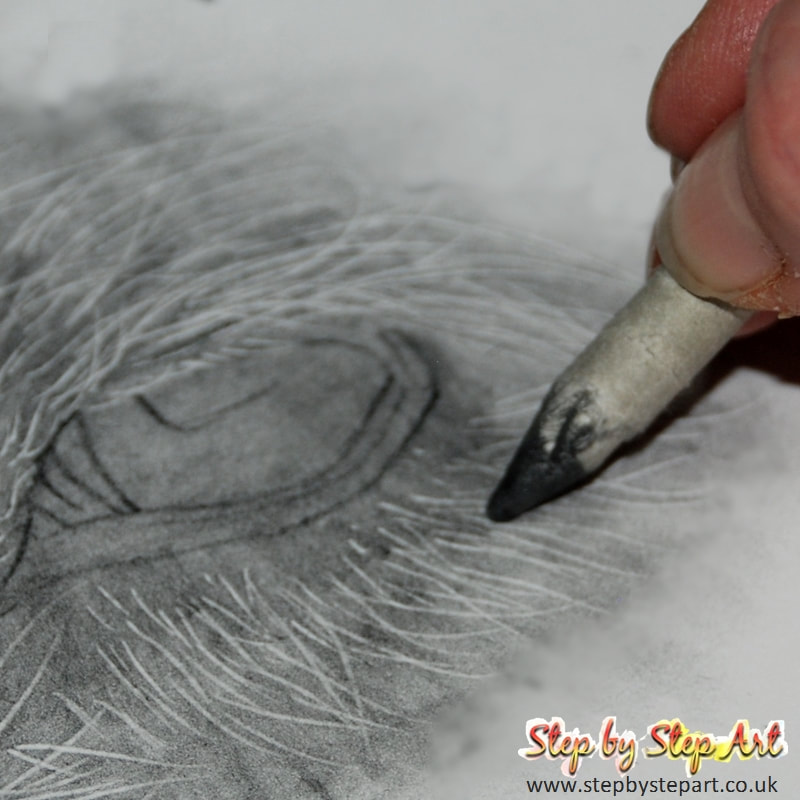
The first thing to do is to draw the outline of the eye itself. Sketch it out first if you prefer and then apply a heavy outline using the 4B, use the example above if it's easier to copy from than the actual reference photo. The reason for such a dark outline will be explained in the next section. The top of the eye has not been filled in as I need to apply eyelashes in this area with the indent tool and so keep this graphite free for now. When indenting, you may need to work with a lamp close to the paper at an angle so you can see where you are placing the markings as you go along. Add as few or as many indents as you wish in your portrait and for best effects, press into the paper - using a heavyweight paper such as 300gsm and upwards is ideal for this as you won't tear the paper and it is more likely the indents will stay 'clean' without the worry of the pencil being pushed into the grooves on the paper as you blend later.
|
|
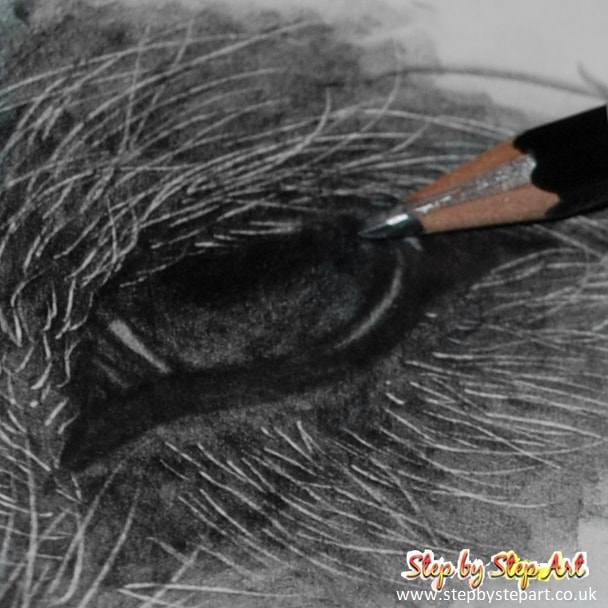
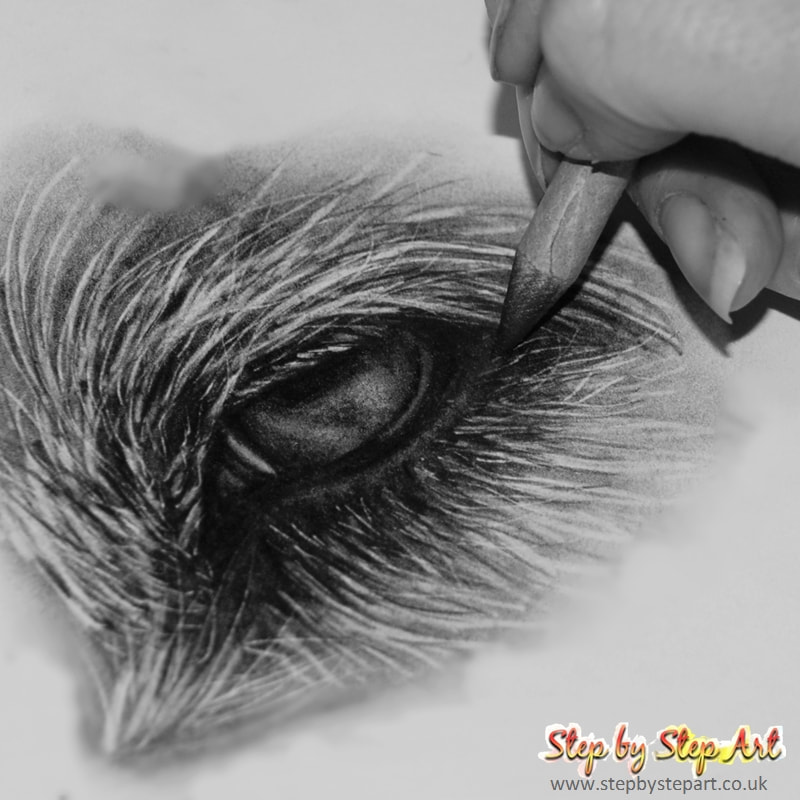
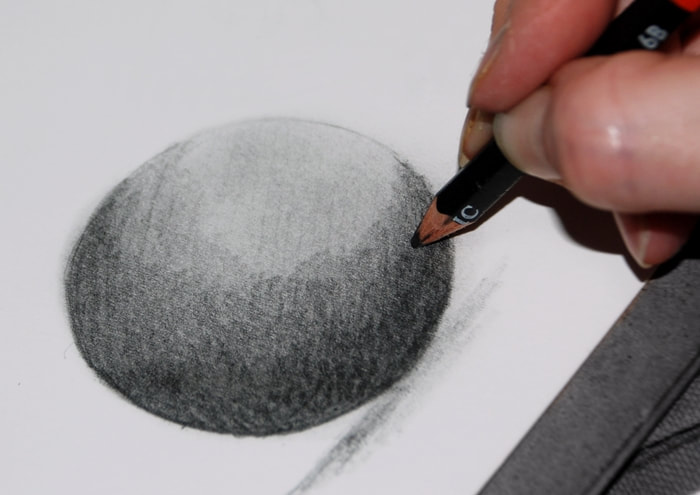
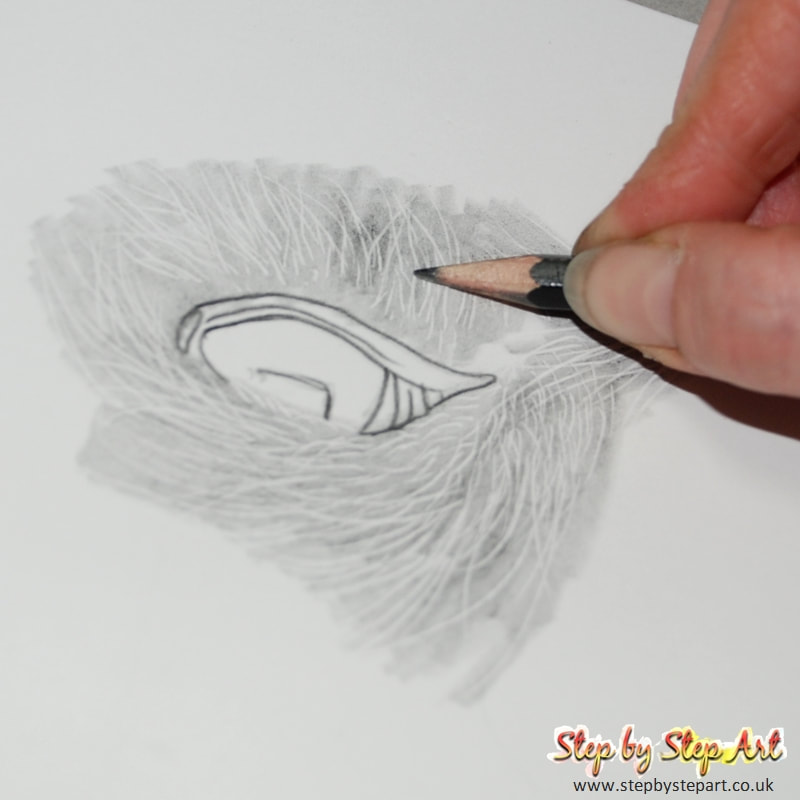
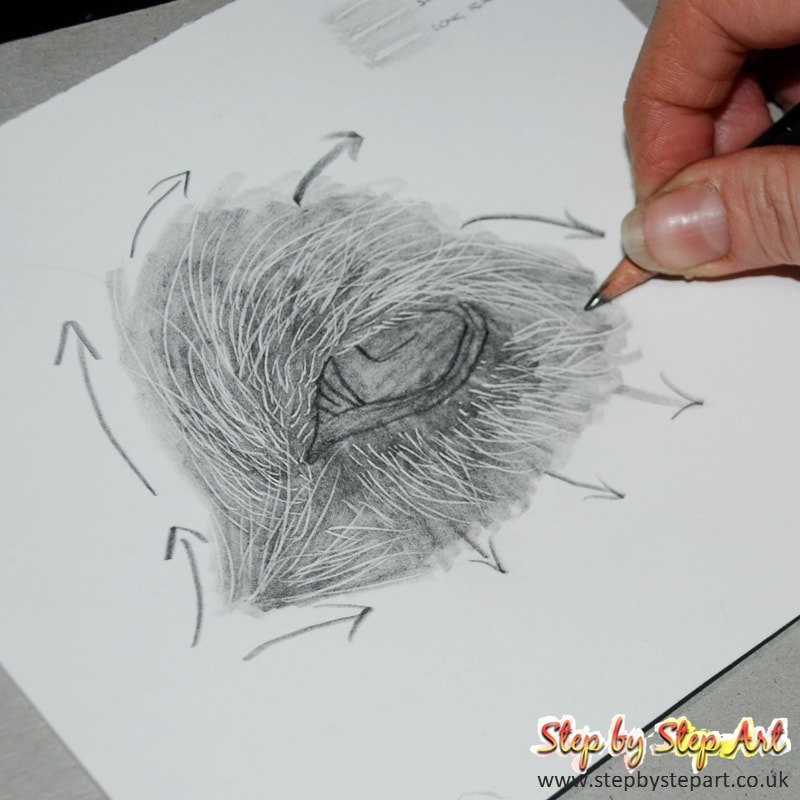
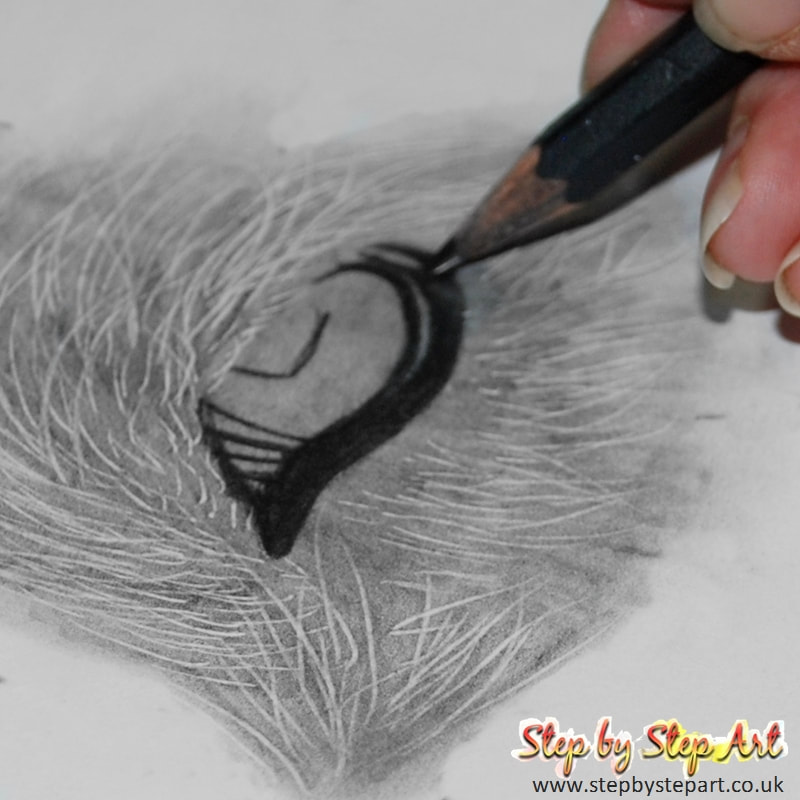
Once you have finished indenting, the first base layer can now be applied with a 2B grade. It is recommended that you apply the pencil following the direction of the indent so as not to accidentally push any graphite pencil into the grooves, another tip is to spin the paper round as you are laying your base layer so you can carry on applying the layers without having to twist your arm round at the same time. The arrows on the second photo shows the direction you should apply the pencil and by using the full length of the lead means you limit the amount of hard edges which makes blending far easier. Do not worry about applying the layer too heavily as the blending process softens the finish anyway. If you have applied too gently, you can always repeat the process until you get a nice, dark shade in preparation for blending. The darker it becomes, the brighter the indented 'highlights' appear and the more effective your work.
|
|
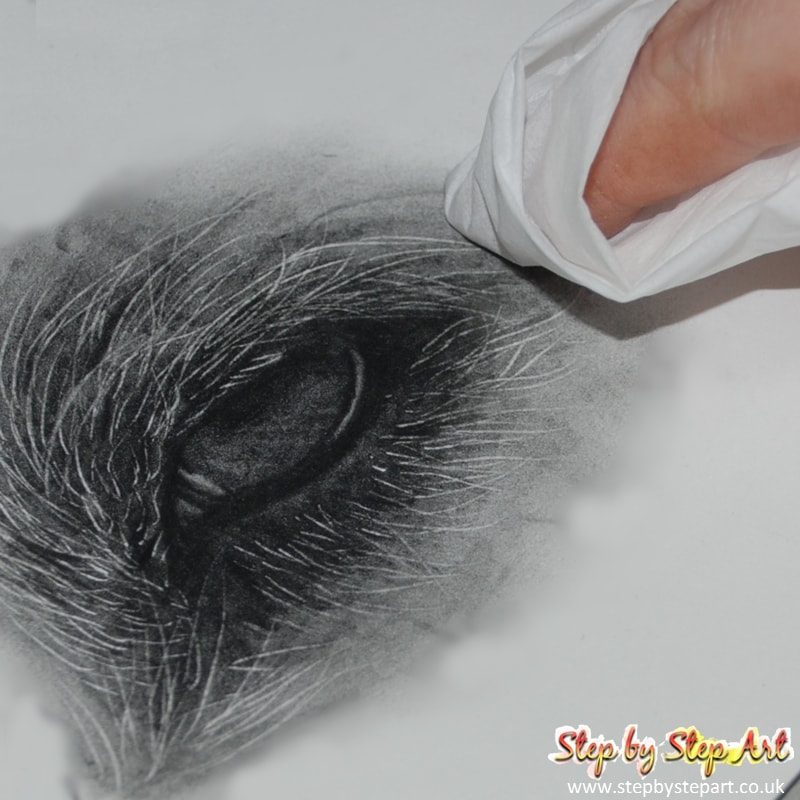
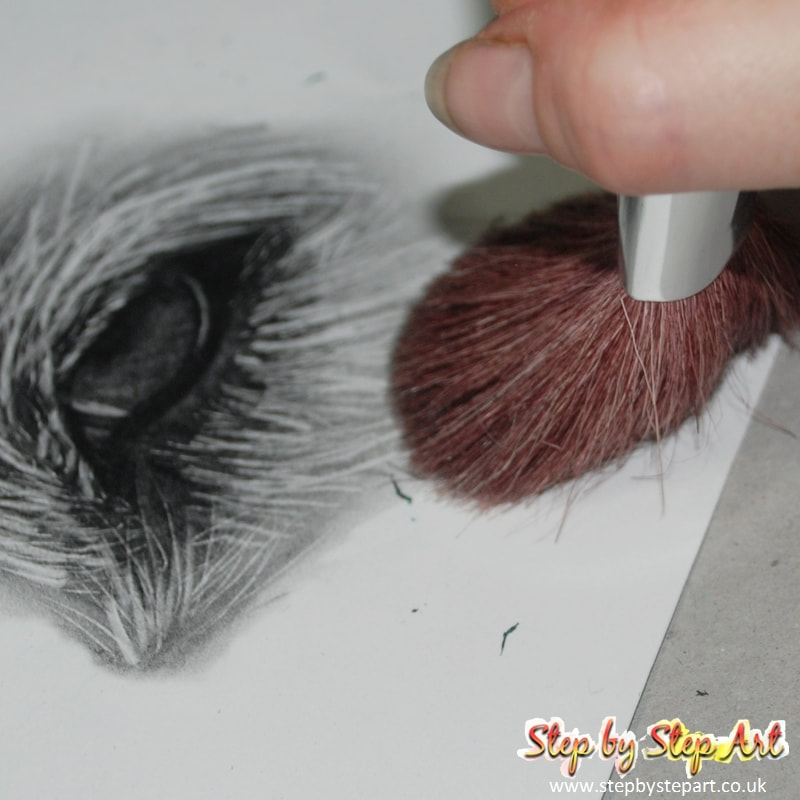
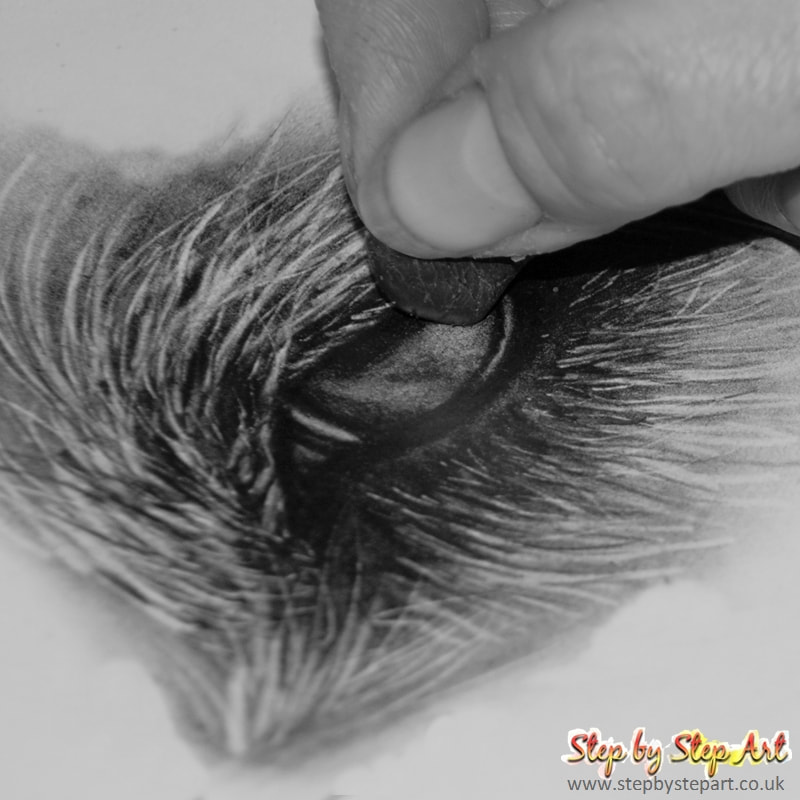
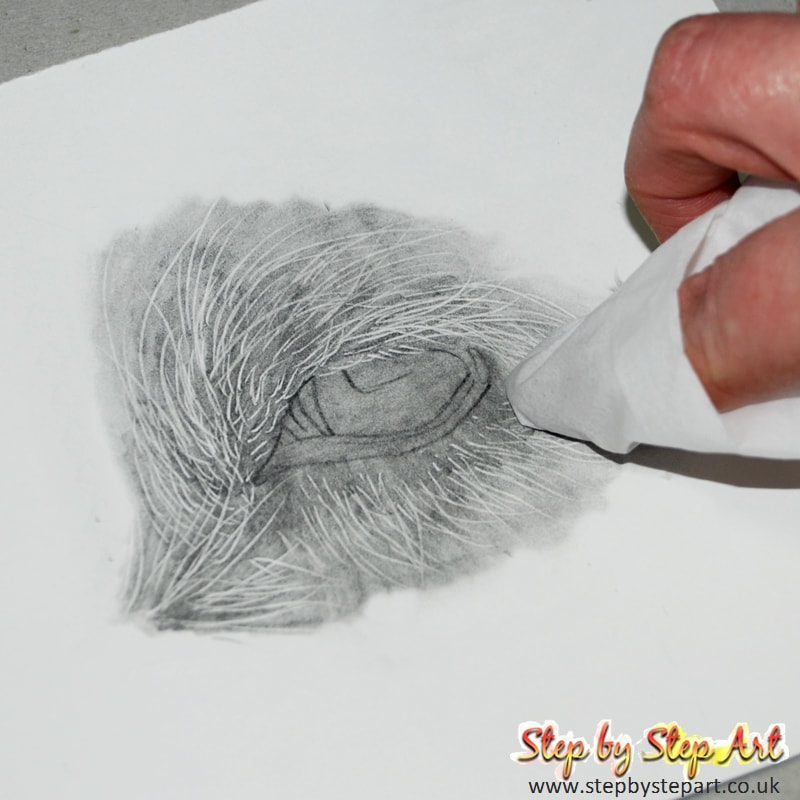
Once you are happy with the shade of your base, it will now need to be blended to soften any harsh edges that may have been created by the pencil. Wrap a clean tissue around your index finger and following the same direction as you applied the indents, gently pull the tissue across the paper. Alternatively, you can get more control if you use a paper stump or a tortillion as the tip is much finer and you can work smaller areas. Clean tortillions are not as effective as well used ones as you have excessive pencil on the tip so it simply blends the tones already laid as opposed to transferring some of the pencil onto the tip of the blender. You should still be able to see the white indents and hopefully you have worked with the lines instead of against them to avoid pushing graphite into the paper grooves.
|
|
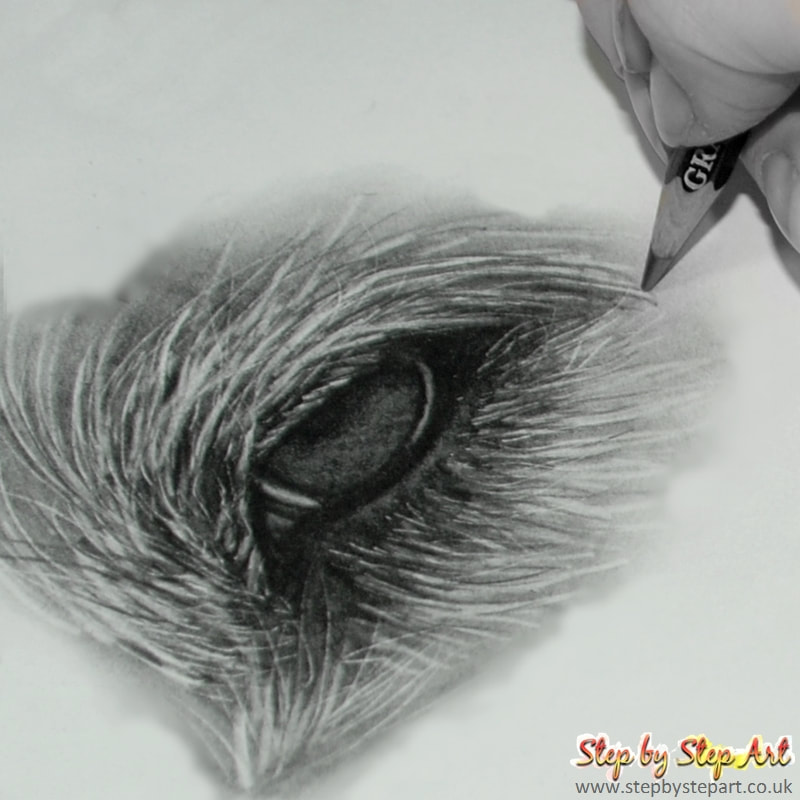
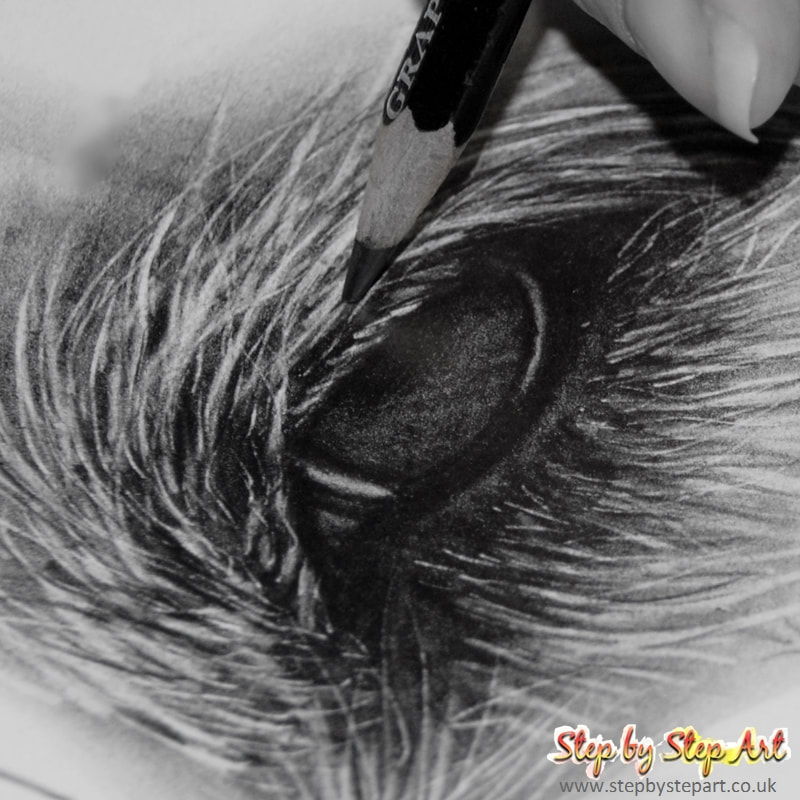
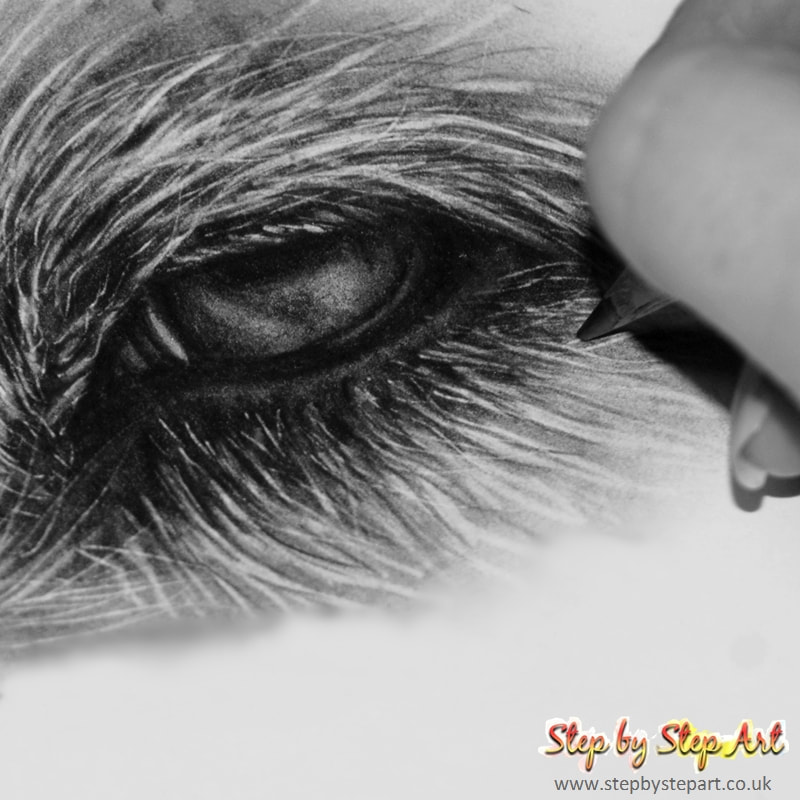
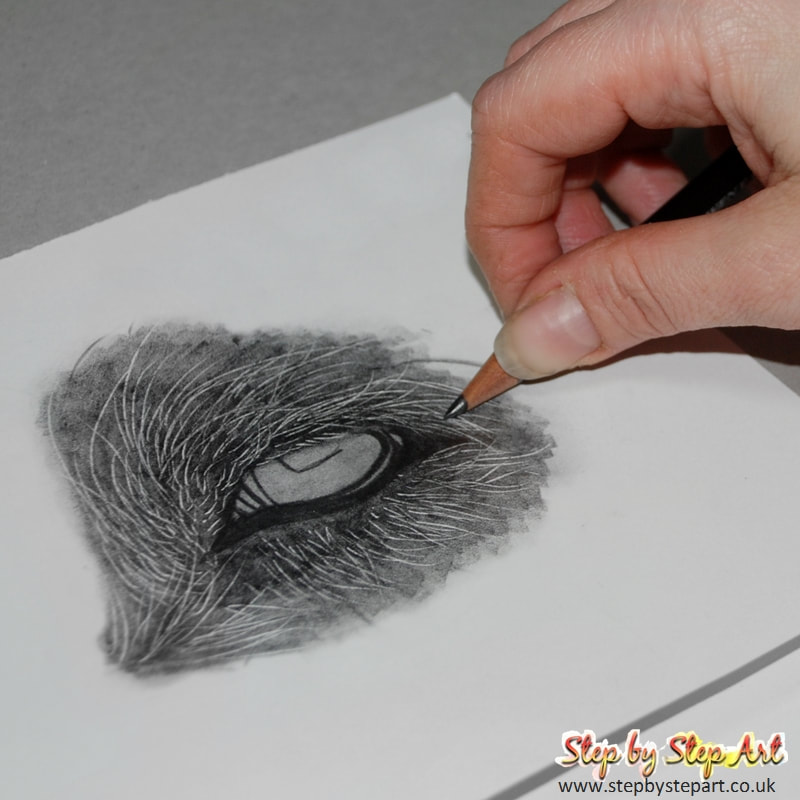
You will notice, after all that blending that the initial base tone and outline has been muted so much that you will need to apply a second layer. There is no limit as to how many layers you apply following the same process before, but do be aware that each time you repeat this, the more likely it is that some of the pencil will fall into the indents, so you do need to be careful. Using the 6B grade, fill in the dark shadows above and below the eye area as well as inside the eye itself. Deepen the outline once again in preparation for blending using the image above as a guide if it is easier than working from the reference image for this detail. Using the 4B grade, reapply a second base layer over the outer areas using the exact same process as you did the first time. Always apply following the direction of each hair you indented and follow up by blending with the tissue or blending stump following that same direction. As before, the grade of the pencil will lighten somewhat with blending