STEP BY STEP ART | ART TUTORIALS, ARTICLES, PRODUCT REVIEWS & ART WORKSHOPS
  • Home
  • Articles
    • Starting Out With....
    • Coloured Pencils
    • Graphite Pencils
    • Soft Pastels
    • Acrylic Paints
    • Water based Products
    • Papers & Canvases
    • Art Accessories
  • Tutorials
  • Workshops
    • Gift Vouchers
  • News
  • Kofi-blog
  • Subscribe
  • About
  • Mail Us
  • Site Map

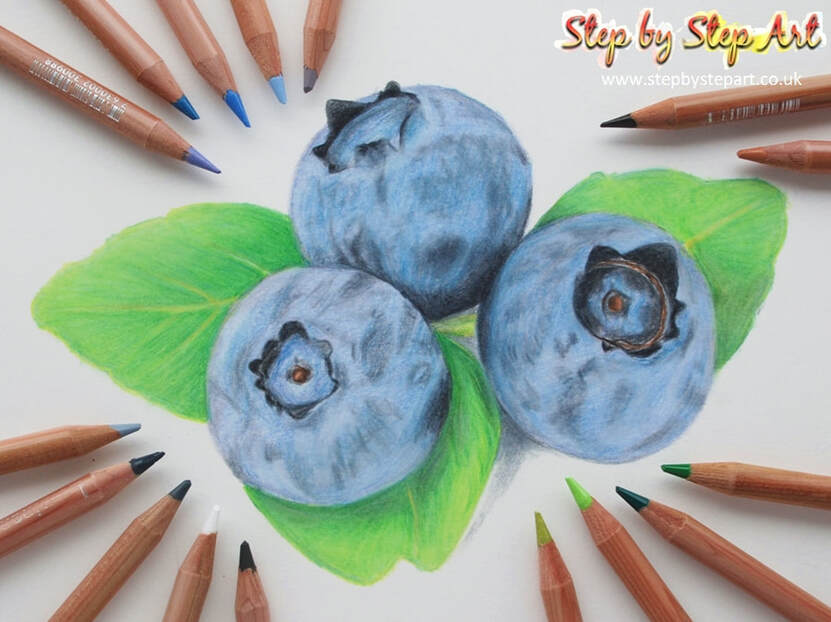
Blueberries in Coloured pencils Tutorial

Written: December 2019
Coloured pencils used: Caran Dache Luminance range
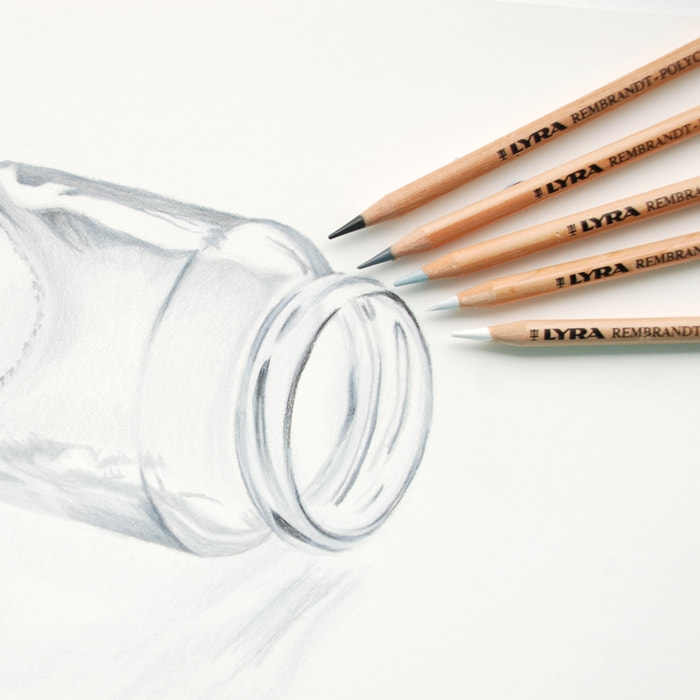
​Paper used: Bockingford hot pressed 300gsm

This tutorial was originally created for the Colored pencil Magazine 'Workshop series' back in November 2018 and has been reproduced here for inclusion in my mini tutorials sections. This tutorial gives an extensive breakdown of the process required to create this vibrant subject. It explains  in short stages how to apply, and why building up colour tones in this way aids the realism. It also explains how and when to blend for best effect. 

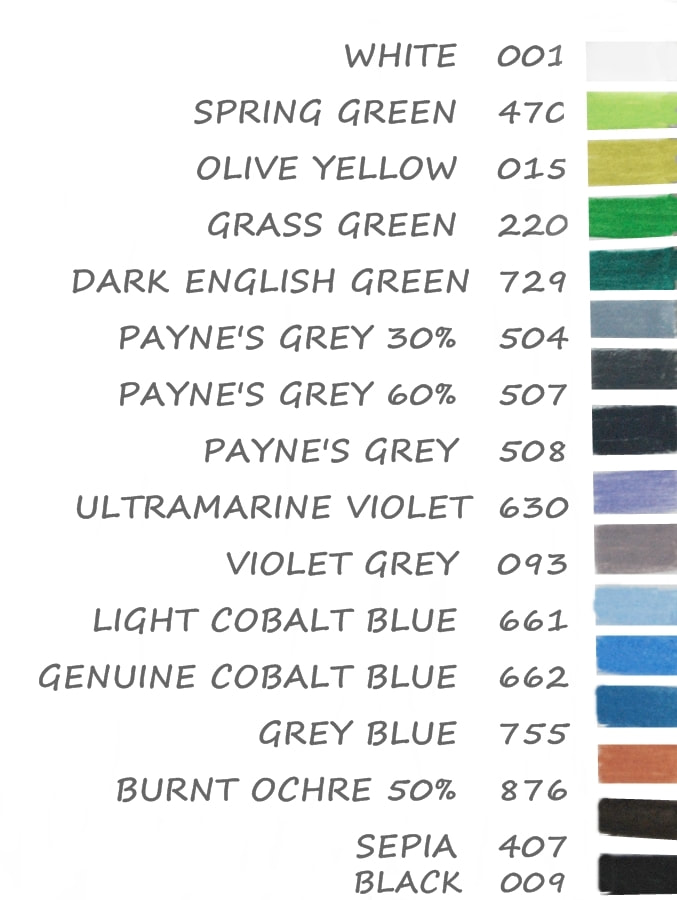
The reference image can be found below, which you can screen grab and print out or view on a tablet whilst reading the instructions on a smartphone or computer. The colour chart shown here is the colours from the Caran d'Ache Luminance range, or you can pick similar colours from your own preferred pencil collection if you do not have the Luminance pencils.

I hope you enjoy this tutorial and if you would like to request a subject for inclusion of a future mini tutorial, please get in touch!
Picture
Colored pencil magazine 2018 blueberries in coloured pencils workshop series by Karen M Berisford
Caran Dache Luminance colour chart for Blueberries tutorial

The reference image

Photograph of Blueberries
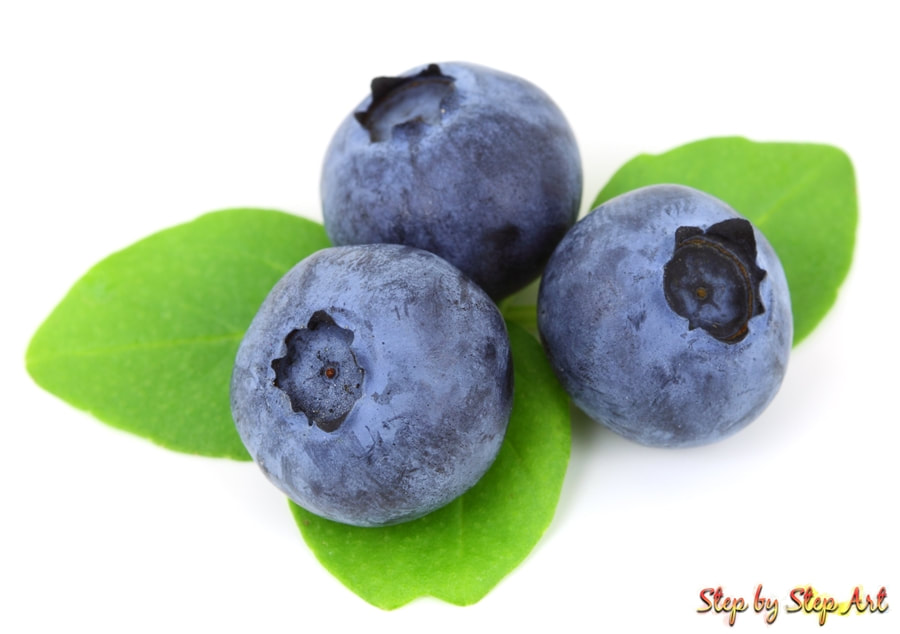
Blueberries reference image

Beginning the base layers

Blueberries coloured pencil drawing base layer
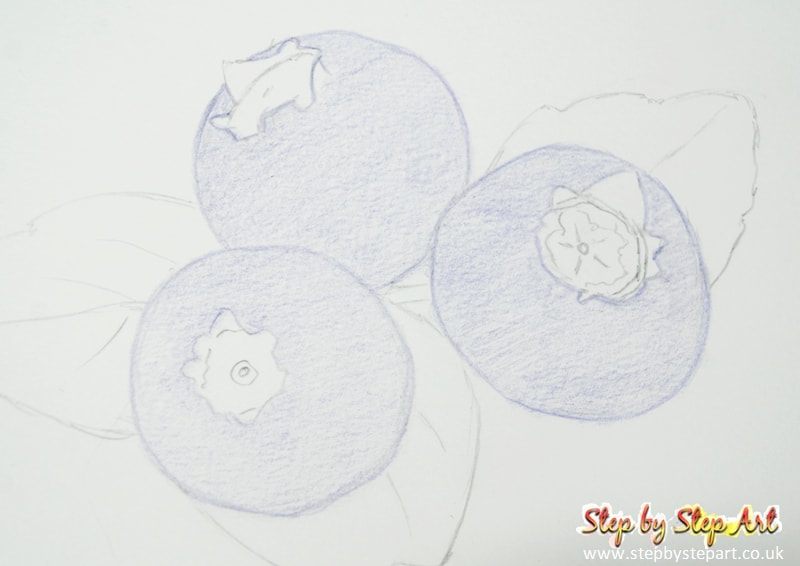
After creating the outline, before applying any colour be sure to erase the outline as you go along to avoid sealing the outline beneath the layers. Begin by building up the tonal layers starting with the ULTRAMARINE VIOLET (630) - apply loose pressure over the area of the fruit using the length of the pencil. 
Blueberries coloured pencil drawing base layer
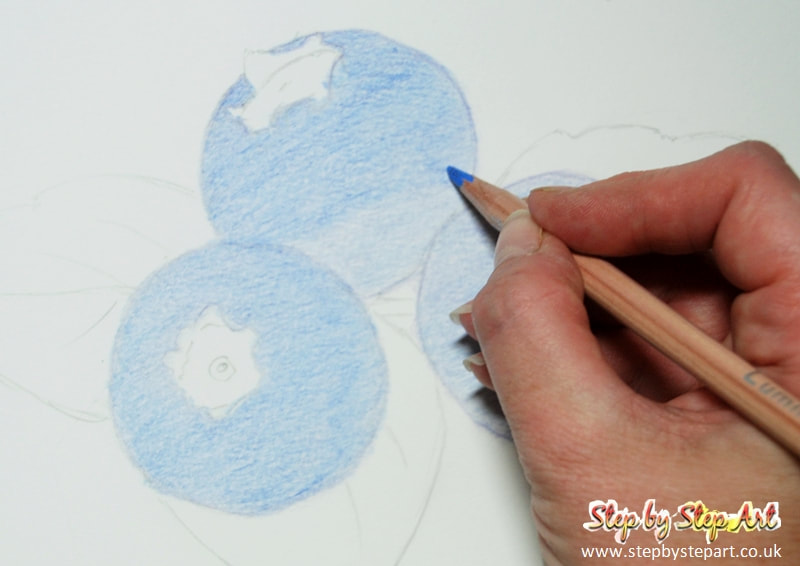
Follow up with a second layer using LIGHT COBALT BLUE (661). Having applied a violet tone first gives the fruit a purple undertone, allowing you to layer the blue tones on top. Apply this colour to each blueberry before moving on to the COBALT BLUE (662) tone for the third layer. Keep the application within the lines but should you overlap and providing your layers are light enough, you should still be able to erase. 

Do not cover the crowns at this stage

Blueberries coloured pencil drawing base layer
Once the base layers have all been applied you can start adding the markings on the fruit. Begin with VIOLET GREY (093), applying the colour in areas where darker shading is seen. Using one colour would render these shadows rather flat so it is important to build up using more than one tone
Blueberries coloured pencil drawing base layer
Apply a secondary layer to the shading using PAYNE'S GREY 30% (504) be sure to apply a little more pressure on each consecutive layer for deeper shading. The third layer is using GREY BLUE (755). Avoid saturating the area with each colour as these stages are all about achieving a mixture of tones for a realistic finish at the end.

Shading & Blending

Blueberries coloured pencil drawing tonal layer
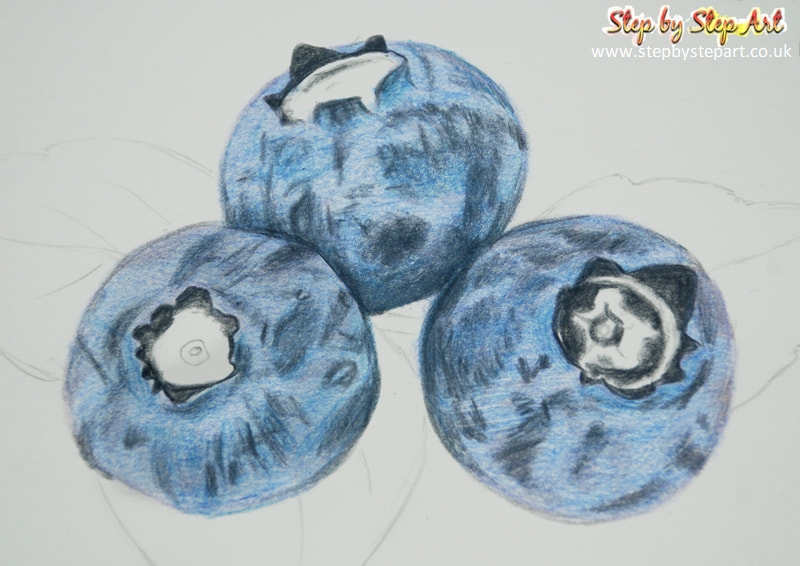
The final layer for the shading is PAYNE's GREY 60% (507) finalise the markings, placing any individual lines too. Begin by filling in the inner section of the crowns of the fruit; apply softly in the lighter areas and heavier next to the outlines to create a smooth transition between the two.
Blueberries coloured pencil drawing tonal layer
Return to the LIGHT COBALT BLUE (661) and apply the colour inside the crowns, avoiding the brown areas which will be filled in last. Redefine the darker areas of the crowns using the BLACK (009) ensuring there are no harsh lines between the black and the earlier application of Payne's Grey 60%.
Blueberries coloured pencil drawing tonal layer
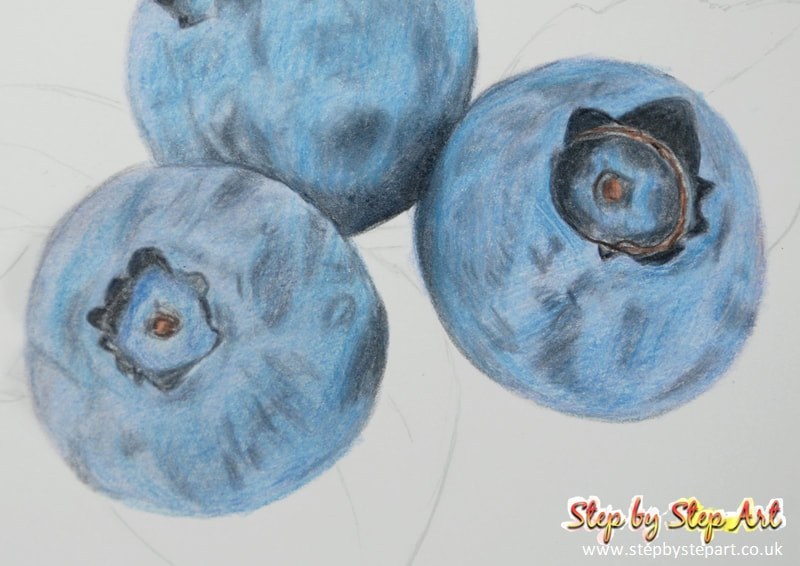
This time use the LIGHT COBALT BLUE (661) as a blender, applying circular motions over the skins of the fruit to soften the pencil marks whilst creating a smooth layer of tones, avoid softening the marks too much.  Fill in the brown sections of the crowns with BURNT OCHRE (876) and finish with SEPIA (407) in the darkest section namely the circular area of the berry on the right.
Blueberries coloured pencil drawing
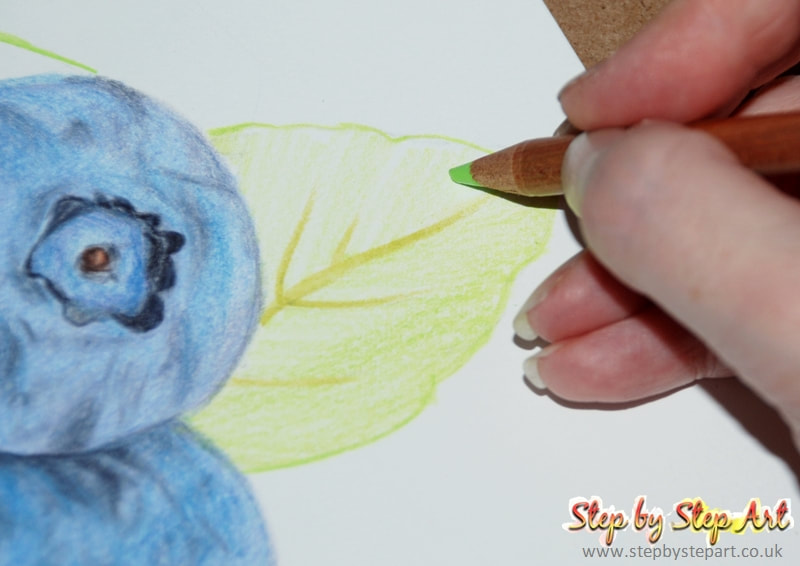
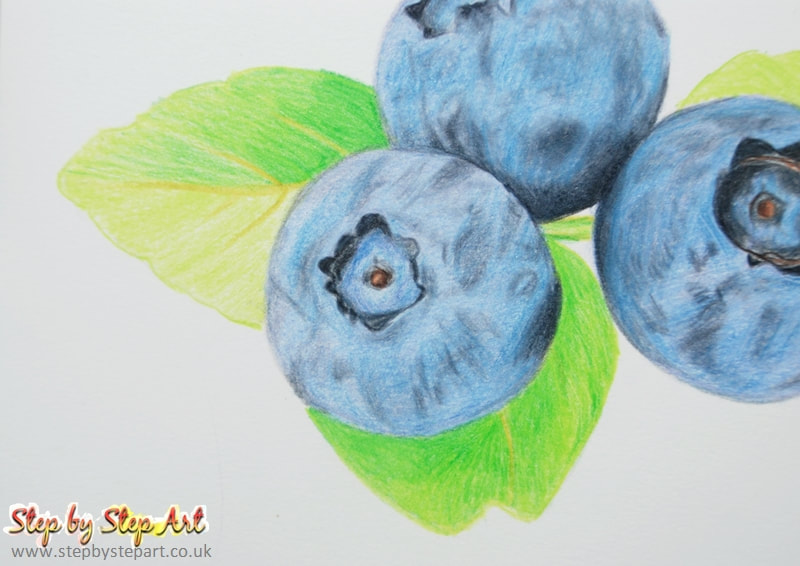
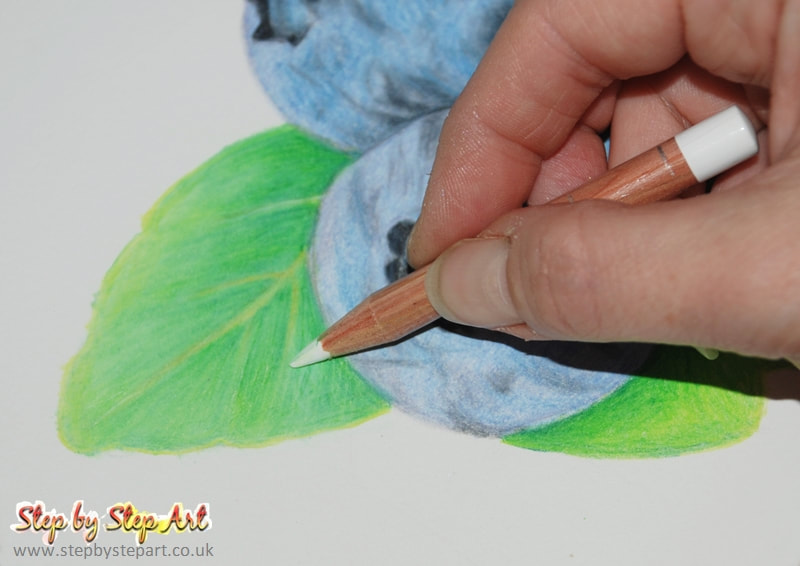
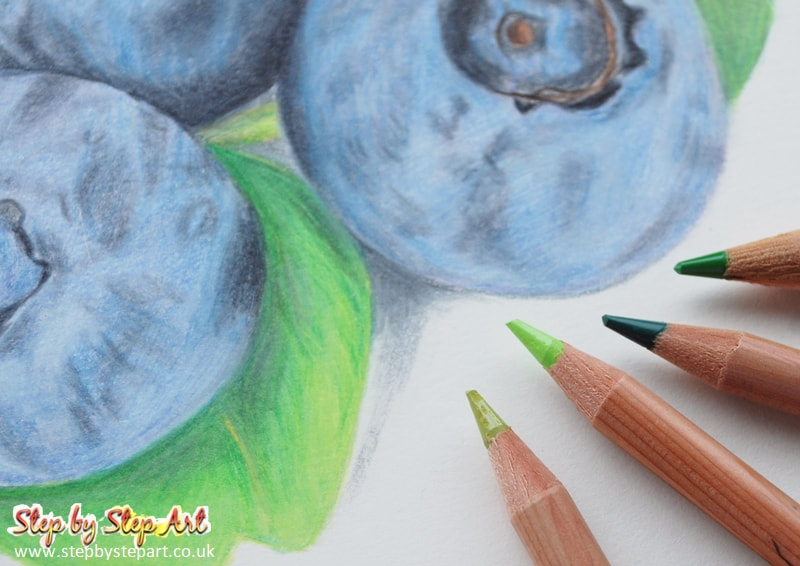
Begin the base application of the leaves by applying the veins first using OLIVE GREEN (015). Apply a heavy pressure into the paper which will create an indent and avoid consecutive colours covering this section. Apply a base tone of SPRING GREEN (470) over the leaf in upward strokes starting from the central vein out and upwards towards the edges. Create the less noticeable stem right in the centre of the fruit too with this colour.


Other related articles that may be of interest
​

Colored pencils magazine cover with Robin
The USA's Colored pencil Magazine - digital issues $3.99 each
Coloured pencils
Other Coloured pencils article section including: Pencils, Papers & Accessories
Caran d'Ache Luminance pencils and 1980's heart shaped rubber
Caran Dache Lumminance pencil review
Bockingford watercolour paper
About the Watercolour paper used in this tutorial

Finishing up

Blueberries coloured pencil drawing creating leaves
The second tone to use is GRASS GREEN (220), the layers should be applied the same way as before (stem to edge in upwards strokes), for this layer however, the tones should be darker in the centre and lighter towards the edges which will help to create a balanced transition. When applying the colour, avoid overlapping the veins as these need to stay light.
Blueberries coloured pencil drawing creating leaves
​ The last shade of green needed is the one that will be used to create the shadows at the base of each leaf - this colour is the DARK ENGLISH GREEN (729) which is the best tone for this and as before, ensure you apply heavier immediately below the fruit and lighten as you blend outwards to create a natural transition. With a BLENDER pencil or the WHITE, blend all tones together for a balanced finish and re-apply a loose layer of the SPRING GREEN (470) to give a warm hint of green.
Blueberries coloured pencil drawing blending
Create highlights on the skins of the fruit using the WHITE pencil. You do not need to apply all over, just in areas you want to create a sheen/highlight. Tweak areas you feel require a little adjustment before completion.
Blueberries coloured pencil drawing completed
Finish the portrait by creating the shadow at the base of the right blueberry firstly applying a soft layer of PAYNE's GREY 30% (504) and then a heavier layer of the PAYNE's GREY 60% (507) for the darker shades, blend to smooth. 

Completed

Coloured pencils blueberries tutorial and Caran d'Ache Luminance pencils
Correctly building up your tonal layers and learning how to balance the shading on these berries will help you achieve a highly effective drawing regardless of your subject.

Blueberries (or any type of fruit) are great subjects to practice your pencil techniques as many are simplistic, and the process explained here can be used as a guide for others subjects too.

Learning how to pick out the correct tones needed for the under layers will help prepare you when it comes to creating more detailed subjects and your artwork will become a lot more effective in depth and shape the more you do.

If you would like to purchase a digital copy (or hard copy) of the magazine with this tutorial in, click the link HERE to visit the page where you can purchase direct.  

There is also a mini tutorial of mine included in Januarys' edition of the Colored pencil magazine with a step by step breakdown of how to create a Peacock feather in Derwent Lightfast coloured pencils which can be found HERE if you wish to purchase.
​

View our other coloured pencil tutorials

Drawing a Peacock feather
Creating three-dimensional art
Achieving realism in your work
Layering with coloured pencils
Creating movement in water
View all other tutorials >>>>

QUICK LINKS


​Articles

Art Tutorials

Art Workshops  
​
Art Blog

The Tutor  

Workshop Gift Vouchers

Workshops T's & C's

Contact  

Links 
  
Site Map
Vertical Divider

SUPPORT US

Picture
This website is free to everyone. If you value what we do, you can help support this site by buying us a coffee. Click the link below to make a donation. Thank you!
What is Ko-fi?
Vertical Divider

Picture
Our Facebook is not currently available
Picture
Follow us on Instagram
Picture
Vegan Art products list

    SUBSCRIBE TO OUR NEWSLETTER

Subscribe
Our quarterly newsletter is filled with reviews, recommendations, hints and tips on various art products as well as new tutorials that you may enjoy.  ​Please note we NEVER spam
No part of this website should be copied or re-used anywhere without written permission by Karen M Berisford - 2011 - 2021
All images on this website are copyright of Karen M Berisford unless otherwise stated - Website design by Karen M Berisford. All rights Reserved.
  • Home
  • Articles
    • Starting Out With....
    • Coloured Pencils
    • Graphite Pencils
    • Soft Pastels
    • Acrylic Paints
    • Water based Products
    • Papers & Canvases
    • Art Accessories
  • Tutorials
  • Workshops
    • Gift Vouchers
  • News
  • Kofi-blog
  • Subscribe
  • About
  • Mail Us
  • Site Map