Coloured pencils | A helpful guide for coloured pencil artists and beginners
Are you new to coloured pencils, but not sure where to start?
Coloured pencils have been rising in popularity over the years. They're an easy medium to transport; produce less mess than most other mediums, and you can execute varied designs from sketches to photo-realism. There are many brands out there, and this article offers lots of information that should help you begin your journey. We provide a list of the six products that you need to get started, followed by other recommendations and useful information for those new to coloured pencils.
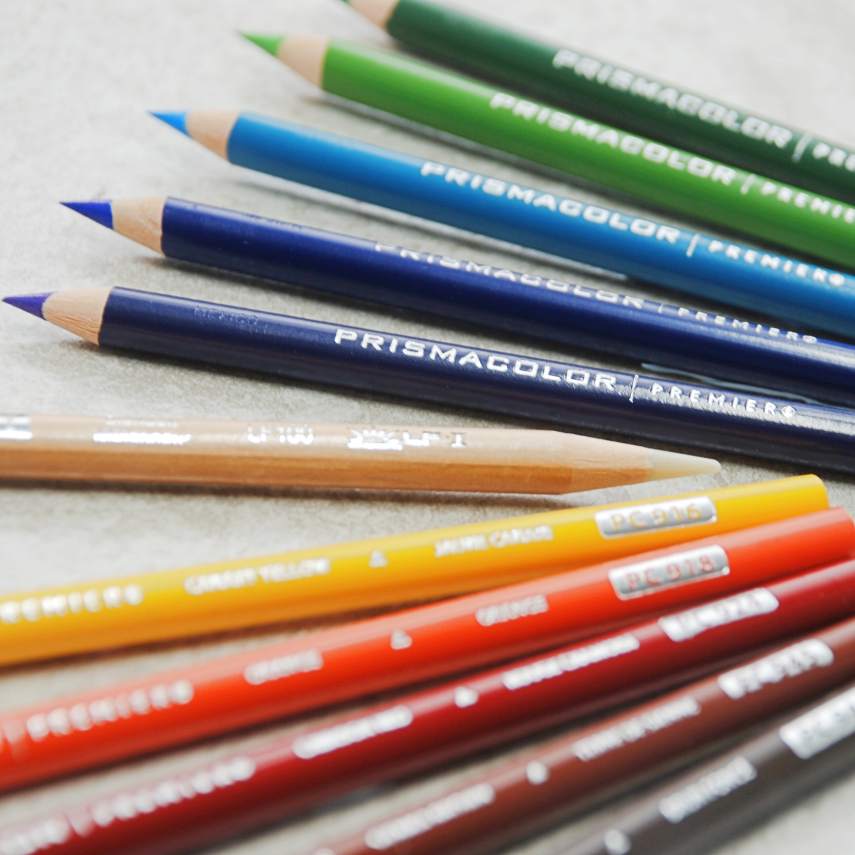
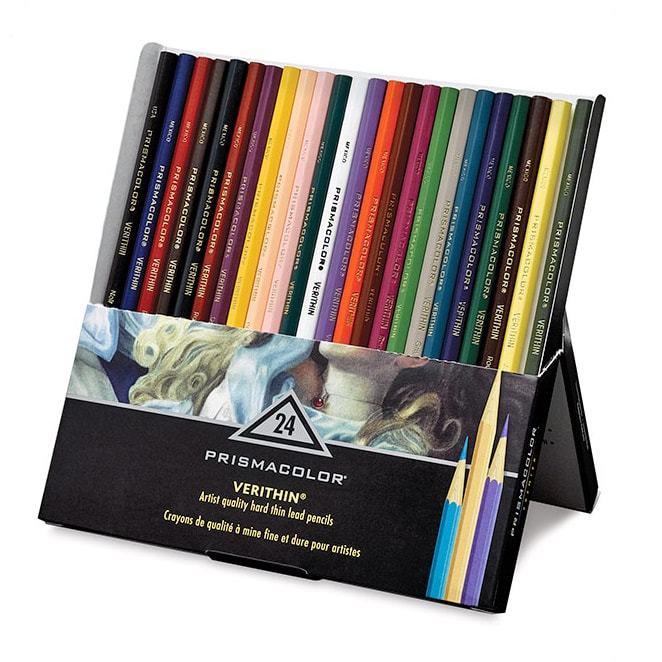
1. THE PENCILS
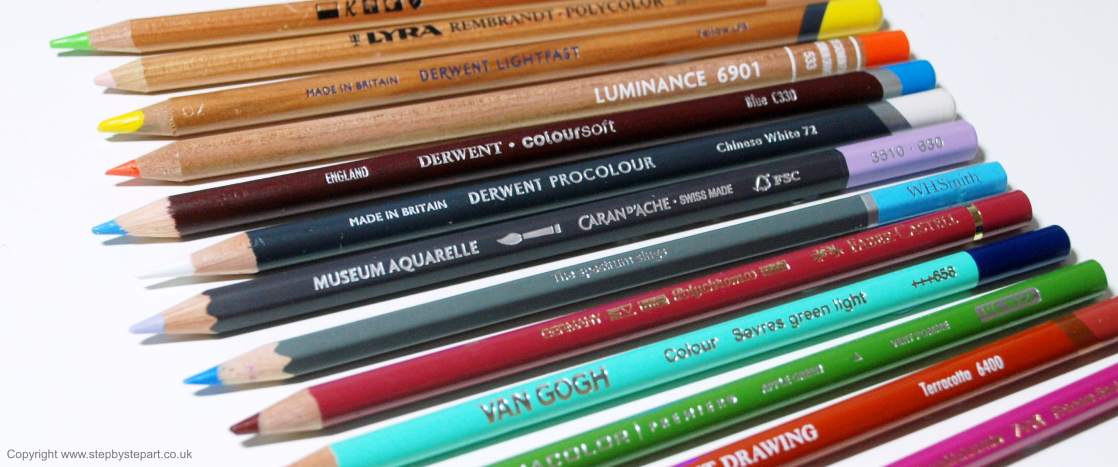
The first thing you will need is a set of coloured pencils. With so many brands available, it may seem daunting choosing your first pencil range, especially if you are new to the medium. How do you decide which to buy? The truth is, there is no 'perfect' solution. Many artists own various ranges and use them interchangeably, there is no 'miracle' brand that will suit every artist, it is simply preference. Some pencils are soft, others are hard, some low cost, some high. Many are highly pigmented, others are more neutral. Some have excellent lightfast properties and some have none at all. Whichever one(s) you choose, it depends on the subject(s) you will be undertaking and though there may be one particular brand that covers all ground, you may find you need two or three different ranges to cover all angles. Below we explain the differences between the three types of coloured pencil.
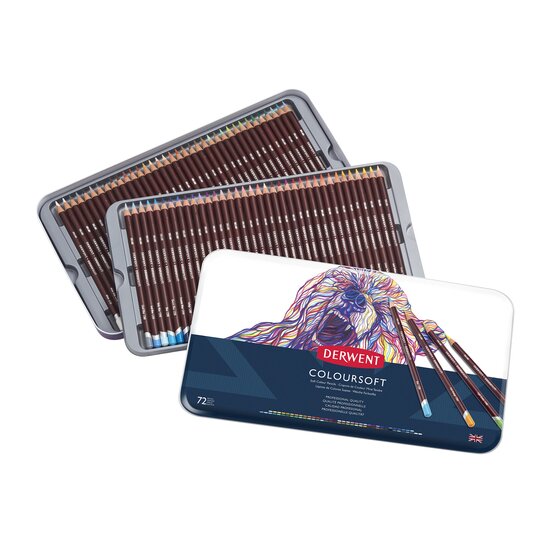
Wax-based pencils | Prismacolor PremierWax-based pencils are the most commonly found coloured pencil. The pencil you used as a child would have been waxed based, so it is likely that you are familiar with this type of pencil already. Wax-based pencils tend to have a soft core, ideal for those new to coloured pencils as they are more malleable making them easier to layer and blend.
|

Oil-based pencils | Faber Castell PolychromosOil-based pencils tend to have a harder core. Due to their firmness, they are more durable and achieve much finer detail than their wax-based counterparts although there are exceptions. Oil based pencils do not suffer from wax bloom and artists who prefer a limited amount of layers may find oil-based pencils far more suitable.
|
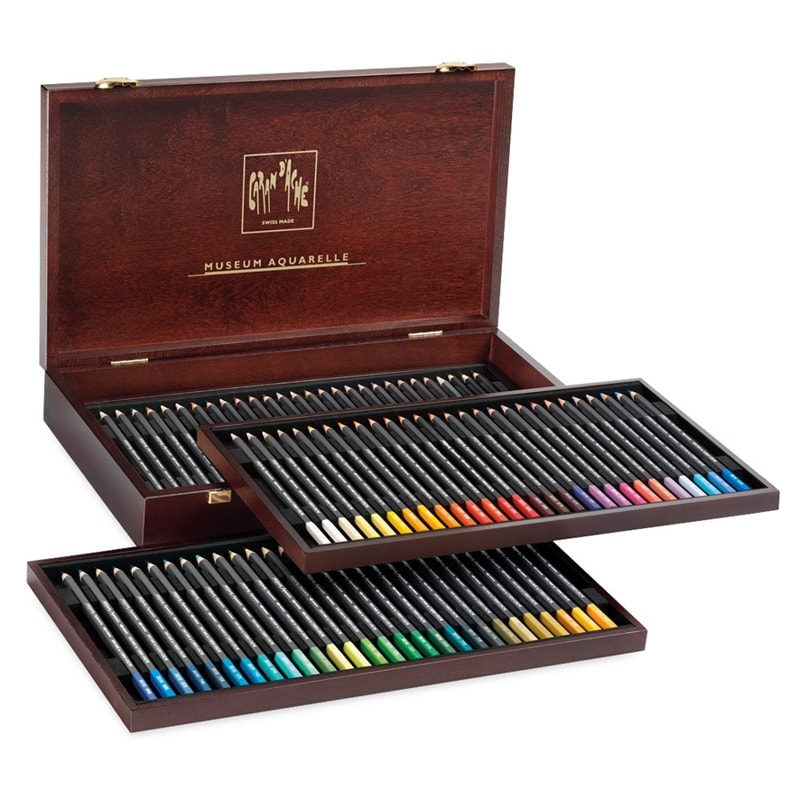
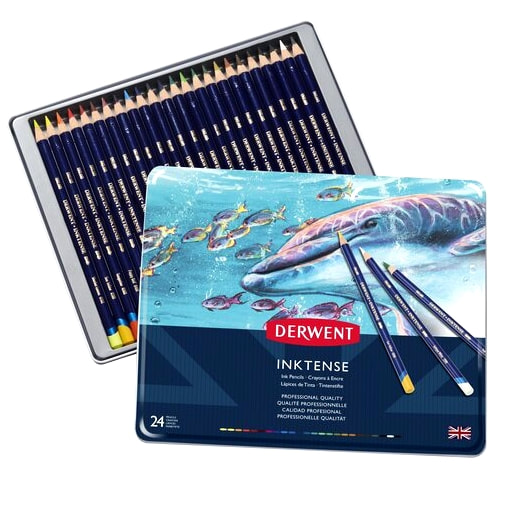
Water-based pencils | Museum AquarelleWatercolour and water-soluble pencils use a gum arabic binder which dissolves in water. Water-soluble pencils can be used dry or mixed with water to create loose pencil drawings like watercolours. The Inktense pencil shown here turns to ink when wet and are permanent. Diluting water-soluble pencils can effect their lightfast ratings.
|
2. PAPER/SUPPORT
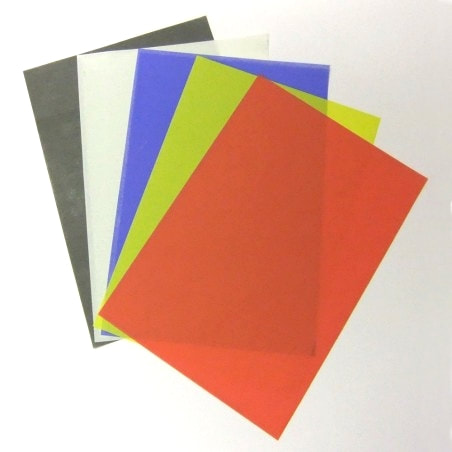
There are so many surfaces out there for artists that it is difficult to know which type to choose when starting your new journey. A hot pressed watercolour paper is always a good starting point. You can also buy a budget pad from one of the better known art companies like Winsor & Newton. Like the pencils, a paper that works for one artist is not going to work for everyone. For example, Stonehenge paper by Legion is a very popular paper, but some artists find it too soft. Here we explain three different paper options.

White paper | Strathmore Bristol 500A white surface is the most popular base with which to work on. It is a blank canvas, offering a fresh and clean look, isolating your work and enhancing both colour and detail more productively. Paper can be ultra smooth or textured, but the type you choose is down to preference. A hot-pressed watercolour paper like Bockingford is a good option.
|
Tonal paper | UrsusTonal papers can provide a mid-ground with which to build your layers on. Cool papers are suited to subjects with blue and purple undertones and warm tone papers are ideal for subjects with yellow, orange and brown undertones. Using black paper can evoke powerful emotion in your work due to the stark dynamism between dark and light. Read our 'Working with tonal paper' article for more information.
|
Textured paper | Art Spectrum ColourfixTextured paper is a popular choice for many pencil artists. The tooth grabs the pigment more effectively, leaving behind richer colour than smoother surfaces allow. For this reason, it can cut down your work times and those additional layers you usually apply become unnecessary. We explain more about this in our 'Working with textured paper' article.
|
3. TOOLS FOR YOUR OUTLINE
Before you start your drawing, you need to create your outline. There are many options available other than a pencil and what you use to create your outline is entirely up to you. Some ideas are offered below but if you use a pencil, add a rubber/eraser to the requirements too.
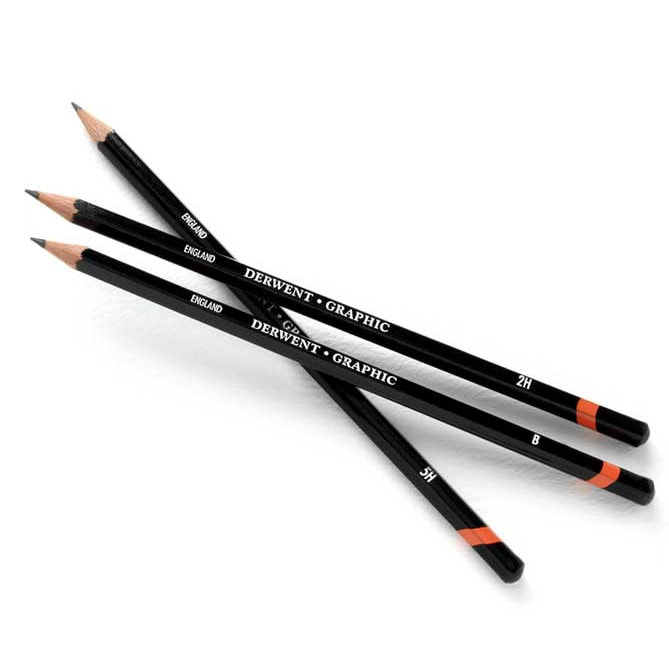
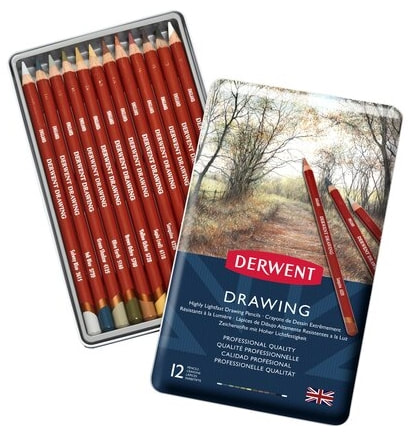
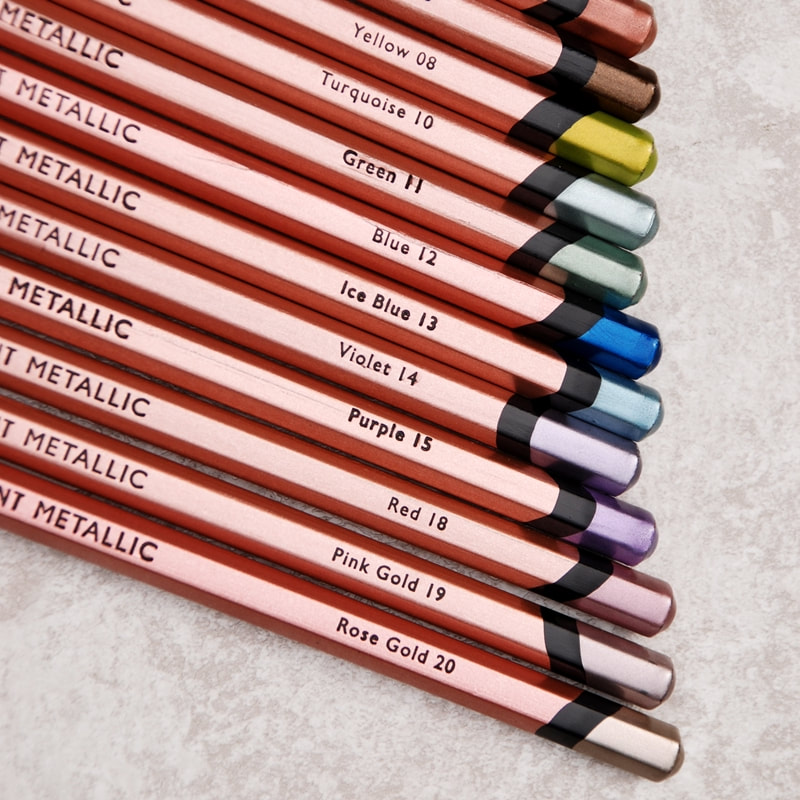
Graphite pencil | Derwent brandH grade pencils are hard and produce a lighter application. B grades are softer and are darker in tone, becoming notably darker the higher the number. A HB or B grade is ideal for your initial outline for drawing on light coloured paper. This makes it easier to erase. If working on textured or dark coloured paper, you may need something bolder like a 2B or 3B.
|
Transfer paper | Frisk TracedownFrisk Tracedown offers an effortless way of tracing your outline. Place a sheet, darkest side down over your drawing paper and place your reference image on top. Secure this onto your paper with tape or use a paperweight if you do not wish to damage the paper, then trace the outline onto your working paper. Ensure your first lines are transferring to your paper before doing the whole outline.
|

Transfer spray | GhiantGhiant's transfer spray ensures you get the perfect outline with minimal wastage. You can spray it directly on to the back of your reference photo before placing onto your support and drawing around the outline. You can cover around 75+* sheets of A4 with one can. *Number taken from a personal trial count.
|
4. PENCIL SHARPENER
Working with pencils means you will need a sharpener of some kind. You can buy a cheap sharpener and use it for all the pencils you own, but the width of pencil barrels can vary between brands and cheap sharpeners can damage the wood, so it is better to purchase something more suited to the needs of your pencils. Some brands sell sharpeners for a particular range of pencil, allowing you to replace the blades when they become blunt. Here we show you three different types of sharpener but in our 'Sharpening pencils' article, we go into more depth explaining the difference in sharpeners and how you can use them to improve your pencil techniques.
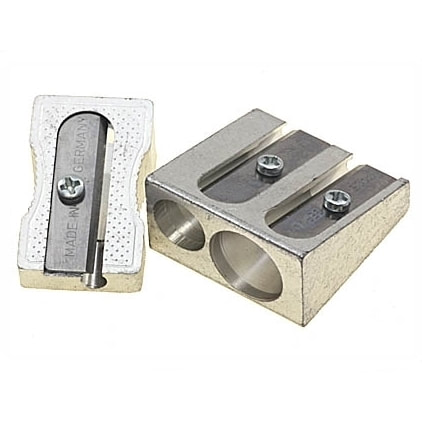
Metal SharpenersThe basic sharpener tends to be a single or double holed sharpener and made of plastic or metal. The metal brand is far more robust than a plastic one as it is stronger, easier to replace the blades and puts less pressure on the wood in your pencil due to the robustness.
|
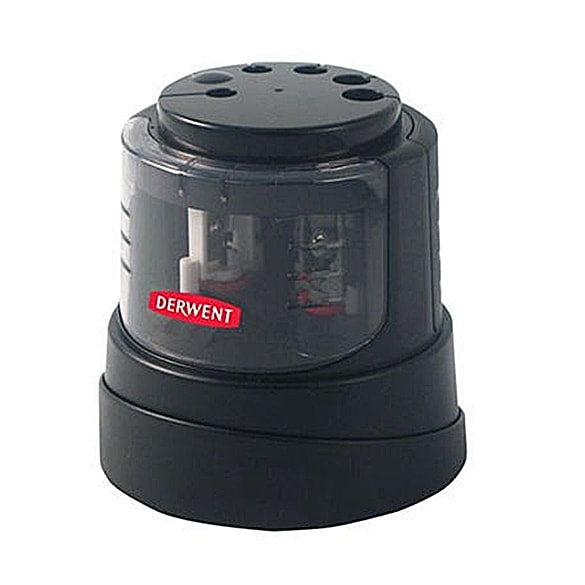
Battery-powered & Manual sharpenersManual sharpeners hold the pencil in place whilst the blade rotates around the pencil. This can minimise pencil breakages. Battery powered sharpeners are quick which only requires you to grip the pencil whilst the blade is activated. These can be too harsh on some softer pencils.
|
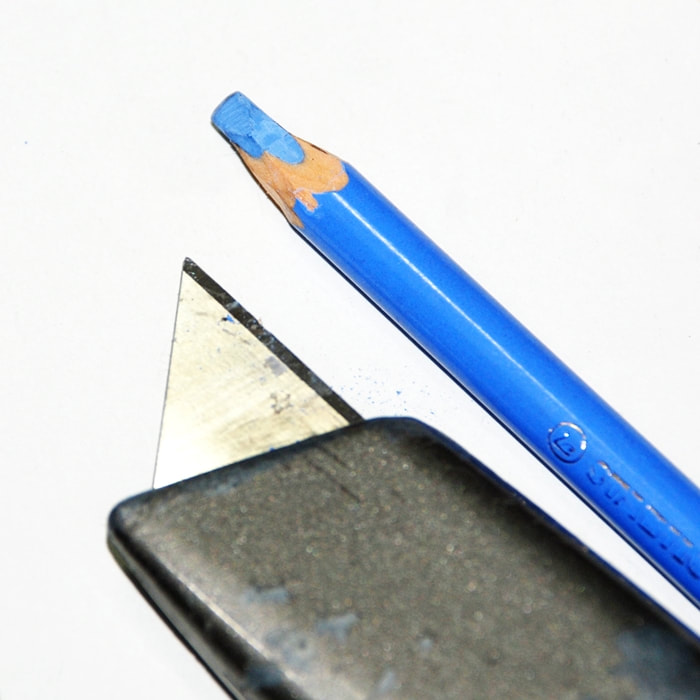
Craft KnifeMany pencil artists use a craft knife to sharpen their pencils. It allows them to sharpen them to the length and shape that is needed for a particular section of a drawing. Pencil sharpeners only achieve a universal shape and you may struggle to get a really fine tip, so a blade may be favoured.
|
5. RUBBER/ERASER
One eraser is not going to be suitable for every section of your drawing, which is why there are so many varied shapes available. Pencil form and battery powered products can be a useful edition to your standard eraser, but are by no means the only ones. Here we explain the difference between the three found below and how they can benefit your work.
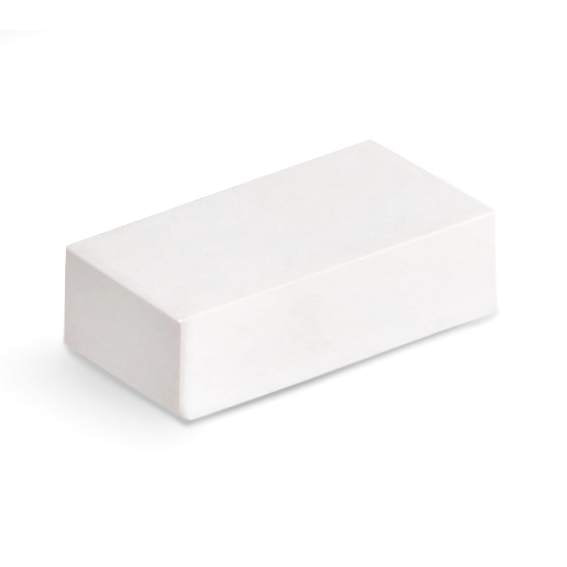
Polymer eraserPolymer erasers are so economical that you can buy a box full for a few pounds, using one for each medium you work with to avoid cross-mixing mediums. Use the corners for removing small sections and the wider edges for larger ones. Putty rubbers can be broken up so you can mould them into any shape you require.
|
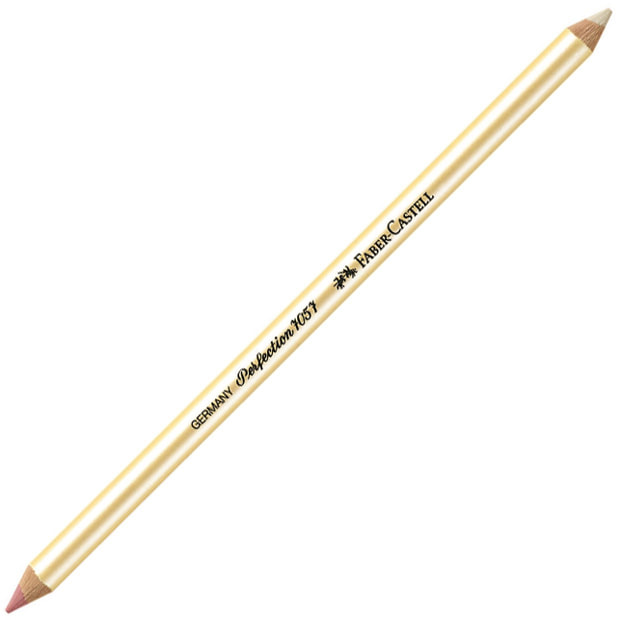
Pencil eraser | Faber Castell PerfectionPencil erasers consist of an eraser core running through the centre. Sometimes doubled edged, one has a harder side for ink removal or very dark lines, the other has a softer tip for pencil removal. You can use them interchangeably with your pencil work, but be careful not to tear your paper with the sturdier side.
|
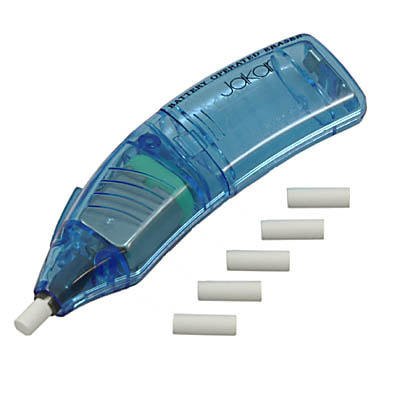
Battery powered eraser | JakarBattery powered erasers are great tools to possess as they have the power to remove almost all pigment from your paper. Particularly ideal if you are trying to pull the white of your paper back for highlighting and creating catchlights. Eraser refills are available so you can use a different tip for use with other mediums like graphite pencils.
|
6. ACCESSORIES
The following products are an important part of the pencil kit. A soft brush is a must as it replaces the need to touch or blow on the paper where there are dust particles. Colour charts are more important the larger your collection of coloured pencils as it allows you to pick out the correct colour straight away rather than using guesswork. Pencil extenders ensure that you use as much of the pencil as possible, particularly if they are expensive or a discontinued colour that you can no longer buy. Find out more about each below.
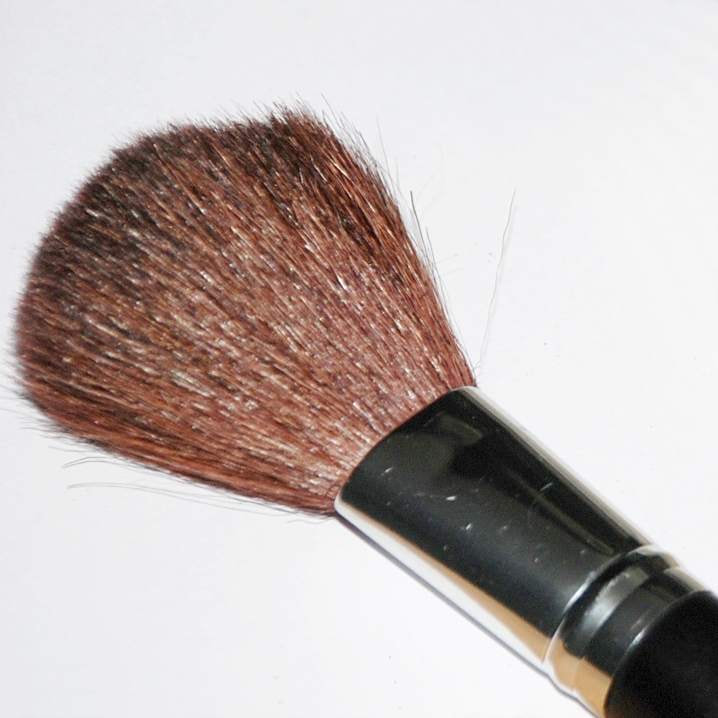
Soft BrushA soft brush is a must for every pencil artist. When you erase or apply heavy applications of pencil, this creates dust and removing it with a soft brush is far more preferable than using your hands which can transfer oils onto your paper or by blowing it away, which can spray droplets onto your drawing and spoil your work.
|
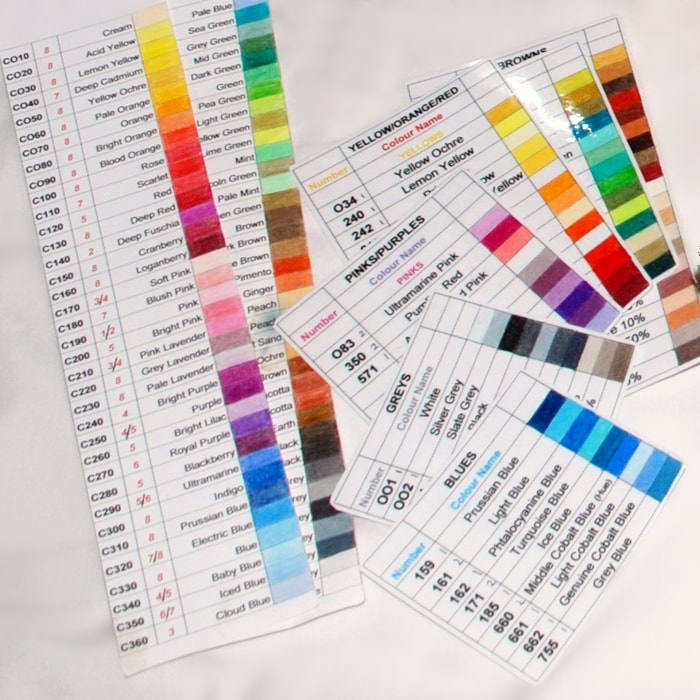
Colour chartsColour charts are always good to have as they allow you to compare colour palettes and select the pencil most suited to the task. You can find blank colour charts online if you search long enough which will allow you to print off and fill in, but it may be quicker and easier to make your own. We explain more about colour charts a little further down the page.
|
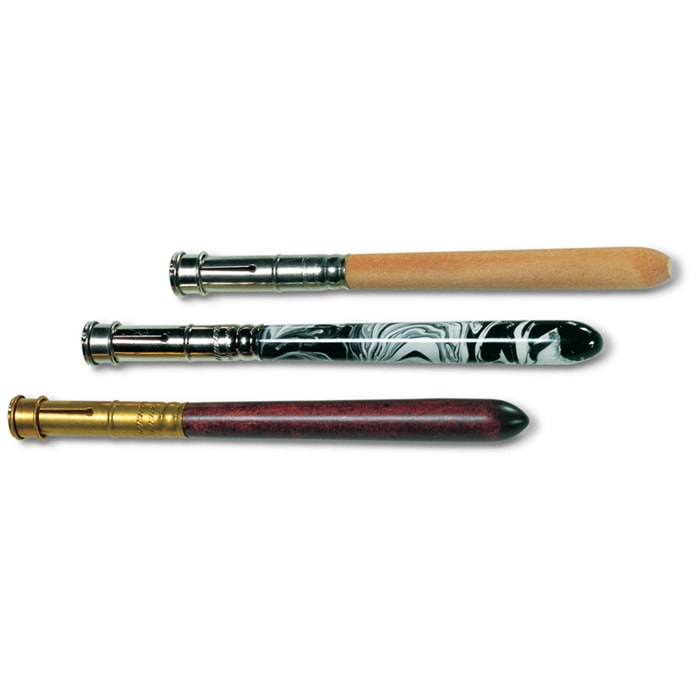
Pencil Extenders | Faber CastellYou will always reach a point when your pencils approach the end of their lives and all you are left with is a short stub. You don't need to throw it away, you can enhance it's lifespan by using a pencil extender. You can purchase individual ones from around a £1, so it is useful to have a few in your collection.
|
SUPPORT BOARD/EASEL
Easels can be as simple as a flat piece of wood or it could be a standard desk or floor easel. If you have an area in your home such as a kitchen table or a spot near a window, maybe even a spare room that you can utilise for your art, securing your art to a flat and sturdy surface is important, allowing you to create your drawing without the fear of your paper moving around or getting damaged in the process. Below are some examples of easel, the one you select will be down to space, comfort and personal preference. If you spend many hours creating your art, you need to ensure you are comfortable and that you do not put undue pressure on your neck and back. A supportive chair is a must.

Support BoardThis support board can be placed on any flat surface. The ridges underneath the board help to grip onto the edge of a table, allowing you to secure whichever height you find most comfortable. The legs fold under and this transforms into a carrying handle, easy to transport from one area to another.
|
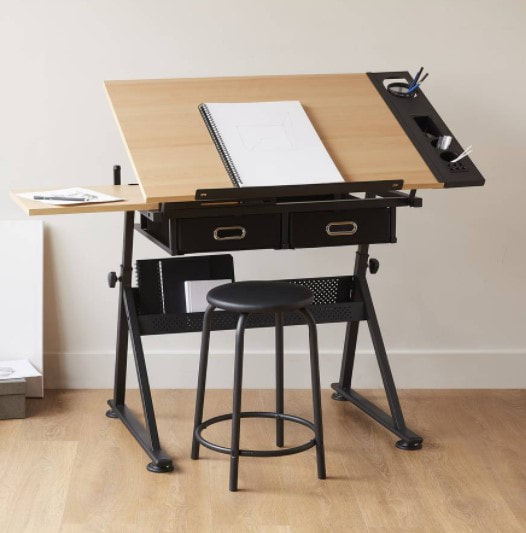
Illustration DeskAn illustration desk like this is ideal for every creative artist. It takes up less space and provides a work area and storage space in one. The tilting desk is adjustable so you can work on a flat surface or tilt it to whichever height is most comfortable. A supportive chair is recommended if you spend long hours at the easel.
|
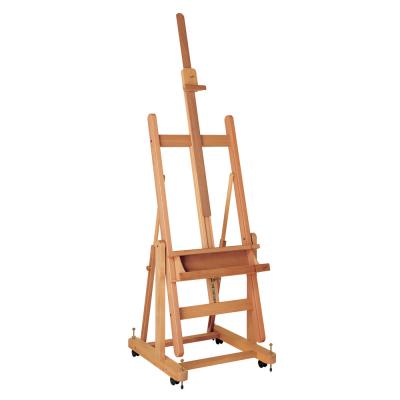
Floor EaselA floor easel allows you to place it anywhere you wish. A chunky easel like this one is suited to those that work on large-scale drawings. You can adjust the height, lay it horizontal or vertical, at whichever angle is most convenient. The easel shown in the photo has a storage shelf to hold all your products securely whilst you work.
|
OTHER PRODUCTS YOU MIGHT FIND USEFUL:
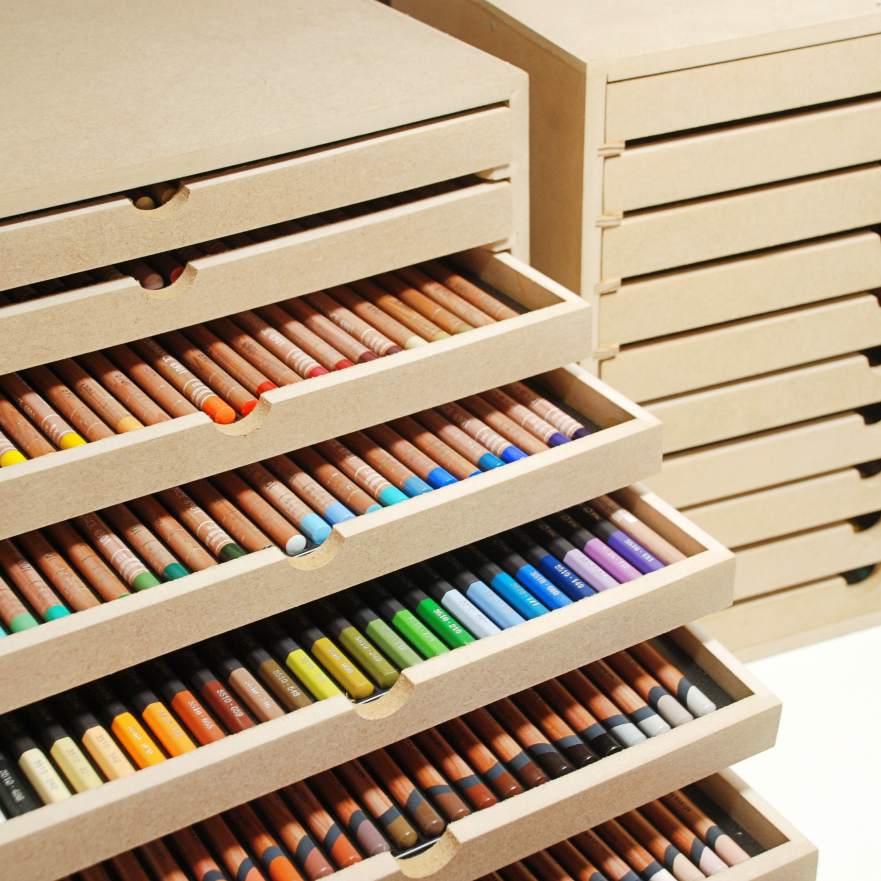
Pencil storage chestIt is important to keep your pencils well protected at all times to minimise any damage. Searching for suitable storage can be difficult, however we came across this storage chest which can hold up to 250 pencils and thought it perfect for almost every artist. Read our article on this product. (Not sponsored)
|
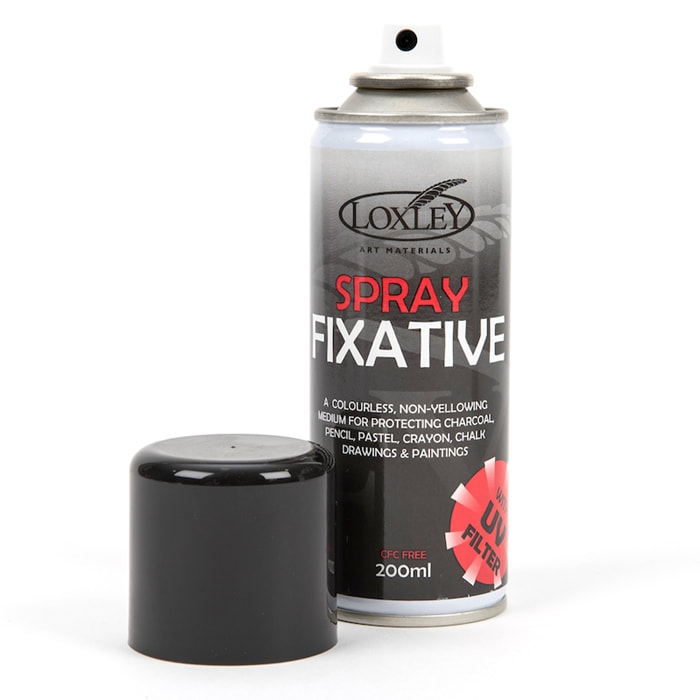
Loxley FixativeA fixative is useful to protect your final drawing from atmosphere damage caused by moisture and the suns UV rays as well as preventing smudging. The Loxley spray fixative 200ml is a high quality, colourless, non-yellowing protection medium with UV Filter and is CFC free. Click the image to read our blog post on this product and see how it can help you in your work.
|
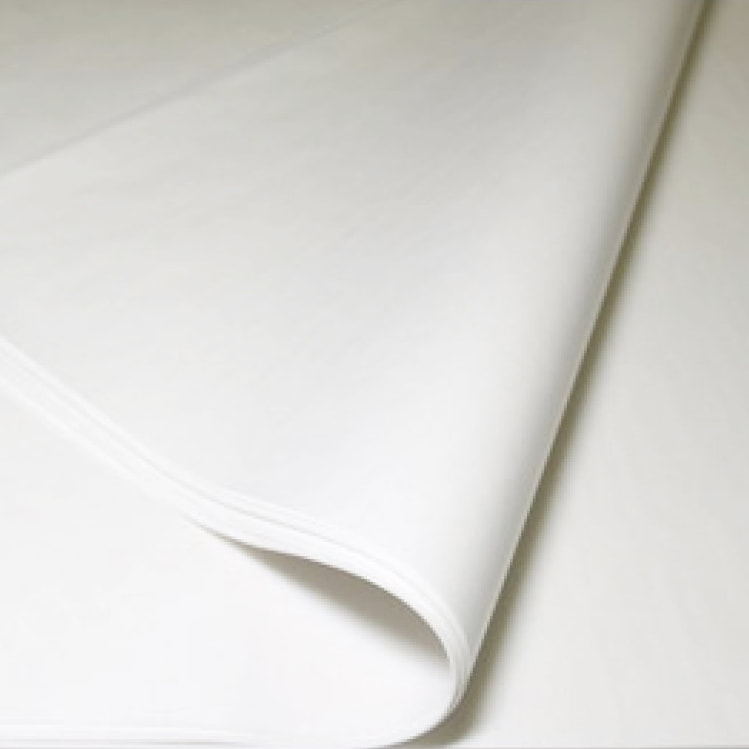
Glassine paperGlassine is a smooth and glossy paper that is air, water, and grease resistant. It is also acid-free and has multiple uses for an artist. Use it to package or store your drawings or use it as a protective layer between your artwork and your hand to avoid the transfer of any oils. You can also use it to cover your drawing when you aren't working on it too. A multi-functional product.
|
BLENDERS
Blenders are not for every pencil artist, in fact some don't use blenders at all, but they are mentioned here as they could be useful in your work. Pencil blenders are colourless wax or oil-based cores which help to soften lines and blend colours together. Blenders are also sold in powder form and solvent form. The solvent helps to soften the wax in the pencil but make sure the paper you use is suitable for use with solvents to avoid damage. We illustrate three types of blender below, and also have a dedicated article explaining how each work and how they could help you to improve your work. Click the link 'How to blend with coloured pencils'.
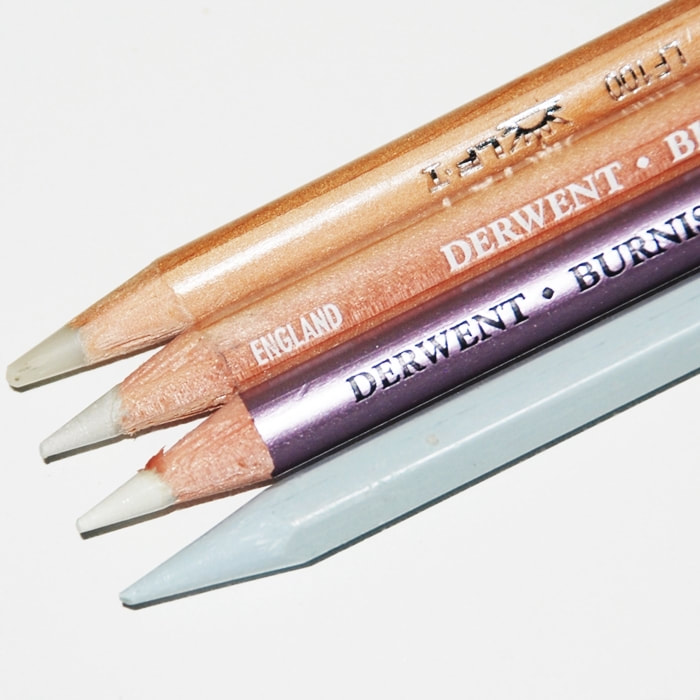
Blender pencilsPencil blenders are a colourless wax or oil-based blender in pencil form. Many pencil ranges have their own blender. They do differ somewhat as some aid blending better than others. The company Caran d'Ache, provide both a full blender and a pencil blender. The full blender (seen above in grey), is not encased in wood and can blend on a larger scale but can also be used as a wax resist tool.
|
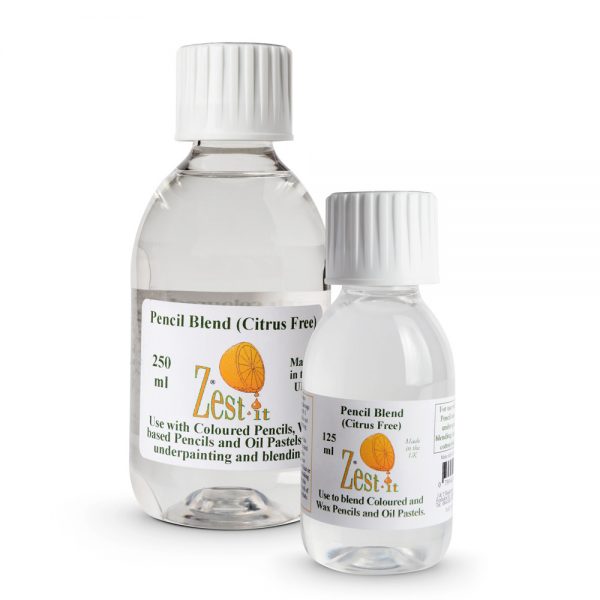
Solvents for blendingColoured pencils can be blended using solvents like Derwent's blender pen and the Zest-it 'pencil blend'. The solvent softens the wax in the pencil allowing you to achieve a smooth blend of colour. Blender pens have a solvent inside the barrel which is absorbed by the hard sponge-like nib, allowing control in the amount that you apply to your paper. Zest-it is a solvent in a bottle which can be applied using a cotton bud or a paintbrush to blend.
|
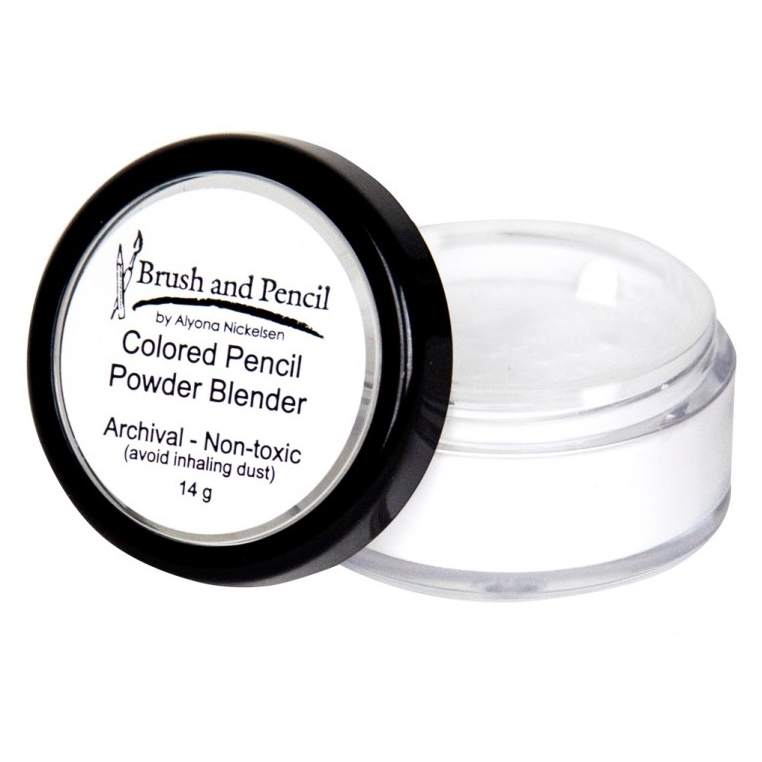
Powder blenderPowder blend is a product created by artist Alyona Nickelsen. She states that the powder blender makes the coloured pencil medium completely adjustable/correctible/erasable. It is a transparent and non-toxic dry lubricant which allows the pencil to move freely over the top and it can be manipulated and blended like soft pastels. It also allows artists to create seamless and stroke-free coverage over large areas quickly, and aids the softening of eraser marks.
|
Our coloured pencil articles
View all our articles covering coloured pencils, accessories and tutorials
|
Coloured pencil comparisons - find out which brand may be best for your style.
|
Why not try one of our coloured pencils tutorials
|
Want to know how to blend your coloured pencils effectively? Read our article.
|
The 3 types of Coloured Pencils
There are 3 types of coloured pencil; wax based, oil based and water-soluble. These pencils are made from a mixture of wax-based or oil-based binder, pigment and additives. The percentage of each will vary between manufacturers and you can use them interchangeably or work with one base type alone. The differences between each have been covered a little already, but we go into more detail below.
Coloured pencils can be broken into 3 types:
* Wax based
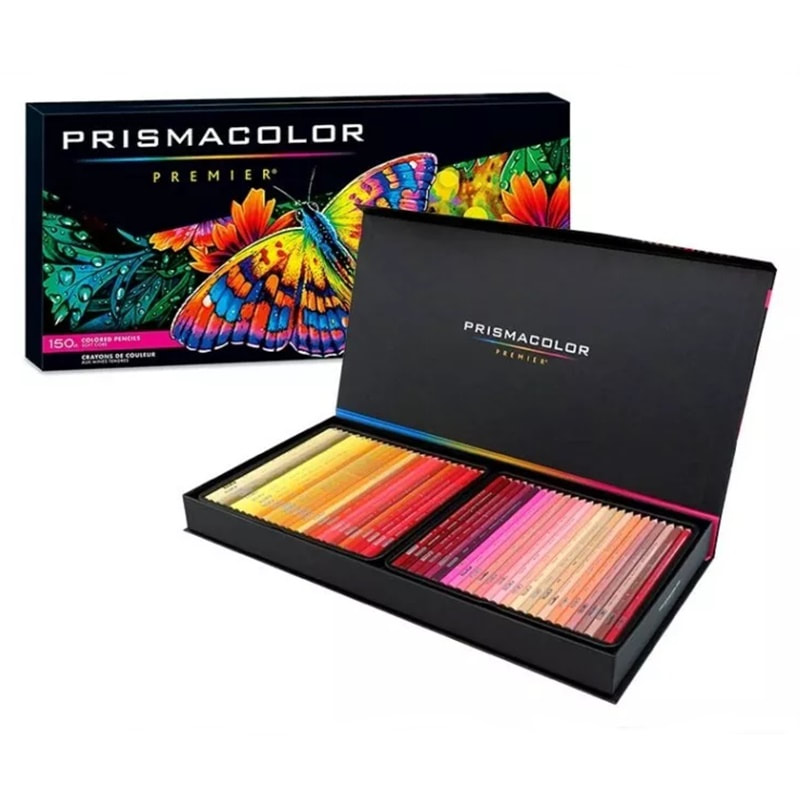
Brands like: Caran d'Ache Luminance, Prismacolor Premier, Derwent Coloursoft,
*Oil based
Brands like: Faber Castell Polychromos, Caran d'Ache Pablo, Lyra Rembrandt Polycolor, Derwent Lightfast, Koh-I-Noor Polycolor
*Waterbased
Brands like: Derwent Inktense, Caran d'Ache Museum Aquarelle, Faber Castell Albrecht Durer, Stabilo Aquacolor
* Wax based
Brands like: Caran d'Ache Luminance, Prismacolor Premier, Derwent Coloursoft,
*Oil based
Brands like: Faber Castell Polychromos, Caran d'Ache Pablo, Lyra Rembrandt Polycolor, Derwent Lightfast, Koh-I-Noor Polycolor
*Waterbased
Brands like: Derwent Inktense, Caran d'Ache Museum Aquarelle, Faber Castell Albrecht Durer, Stabilo Aquacolor
Wax-based pencils usually have a soft core, allowing for smoother application and easier blending. These are particularly suited to the creation of gradient backgrounds and establishing smooth applications. Oil-based pencils tend to be hard, less likely to break and excellent for fine lines such as hair/fur and detailed work. There are always exceptions though. The Lyra Polycolor is a soft, oil based pencil and the Derwent Procolour is a hard, wax-based pencil. Water based pencils can be mixed with water allowing you to create a base for the finer details to be built upon, you can also cover larger areas much faster. Mixing with water offers far more control over the strength of the pigment and can create softer tones for pale backgrounds. The lightfast qualities in some water-soluble brands can become weaker when mixed with water. The INKTENSE range includes pigments that turn to ink when mixed with water and does not affect the lightest quality at all. You may find using pencils with the same base ie, Caran Dache Luminance & Derwent Coloursoft (both wax based) makes layering and blending easier for some, but there are artists that mix oil and wax based pencils and find that they work well together. You may need to try a few brands out before you start important pieces of art just to see if they work for you. If you're looking to choose your first range, the next section may help you decide.
Buying your first pencil range - which brand?
It's likely that you already own some coloured pencils and have been using these to kick start your journey, but now you want to branch out and buy a quality brand but are unsure where to begin?
We have already provided a little advice on the 3 different types of pencil, so this may or may not be an important part of your decision going forward.
We have already provided a little advice on the 3 different types of pencil, so this may or may not be an important part of your decision going forward.
Here we offer advice as you begin your search for the 'perfect brand'. As you progress on your journey, you may change brands or purchase a few different ranges, using them interchangeably. Here are some pointers that may be worth considering before you go out and buy your first set of expensive pencils.
* Research other artists. See what they do and how they do it. This is worth taking time before making any decisions. It is fascinating to see what other artists create, but the pencils they use may not always be suited to your own techniques.
* Look for articles and videos online that offer lots of information about a range. Some can be sponsored by a company, so their recommendations may be a little skewed. Be aware of this before making any decisions. (None of our articles on this website are sponsored)
* Do some research on the pencil range, especially look for any re-occurring negatives before splashing out.
* Ensure you can buy open stock locally or easily online. This is very important. Vintage pencil ranges such as the Berol Karismacolor has been discontinued for 20 years, but you can still buy pencils on auction sites although they can be expensive.
* Buy a few pencil colours in the different ranges if you feel they may be suitable before buying the full set. Alternatively, if you know other artists, ask if you can loan some of their pencils and try them out before committing to anything.
* If you plan on working on a commission basis, make sure the pencil range(s) you choose are lightfast
* If you only plan to produce prints from your drawings, but not sell the original, lightfast ratings may not matter and you may wish to go for a range that have lots of vibrant colours.
* Join an art forum such as 'Wet Canvas' or a social media group where you can ask for advice and recommendations from other artists.
Hints & Tips
Here are a few suggestions of what to do and not do when working with coloured pencils. This is a short version based on the basic requirements when working with this medium. The more products you use, the larger this list will grow.
|
DO: √ Use a pencil eraser to remove tiny mistakes √ Try using a blender to smooth out your pencil lines for softer transitions √ Use a soft brush to dust away eraser bits rather than using your hand. This will avoid transferring natural oils in your skin onto your paper. √ Use a heavyweight paper (220gsm+) if you create high detail or photo-realism art. Thinner papers are ideal for sketches. |
DON'T: X Avoid leaning onto your working paper. Place a blank sheet of paper underneath your hand to avoid smudging your pencils whilst you work. X Avoid touching your working paper with your hands as natural Oils may transfer onto your paper and spoil your work X Avoid applying lighter pencil tones over an outline. Soften or erase completely beforehand or you may be unable to remove it once it is sealed with pencil. |
Coloured pencil brands
We have articles on many different brands of coloured pencil. If you wish to find out more about them, click any of the images below to visit the article. Some do not yet have articles attached and as we continue to add to this list, some brands may be added at a later date.


Comparing coloured pencilsHow does one coloured pencil compare with another? In this article we trial each brand allowing you to compare multiple characteristics along side others. We continue to update this list as we trial more brands. with this checklist including availability, lightfast information and thoughts on each range.
|
Checklist coloured pencilsThis checklist which covers an ever-growing range of coloured pencils. This includes base content, lead strength, colour count, stock availability, lightfast ratings, environmental information pros and cons plus a personal review of each range.
|
Lightfast ratings
Artist quality coloured pencils were first produced in the 20th century which is rather new next to mediums such as oils and watercolours. Because of the durability of the coloured pencil, it was not considered to be a professional medium for many years. As they became more popular, societies such as the CPSA realised that "quality lightfast products would be crucial in gaining recognition for coloured pencil as a fine art medium". in the 1990s, many art companies began to apply lightfast ratings to their pencil ranges. The Caran d'Ache Luminance & Faber Castell Polychromos pencil range both have a lightfast lifespan of 100+ years! Many pencil brands will have a lightfast rating these days, with the exception of the cheaper, nondescript pencils, and those that do have pigments that are more lightfast than others. Art companies now provide lightfast information for most of their coloured pencil ranges, particularly the professional ones, as longevity is very important to an artist.
Colour charts - What are they and why use one?
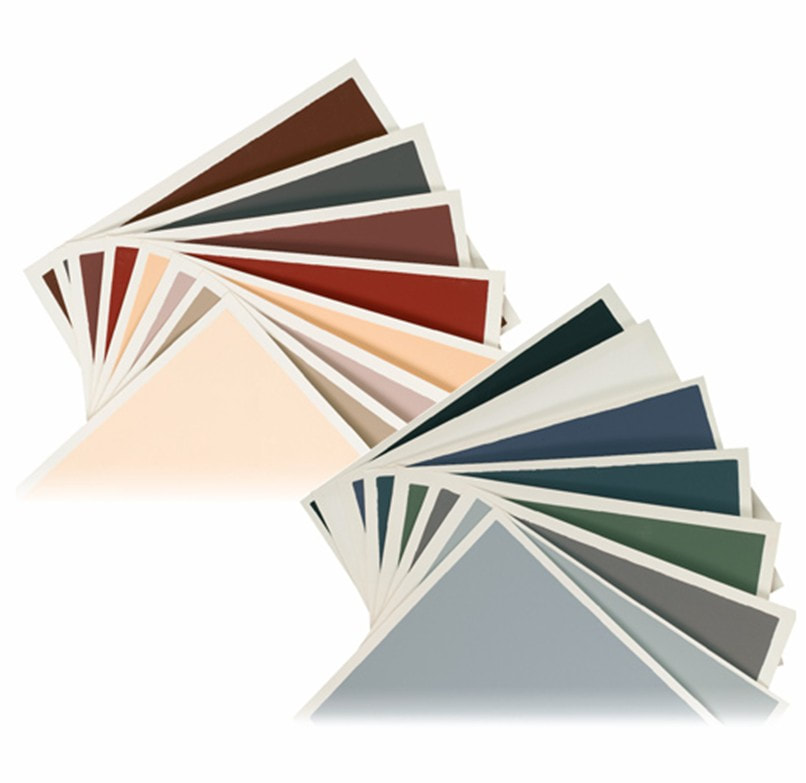
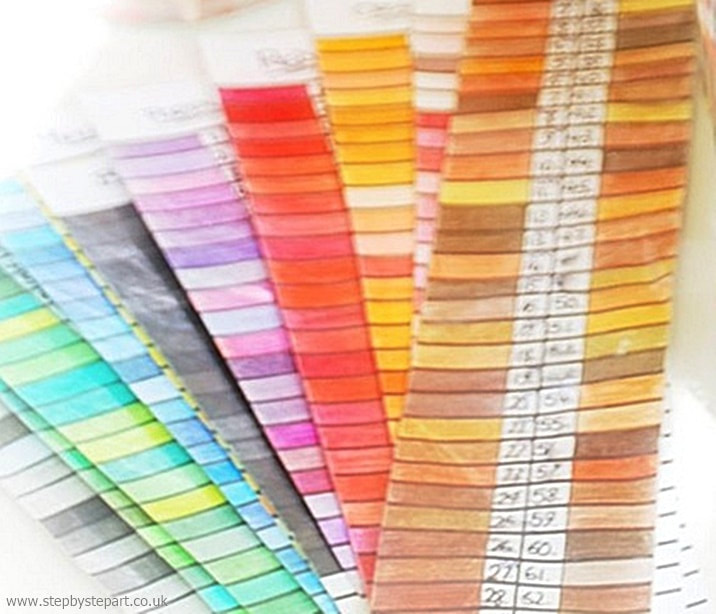
Making a colour chart is a great way to familiarise yourself with your pencils as they allow you to pick out the right colour quickly. Also including the lightfast ratings, means you can minimise your use of inferior colours, instead using them for the base layers.
Whether you have a large collection of pencil ranges or just the one, a colour chart can be a very helpful tool. If you own various brands, you may find some blank colour charts online that you can print out and fill in at home, however, if you only have one or two ranges, it is far easier to make your own.
Whether you have a large collection of pencil ranges or just the one, a colour chart can be a very helpful tool. If you own various brands, you may find some blank colour charts online that you can print out and fill in at home, however, if you only have one or two ranges, it is far easier to make your own.
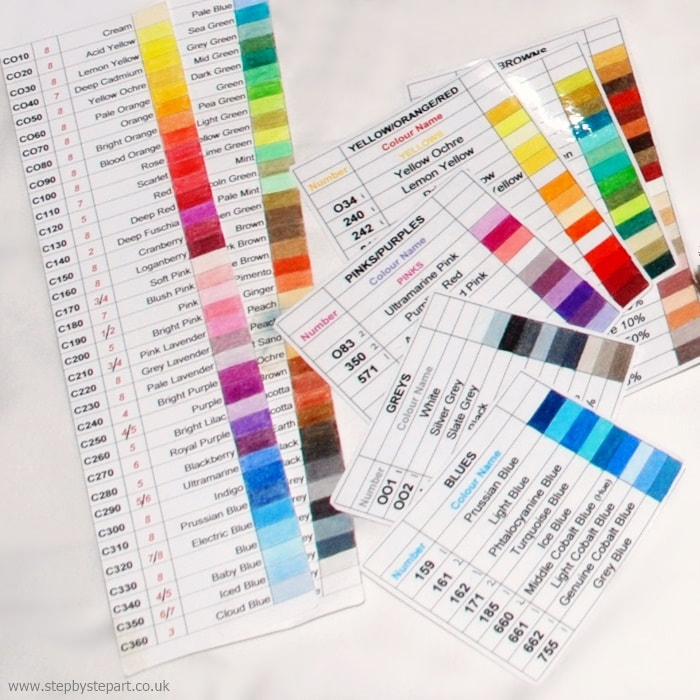
Making a separate colour chart for each brand of pencil you use is useful so you can select the right colour when you need to be precise. You will become quite familiar with the colours over time, especially if you use certain colours regularly.
|
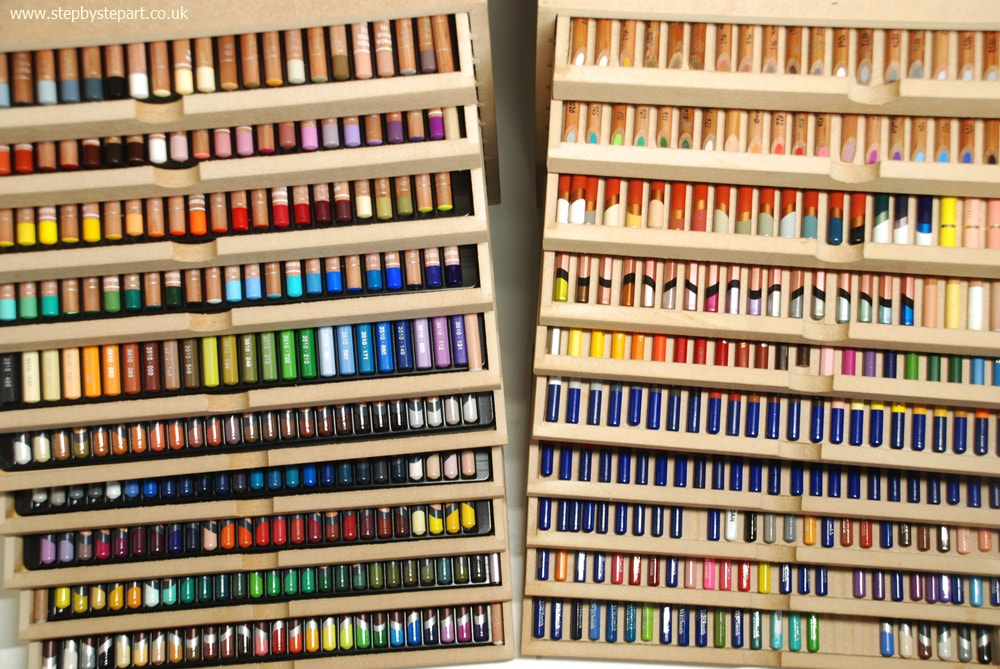
If you have ten different ranges, and use them interchangeably, making an individual chart for the colour alone may work better for you. On your chart you could include the brand, colour, code and lightfast rating wherever possible, or simply number your pencils with a sticker which match the number on the chart like the ones seen above.
|
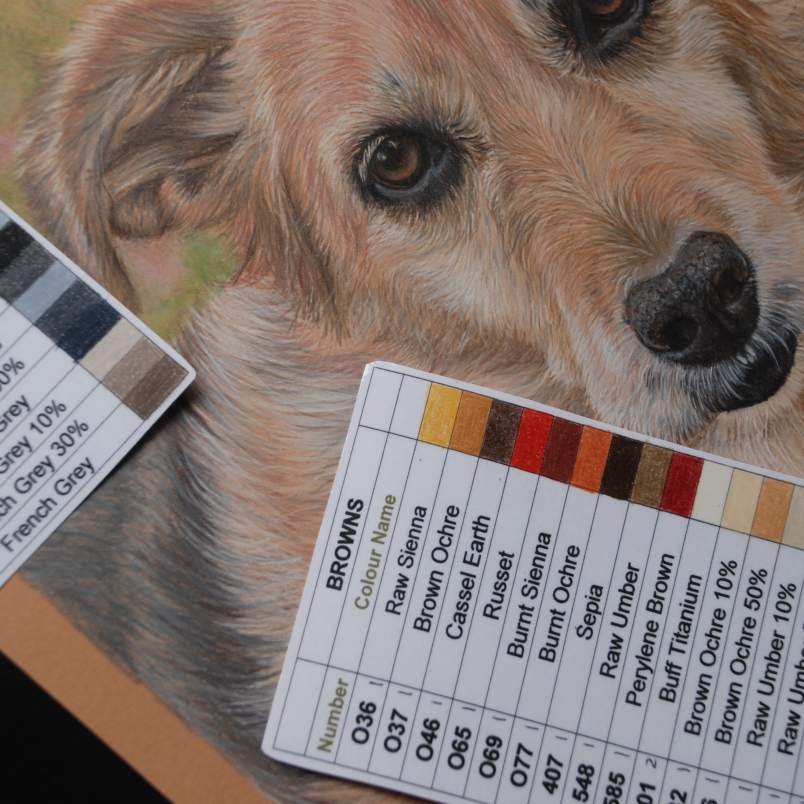
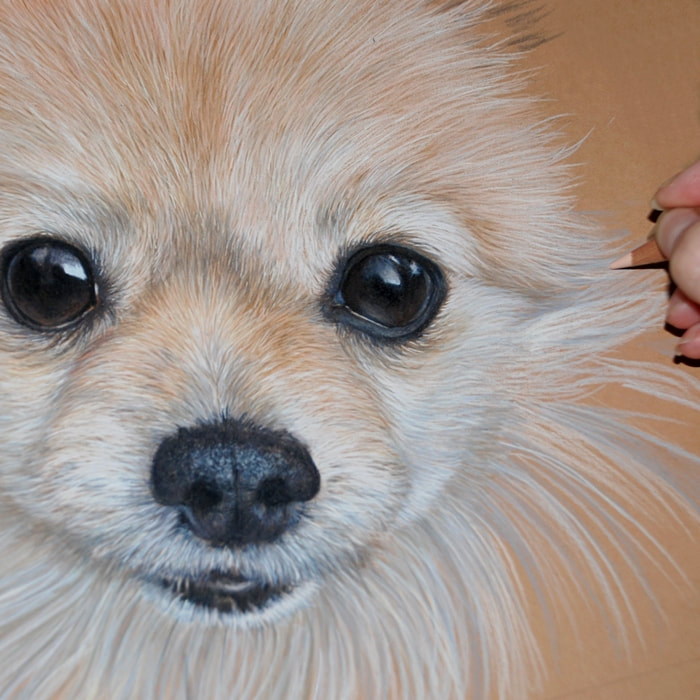
If you are creating a commission of a pet or a portrait, using the right colours are a must. If you work from photos, this may not be ideal as the colour in one photo may not match the colour in another. If you are able to take a photograph of the subject yourself, grab a photo of the subject alongside your colour chart(s) so that you can be more precise when back in the studio.
|
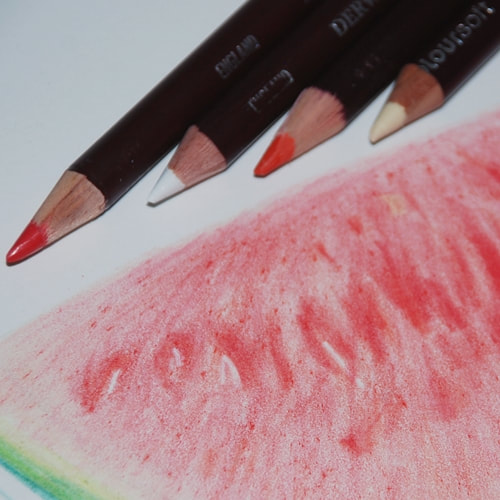
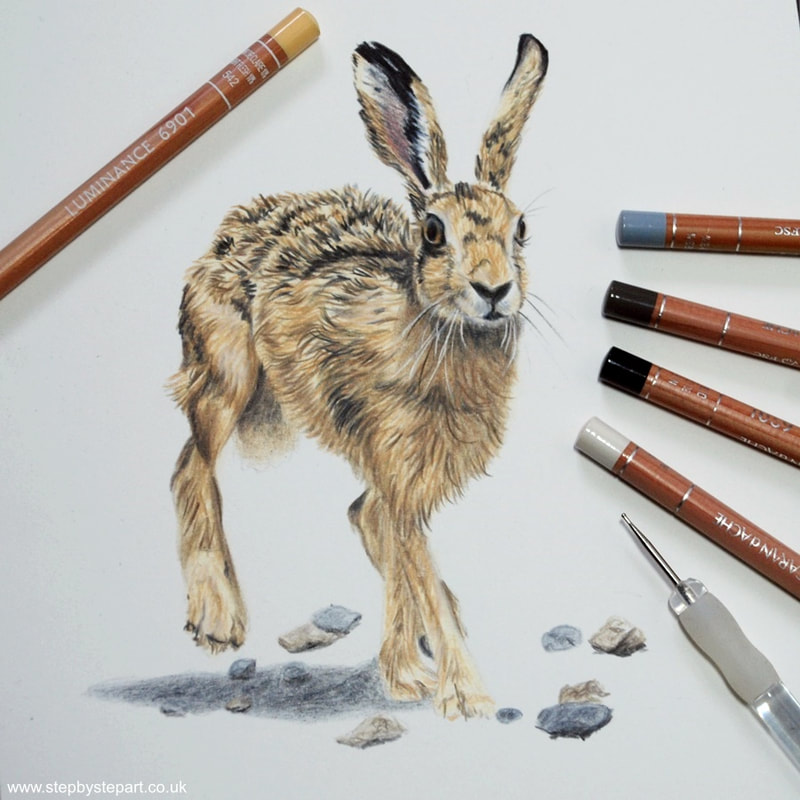
Try one of our step by step tutorials for coloured pencil artists
We have a selection of tutorials for all coloured pencil artists. If you are completely new to coloured pencils, why not try the 'Watermelon' tutorial. It teaches you all about how to layer with coloured pencils, the basis for all pencil work. All other tutorials below are available for any level artist to try out. If you wish to learn how to create fine detail, the Snow Leopard eye is more challenging. All are provided with step by step guidance and include a colour chart so you can work with your own pencil brand.